RT-SVX34V-EN
77
Monthly Maintenance
WARNING
Hazardous Voltage w/Capacitors!
Failure to disconnect power and discharge capacitors
before servicing could result in death or serious
injury.
Disconnect all electric power, including remote
disconnects and discharge all motor start/run
capacitors before servicing. Follow proper lockout/
tagout procedures to ensure the power cannot be
inadvertently energized. For variable frequency drives
or other energy storing components provided by
Trane or others, refer to the appropriate
manufacturer’s literature for allowable waiting periods
for discharge of capacitors. Verify with a CAT III or IV
voltmeter rated per NFPA 70E that all capacitors have
discharged.
Before completing the following checks, turn the unit OFF
and lock the main power disconnect switch open.
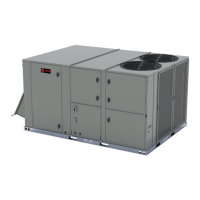
Filters
Inspect the return air filters. Clean or replace them if
necessary. Refer to the table below for filter information.
Table 35. Filters
Unit Model
Quantity
Filter Dimension
(inches)
(a)
TC, TE, YC*330 - 420
16 15½ X 19½ X 2 or 4
TC, TE, YC*480 & 600
17 15½ X 19½ X 2 or 4
(a)
Filter dimensions are actual. Nominal filter size is 16 x 20.
Condensate Overflow Switch
During maintenance, the switch float (black ring) must be
checked to ensure free movement up and down.
Cooling Season
WARNING
Hazardous Voltage!
Failure to disconnect power before servicing could
result in death or serious injury.
Disconnect all electric power, including remote
disconnects before servicing. Follow proper lockout/
tagout procedures to ensure the power can not be
inadvertently energized. Verify that no power is
present with a voltmeter.
☐ Check the unit’s drain pans and condensate piping to
ensure that there are no blockages.
☐ Inspect the evaporator and condenser coils for dirt,
bent fins, etc. If the coils appear dirty, clean them
according to the instructions described in “Coil
Cleaning” later in this section.
☐ Inspect the fresh air and return air damper hinges and
pins to ensure that all moving parts are securely
mounted. Keep the blades clean as necessary.
WARNING
Rotating Components!
Failure to disconnect power before servicing
could result in rotating components cutting and
slashing technician which could result in death or
serious injury.
During installation, testing, servicing and
troubleshooting of this product it may be
necessary to work with live and exposed rotating
components. Have a qualified or licensed service
individual who has been properly trained in
handling exposed rotating components, perform
these tasks.
☐ Manually rotate the condenser fans to ensure free
movement and check motor bearings for wear. Verify
that all of the fan mounting hardware is tight.
☐ Verify that all damper linkages move freely; lubricate
with white grease, if necessary.
☐ Check supply fan motor bearings; repair or replace the
motor as necessary.
☐ Check the fan shaft bearings for wear. Replace the
bearings as necessary.
Note: These bearings are considered permanently
lubricated for normal operation. For severe dirty
applications, if relubrication becomes necessary,
use a lithium based grease. See Table 36, p. 78
for recommended greases.
Important: The bearings are manufactured using a
special synthetic lithium-based grease
designed for long life and minimum relube
intervals. Over lubrication can be just as
harmful as not enough.
☐ Use a hand grease gun to lubricate these bearings; add
grease until a light bead appears all around the seal.
Do not over lubricate! After greasing the bearings,
check the setscrews to ensure that the shaft is held
securely. Make sure that all bearing braces are tight.
☐ Check the supply fan belt(s). If the belts are frayed or
worn, replace them. Refer to the “Fan Belt
Adjustment,” p. 74 for belt replacement and
adjustments.
☐ Check the condition of the gasket around the control
panel doors. These gaskets must fit correctly and be in
good condition to prevent water leakage.
☐ Verify that all wire terminal connections are tight.
☐ Remove any corrosion present on the exterior surfaces
of the unit and repaint these areas.
☐ Generally inspect the unit for unusual conditions (e.g.,
loose access panels, leaking piping connections, etc.)
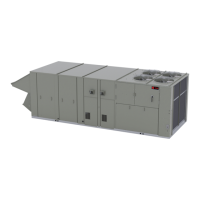
Maintenance