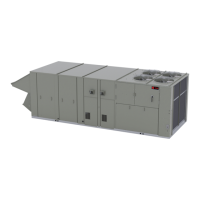
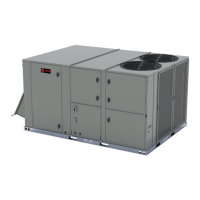
RT-SVX34V-EN
71
Once the ignition system and ignitors have been checked,
open the main power disconnect switch to reset the
Symbio™ 700 controls.
WARNING
Hazardous Gases and Flammable
Vapors!
Failure to observe the following instructions could
result in exposure to hazardous gases, fuel
substances, or substances from incomplete
combustion, which could result in death or serious
injury. The state of California has determined that
these substances may cause cancer, birth defects, or
other reproductive harm.
Improper installation, adjustment, alteration, service
or use of this product could cause flammable
mixtures or lead to excessive carbon monoxide. To
avoid hazardous gases and flammable vapors follow
proper installation and setup of this product and all
warnings as provided in this manual.
Turn the main gas supply to the unit “On” and check the
gas pressure at the unit's gas train. Refer to “Installation
Piping,” p. 33 for the proper gas supply pressure and for
the location of the gas pressure taps.
Close the main power disconnect switch and in the Symbio
700 user interface, select Service Test step Heat 1 to
initiate the first stage of heat operation. Wait approximately
60 seconds for the heater to switch to low fire and check
the manifold gas pressure. The manifold pressure for all
furnaces is 3.5in. w.c. for Natural Gas and 10in w.c. for LP.
For modulating burners, expect to see the manifold
pressure reading fluctuate while the burner is operating,
but it should never read negative.
WARNING
Hot Surface!
Failure to follow instructions below could result in
severe burns.
Surface temperatures may exceed 300°F (150°C). To
avoid possible skin burns, stay clear of these
surfaces. If possible, allow surfaces to cool before
servicing. If servicing is necessary while surface
temperatures are still elevated, you MUST put on all
Personal Protective Equipment (PPE).
In the Symbio 700 user interface, select Service Test step
Heat 2 to initiate second stage heat operation (if
applicable).The combustion blower motor should go to high
speed. The second stage of heat in units with modulating
gas will initiate the second heater bank to fire and both
banks will operate at high fire.
Note: When firing a modulating unit for the first time, a
“humming”, or resonance sound may be heard. This
is an operational sound made by the burner screen
as it burns in. This sound is not a concern unless it
persists longer than the first few times the unit is
fired.
Electric Heat Units
Start the service test steps Heat 1 or Heat 2 (if applicable),
and check the amperage draw for each heating stage.
Refer to the heater electrical data in (60 Hz) and (50 Hz) for
the full load amps of a specific heater size.
Once the operation of the heaters have been checked,
open the main power disconnect switch or the unit
mounted disconnect switch to shut the unit “Off.”
This concludes the setup and testing for the major
components and controls within the unit. Follow the Test
guide in - to verify that the optional VFD, economizer
actuator, and minimum ventilation controls are functioning.
Final Unit Checkout
After completing all of the checkout and startup procedures
outlined in the previous sections (i.e., operating the unit in
each of its modes through all available stages of cooling
and heating), perform these final checks before leaving the
unit:
Verify that the Symbio 700 is in the normal operation mode.
For All Units
The Symbio™ 700 controls have input setpoint
potentiometers inside the control panel that are set at the
factory which will allow the unit to operate and maintain
system control. For specific job specifications;
• Verify that the control input potentiometers are set
according to the job specifications, i.e.;
– Outside air reset temperature - _______ Setpoint
– Reset amount °F. - _______ Setpoint
– Static pressure - _______ Setpoint
– Static pressure deadband - ________ Setpoint
– Discharge air temperature - _______Setpoint
– Morning warm up temperature - _______ Setpoint
– Exhaust Fan - _______ Setpoint
• Inspect the unit for misplaced tools, hardware and
debris.
• Verify that all unit exterior panels—including the control
panel doors—are secured in place.
For Single Zone Variable Air Volume
Units
Verify that the “Mode” selection switch and the “Zone
Temperature” setpoints are set and/or programmed at the
sensor modules.
Startup