40
WSHP-SVX014J-EN
Waterside Economizer
Installation
WARNING
Hazardous Voltage!
Failure to disconnect power before servicing could
result in death or serious injury.
Disconnect all electric power, including remote
disconnects before servicing. Follow proper lockout/
tagout procedures to ensure the power can not be
inadvertently energized. Verify that no power is
present with a voltmeter.
WARNING
Proper Field Wiring and Grounding
Required!
Failure to follow code could result in death or serious
injury.
All field wiring MUST be performed by qualified
personnel. Improperly installed and grounded field
wiring poses FIRE and ELECTROCUTION hazards. To
avoid these hazards, you MUST follow requirements
for field wiring installation and grounding as
described in NEC and your local/state/national
electrical codes.
Waterside Economizer Installation for
Horizontal 0.75 to 6 Ton Units
The following steps were sequenced to aid in the
installation and pairing of a water side economizer to a 0.75
to 6 ton horizontal water source heat pump.
1. Remove the filter bracket from the unit. It is secured by
four screws: three on top (circled) and two on the
bottom (not shown). Do not discard the filter brackets.
Figure 35. Step 1
2. Mount the waterside economizer to the unit. It is
secured to the unit using the three engagement holes
used for the filter bracket on the top. Secure the sides
of the economizer using the two L-Brackets on each
side by lining up the engagement holes for the
fasteners (total of four for each bracket). The
engagement hole locations and L-Bracket can be seen
in the Figure 36, p. 40 .
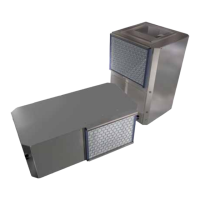
Figure 36. Step 2
3. Attach the filter bracket to the waterside economizer
using the five screws removed earlier. Install the air
filter.
4. Install the braided hose connecting point A (leaving the
WSE) to point B (entering the WSHP). Connect the
supply water to point D and the return water to point C.
Figure 37. Step 4
5. Locate the entering water sensor that is located behind
the unit’s control box, and wire tie it to the water
SUPPLY side of the piping. The sensor must be
mounted before the two-position valve. Attaching the
sensor anywhere else will cause the WSE to not
operate correctly. Bundle up any excess sensor wire
and wire tie the bundle neatly.
6. Locate the WSE valve wires (35B (COM), 36B (OPEN),
37B (CLOSE)) behind control box, and connect to the
valve actuator. Bundle up any excess wire and wire tie
the bundle neatly. Direction of rotation is reversible with
switch.
7. Insulate the economizing piping package and the
associated hoses via field pipe insulation. Insulating the
Installation
 Loading...