Component Installation Requirements
CLCH-SVX010A-EN 29
10. Install inside corner cap. See Figure 30 Detail A and B.
11. Install 3/16-inch x 1. 25-inch grey ribbed butyl tape to
unit wall where pipe cabinet roof connects.
12. Lift pipe cabinet roof into place and attach to unit wall
with screws.
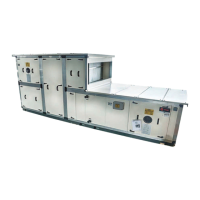
Component Installation Requirements
Each component in the Custom air handler may have
installation requirements that could affect the unit’s
performance.
Note: For components included in the unit but not
included in this manual, reference the component
manufacturers specific Installation, Maintenance,
and Operation manual. Copies of these manuals
are either included in the package with this unit
IOM or are attached to the components mounted in
the unit.
Fan Section
The fan section can be configured as either draw-thru or
blow-thru. Review the submittals and unit tagging
information prior to assembly to determine placement.
Figure 30. Pipe cabinet detail
TOP VIEW
A
See Detail B
AHU
Pipe cabinet
Ribbed Butyl tape
Screw 10-16 x .750
self-driller
Pipe cabinet
outer roof
Slots provided to
allow final adjustment
of outer roof
AHU
outdoor roof
“Picture frame” mounting
chanels factory assembled
to unit
Inside corner cap
Ribbed Butyl tape
(see Note 1)
Roof and base parts
removed for clarity
“Picture frame” mounting
chanels factory assembled
to unit
Ribbed Butyl tape
Ribbed Butyl tape
(see Note 1)
Inside corner cap
Pipe cabinet wall
Note 1: Seam to be sealed with three-ribbed
Butyl tape prior to attaching inside corner cap
with screws (10-16 x .750 self-driller).
Detail A
Detail B
WARNING
Hazardous Voltage w/Capacitors!
Failure to disconnect power and discharge capacitors
before servicing could result in death or serious injury.
Disconnect all electric power, including remote
disconnects before servicing. Follow proper lockout/
tagout procedures to ensure the power cannot be
inadvertently energized. For variable frequency drives
or other energy storing components provided by Trane
or others, refer to the appropriate manufacturer’s
literature for allowable waiting periods for discharge of
capacitors. Verify with an appropriate voltmeter that all
capacitors have discharged.
For additional information regarding the safe discharge
of capacitors, see PROD-SVB06A-EN
 Loading...