RT-SVX34R-EN
135
Replace the sensor if it is out of range.
3. Testing the Humidity Sensors.
a. Return Humidity Sensor (RHS). Leave the
sensor connected to the ECA, and measure the
operating current. The normal current range is 4
to 20 mA (milliampere). Replace the sensor if it
is out of range.
b. Outdoor Humidity Sensor (OHS). Leave the
sensor connected to the ECA, and measure the
operating current. The normal current range is 4
to 20 mA (milliampere). Replace the sensor if it
is out of range.
NNoottee:: Both the RHS and the OHS are polarity
sensitive. Verify that the polarity is correct
before condemning the sensor. Incorrect
wiring will not damage any of the controls,
but they will not function if wired
incorrectly.
ReliaTel Air Module (RTAM)
Tests
WWAARRNNIINNGG
LLiivvee EElleeccttrriiccaall CCoommppoonneennttss!!
FFaaiilluurree ttoo ffoollllooww aallll eelleeccttrriiccaall ssaaffeettyy pprreeccaauuttiioonnss
wwhheenn eexxppoosseedd ttoo lliivvee eelleeccttrriiccaall ccoommppoonneennttss ccoouulldd
rreessuulltt iinn ddeeaatthh oorr sseerriioouuss iinnjjuurryy..
WWhheenn iitt iiss nneecceessssaarryy ttoo wwoorrkk wwiitthh lliivvee eelleeccttrriiccaall
ccoommppoonneennttss,, hhaavvee aa qquuaalliiffiieedd lliicceennsseedd eelleeccttrriicciiaann
oorr ootthheerr iinnddiivviidduuaall wwhhoo hhaass bbeeeenn pprrooppeerrllyy ttrraaiinneedd
iinn hhaannddlliinngg lliivvee eelleeccttrriiccaall ccoommppoonneennttss ppeerrffoorrmm
tthheessee ttaasskkss..
Test 1: Testing the Variable Frequency
Drive (VFD) Output
1. Using the procedure for VAV applications outlined
in “Test Modes,” p. 67, step the unit to the first test
(Step 1). Verify that 10 Vdc is present between
terminals J4-2 and J4-1.
NNoottee:: If voltage is incorrect, verify RTAM DIP switch
settings.
2. If voltage to the VFD is not present, verify that the
wires are properly connected between the RTRM or
COMM (Communications Module) and the RTAM.
If Step 2 checks out and the voltage is still not
present at the VFD output, replace the RTAM.
Test 2: Testing the Static Pressure
Transducer (SPT) Input
1. With main power to the unit turned “Off”,
disconnect all of the tubing to the Static Pressure
Transducer.
2. With the system MODE “Off”, apply power to the
unit and measure the voltage between J1-4 and J1-
1 on the RTAM. The voltage should be
approximately 5 Vdc. If not, check the wiring
between the RTRM and the RTAM. If the wiring
checks good, replace RTAM.
3. Measure the voltage between J1-3 and J1-1 on the
RTAM. The voltage should be approximately 0.25
Vdc. If not, check the wiring between the RTAM and
the SPT. If the wiring checks good, replace the SPT.
4. Apply 2.0" w.c. pressure to the HI port on the static
pressure transducer (SPT). Measure the voltage
between J1-1 and J1-3. The voltage should be 1.75
(± 0.14) Vdc. If not, replace the SPT.
NNoottee:: The SPT is susceptible to interference from
VFD’s. Make sure the SPT is mounted on
plastic standoffs and is not touching any
sheet metal.
Test 3: Testing the VAV Setpoint
Potentiometers
Turn the main power disconnect switch “OFF”. Check
each potentiometer listed in the table below by
measuring resistance. These potentiometers are built
into the RTAM and are not replaceable.
Static Pressure
Setpoint
0-560 ohms
(Approximate)
RTAM J7-1,2
Static Pressure Dead
band
0-560 ohms
(Approximate)
RTAM J7-7,8
Reset Setpoint
0-560 ohms
(Approximate)
RTAM J7-11,12
Reset Amount
0-560 ohms
(Approximate)
RTAM J7-5,6
Morning Warm-up
Setpoint
0-560 ohms
(Approximate)
RTAM J7-9,10
Supply Air Cooling
Setpoint
0-560 ohms
(Approximate)
RTAM J7-3,4
Supply Air Heating
Setpoint
0-560 ohms
(Approximate)
RTAM J7-13,14
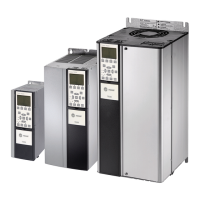
Test 4: Testing the VFD
1. Verify that the keypad in control box is powered. If
not, check the power wires to the VFD and the
Keypad cable.
2. Using the procedure described in “Test Modes,” p.
67, verify that the fan starts and the speed increases
until the SA Pressure reaches the “Setpoint” on
VAV Setpoint panel. If the fan does not start, check
for “Fault Conditions” on the VFD Keypad.
3. If no “Fault Conditions” exist and the fan started
but did not ramp up to speed, verify the “speed
reference voltage” output from the RTAM between
terminals J4-1 and J4-2.
4. If no “Fault Conditions” exist and the fan did not
start, verify that the Fan relay is energized and the
DDiiaaggnnoossttiiccss
 Loading...