40
RT-SVX34R-EN
Installation Piping
General Requirements
WWAARRNNIINNGG
HHaazzaarrddoouuss GGaasseess aanndd FFllaammmmaabbllee
VVaappoorrss!!
FFaaiilluurree ttoo oobbsseerrvvee tthhee ffoolllloowwiinngg iinnssttrruuccttiioonnss ccoouulldd
rreessuulltt iinn eexxppoossuurree ttoo hhaazzaarrddoouuss ggaasseess,, ffuueell
ssuubbssttaanncceess,, oorr ssuubbssttaanncceess ffrroomm iinnccoommpplleettee
ccoommbbuussttiioonn,, wwhhiicchh ccoouulldd rreessuulltt iinn ddeeaatthh oorr sseerriioouuss
iinnjjuurryy.. TThhee ssttaattee ooff CCaalliiffoorrnniiaa hhaass ddeetteerrmmiinneedd tthhaatt
tthheessee ssuubbssttaanncceess mmaayy ccaauussee ccaanncceerr,, bbiirrtthh ddeeffeeccttss,,
oorr ootthheerr rreepprroodduuccttiivvee hhaarrmm..
IImmpprrooppeerr iinnssttaallllaattiioonn,, aaddjjuussttmmeenntt,, aalltteerraattiioonn,,
sseerrvviiccee oorr uussee ooff tthhiiss pprroodduucctt ccoouulldd ccaauussee
ffllaammmmaabbllee mmiixxttuurreess oorr lleeaadd ttoo eexxcceessssiivvee ccaarrbboonn
mmoonnooxxiiddee.. TToo aavvooiidd hhaazzaarrddoouuss ggaasseess aanndd
ffllaammmmaabbllee vvaappoorrss ffoollllooww pprrooppeerr iinnssttaallllaattiioonn aanndd
sseettuupp ooff tthhiiss pprroodduucctt aanndd aallll wwaarrnniinnggss aass pprroovviiddeedd
iinn tthhiiss mmaannuuaall..
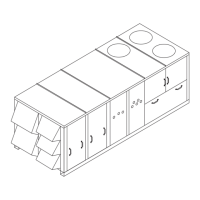
All internal gas piping for YC* rooftop units are factory
installed and leak tested. Once the unit is set into place,
a gas supply line must be field installed and connected
to the gas train located inside the gas heat
compartment.
Access holes are provided on the unit as shown in
Figure 12, p. 19 to accommodate side panel entry.
Following the guidelines listed below will enhance both
the installation and operation of the furnace.
NNoottee:: In the absence of local codes, the installation
must conform with the American National
Standard Z223.1a of the National Fuel Gas Code,
(latest edition).
1. To assure sufficient gas pressure at the unit, use to
determine the appropriate gas pipe size for the
heating capacity listed on the unit's nameplate.
If a gas line already exists, verify that it is sized
large enough () to handle the additional furnace
capacity.
2. Take all branch piping from any main gas line from
the top at 90 degrees or side at 45 degrees to
prevent moisture from being drawn in with the gas.
3. Ensure that all piping connections are adequately
coated with joint sealant and properly tightened.
Use a piping compound that is resistant to liquid
petroleum gases.
4. Provide a drip leg near the unit.
NNOOTTIICCEE
GGaass VVaallvvee DDaammaaggee!!
FFaaiilluurree ttoo ffoollllooww iinnssttrruuccttiioonnss bbeellooww ccoouulldd rreessuulltt iinn
ggaass vvaallvvee ddaammaaggee ffrroomm iinnccoorrrreecctt ggaass pprreessssuurreess,,
iirrrreegguullaarr ppuullssaattiinngg ffllaammee ppaatttteerrnnss,, bbuurrnneerr rruummbbllee,,
aanndd ppootteennttiiaall ffllaammee oouuttaaggeess..
UUssee aa pprreessssuurree rreegguullaattoorr ttoo pprrooppeerrllyy rreegguullaattee ggaass
pprreessssuurree.. DDOO NNOOTT oovveerrssiizzee tthhee rreegguullaattoorr..
5. Install a pressure regulator at the unit that is
adequate to maintain 6" w.c. for natural gas and 11"
w.c. for LP gas while the unit is operating in the
“High Heat” mode. A minimum inlet gas pressure
of 2.5" w.c. for natural gas and 8" w.c. for LP gas is
required while operating in the “High Heat” mode.
NNoottee:: Gas pressure in excess of 14" w.c. or 0.5 psig
will damage the gas train.
WWAARRNNIINNGG
EExxpplloossiioonn HHaazzaarrdd!!
FFaaiilluurree ttoo ffoollllooww ssaaffee lleeaakk tteesstt pprroocceedduurreess bbeellooww
ccoouulldd rreessuulltt iinn ddeeaatthh oorr sseerriioouuss iinnjjuurryy oorr
eeqquuiippmmeenntt oorr pprrooppeerrttyy--oonnllyy--ddaammaaggee..
NNeevveerr uussee aann ooppeenn ffllaammee ttoo ddeetteecctt ggaass lleeaakkss.. UUssee aa
lleeaakk tteesstt ssoolluuttiioonn ffoorr lleeaakk tteessttiinngg..
6. Leak test the gas supply line using a soap-and-
water solution or equivalent before connecting it to
the gas train.
7. Pressure test the supply line before connecting it to
the unit to prevent possible gas valve damage and
the unsafe operating conditions that will result.
NNoottee:: Do not rely on gas train shutoff valves to
isolate the unit while conducting gas
pressure/leak test. These valves are not
designed to withstand pressures in excess of
14" w.c. or 0.5 psig.
Connecting the Gas Supply Line
to the Furnace Gas Train
Follow the steps below to complete the installation
between the supply gas line and the furnace. Refer to
Figure 35, p. 41 for the Gas Train configuration.
1. Connect the supply gas piping using a “ground-
joint” type union to the furnace gas train and check
for leaks.
2. Provide adequate support for the field installed gas
piping to avoid stressing the gas train and controls.
3. Adjust the inlet supply gas pressure to the
recommended 6" for natural gas or 11" w.c. for LP
gas.
 Loading...