EasyManuals Logo

Trane XR13 User Manual

Trane XR13
24 pages
To Next Page IconTo Next Page
To Previous Page IconTo Previous Page
Page #10 background imageLoading...
Page #10 background image
10 18-BC83D1-2
STEP 5 - Replace the pressure tap valve cores
after the service valves have cooled.
STEP 2 - Check for leaks by using a soapy solu-
tion or bubbles at each brazed location.
Remove nitrogren pressure and repair any leaks
before continuing.
Section 8. Refrigerant Line Leak Check
8.1 Check For Leaks
STEP 1 - Pressurize the refrigerant lines and
evaporator coil to 150 PSIG using dry nitrogen.
150 PSIG

Other manuals for Trane XR13

Questions and Answers:

Question and Answer IconNeed help?

Do you have a question about the Trane XR13 and is the answer not in the manual?
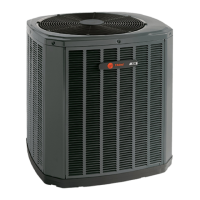
Trane XR13 Specifications

General IconGeneral
Sound Level74 dB
RefrigerantR-410A
StagesSingle-stage
SEER14
HSPF8.2
CompressorSingle-stage
Cooling Capacity1.5 - 5 tons
Warranty10 year limited warranty on compressor

Related product manuals