12
Setup Manual - Butler S2
DMX
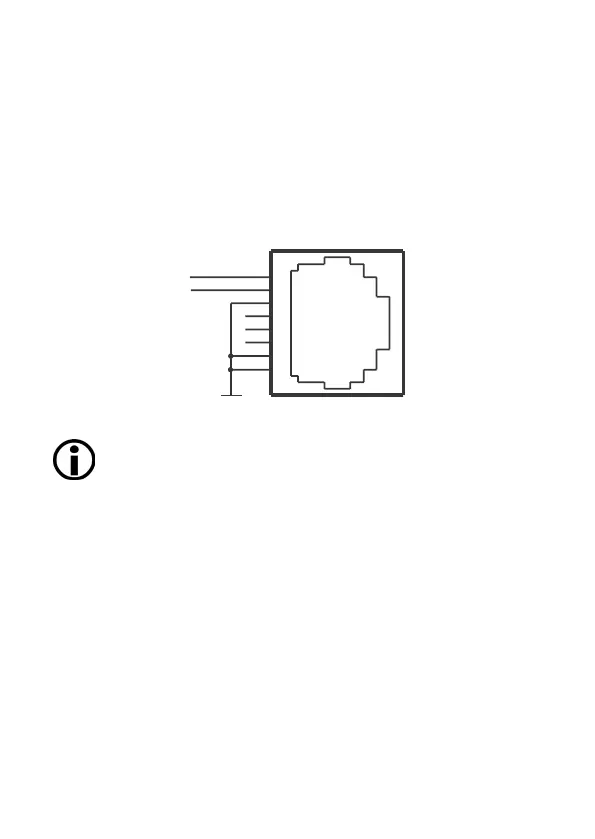
The DMX output is taken from the RJ45 connectors labeled „DMX1“ and „DMX2“.
To connect DMX using a XLR5 type plug, please use the adaptor cable, item
number 40005, available as e:cue accessory or contact your nearest e:cue distribu-
tor for a suitable adaptor cable.
DMX pin assignment for plug
DMX1–
DMX1+
GND
J1
RJ45-2X4
1
2
3
4
5
6
7
8
Do never use RJ45 cross-cables (TX and RX lines exchanged) on the
DMX interfaces. This can destroy the DMX interface of the Butler S2!
System button
During system boot
• Keeping the system button pressed while powering up the Butler S2 starts the
bootloader mode and displays L O A d , no further loading happens.
• Keeping the system button pressed for three seconds, the Butler S2 displays
d E F . If the system button is released now no changes are made.
• If you keep the system button pressed for additional three seconds all param-
eters including the IP address will be reset to factory settings. The IP address is
now 192.168.123.1 again.
During normal operation in online mode
• When in online mode, connected to the Programmer, a short press marks this