TEW-753DAP User’s Guide System Conguration
© Copyright 2013 TRENDnet. All rights reserved.
41
If you want to use the PIN code, you have to know the PIN code of the
wireless client and switch it to WPS mode, then ll-in the PIN code
of the wireless client through the web conguraon interface of the
access point.
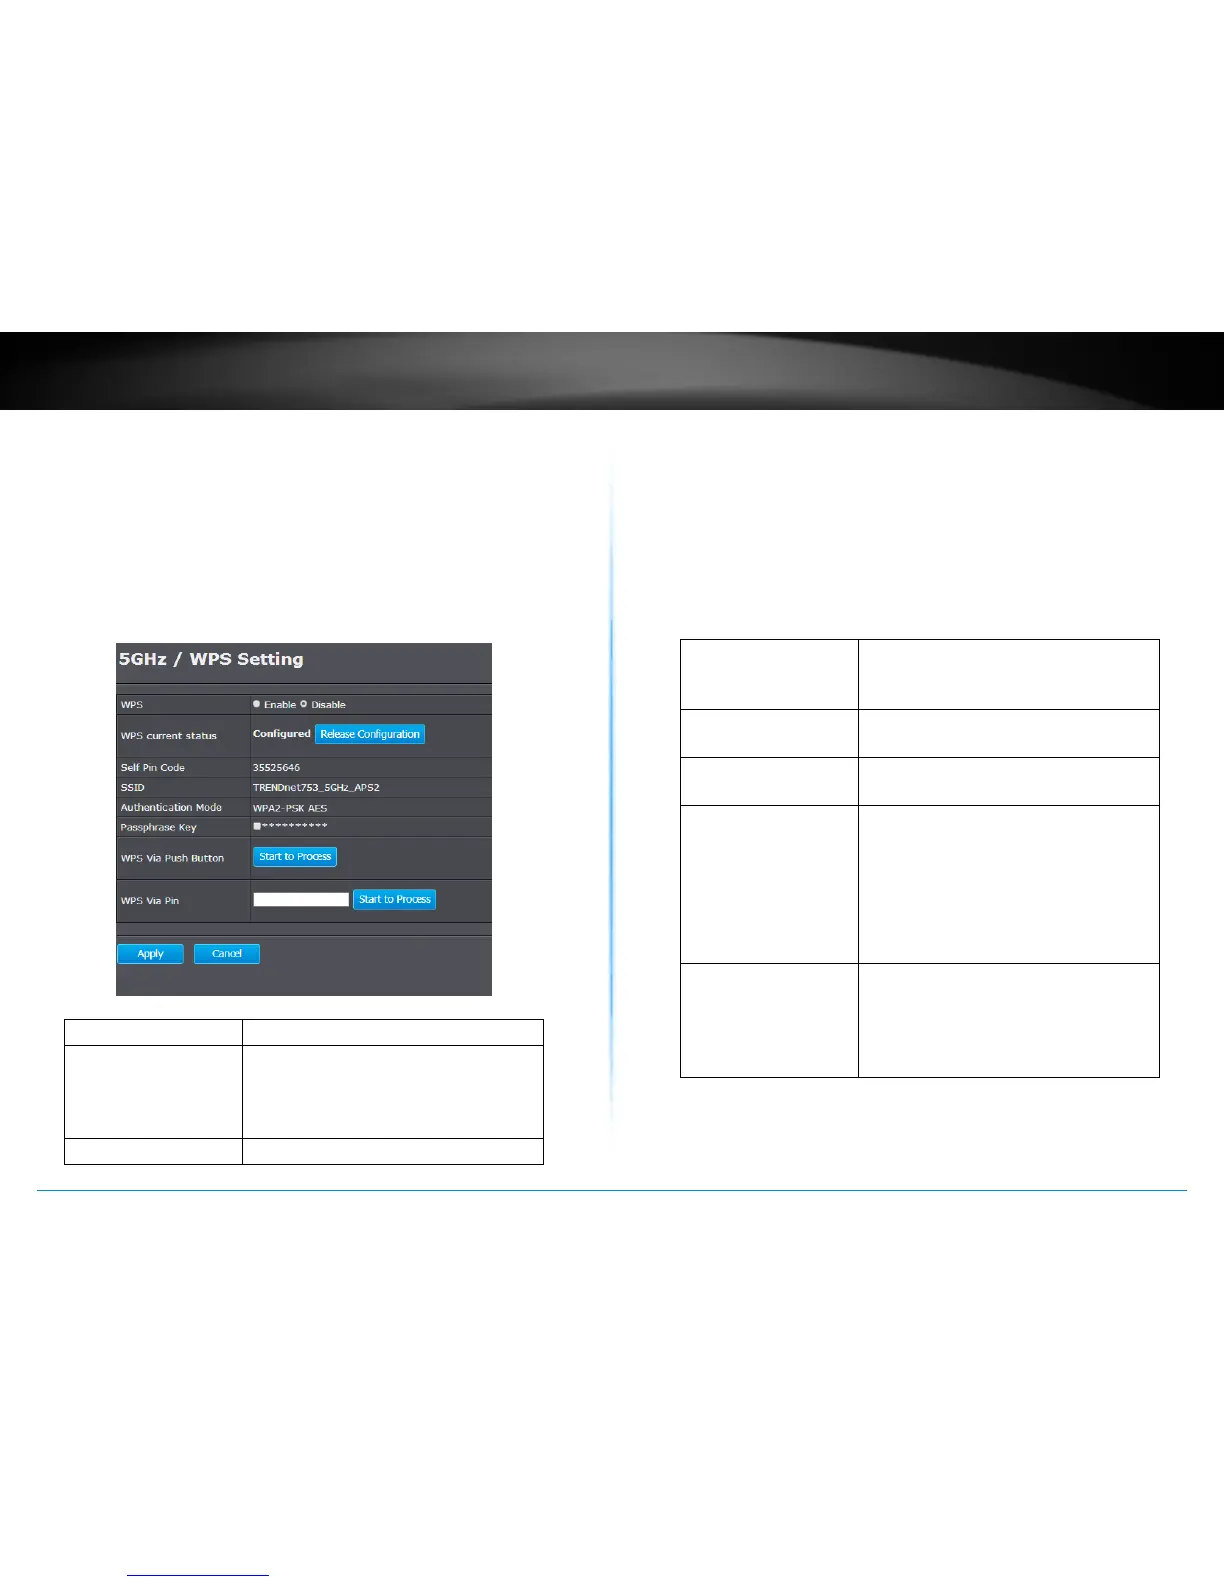
WPS is disabled by default. To enable it, you have to click Enable and
then Apply. Go to Save/Apply to apply the changes. Then come back to
this page to start your WPS session.
WPS :
Enable the WPS feature
WPS Current Status : Displays the current status of the
WPS conguraon. Press Release
Conguraon to release previous
sengs.
Self Pin Code : Displays PIN code of TEW-753DAP
SSID : Displays the SSID for WPS pairing. Only
the rst SSID (SSID 9) can proceed
with WPS pairing.
Authencaon
Mode :
Displays the authencaon mode of
SSID 9
Passphrase Key : Current passphrase. Click the check
box to reveal the passphrase.
WPS Via
Push Buon :
Click on the Start to Process buon if
you would like to enable WPS through
the Push Buon instead of the PIN.
Aer pressing this buon you will
be required to press the WPS on the
client device within two minutes. Click
the OK buon in the dialog box
WPS via PIN : Specify a PIN, a unique number that
can be used to add the router to
an exisng network or to create a
new network. Then click the Start to
Process buon
 Loading...