12
7. Installation
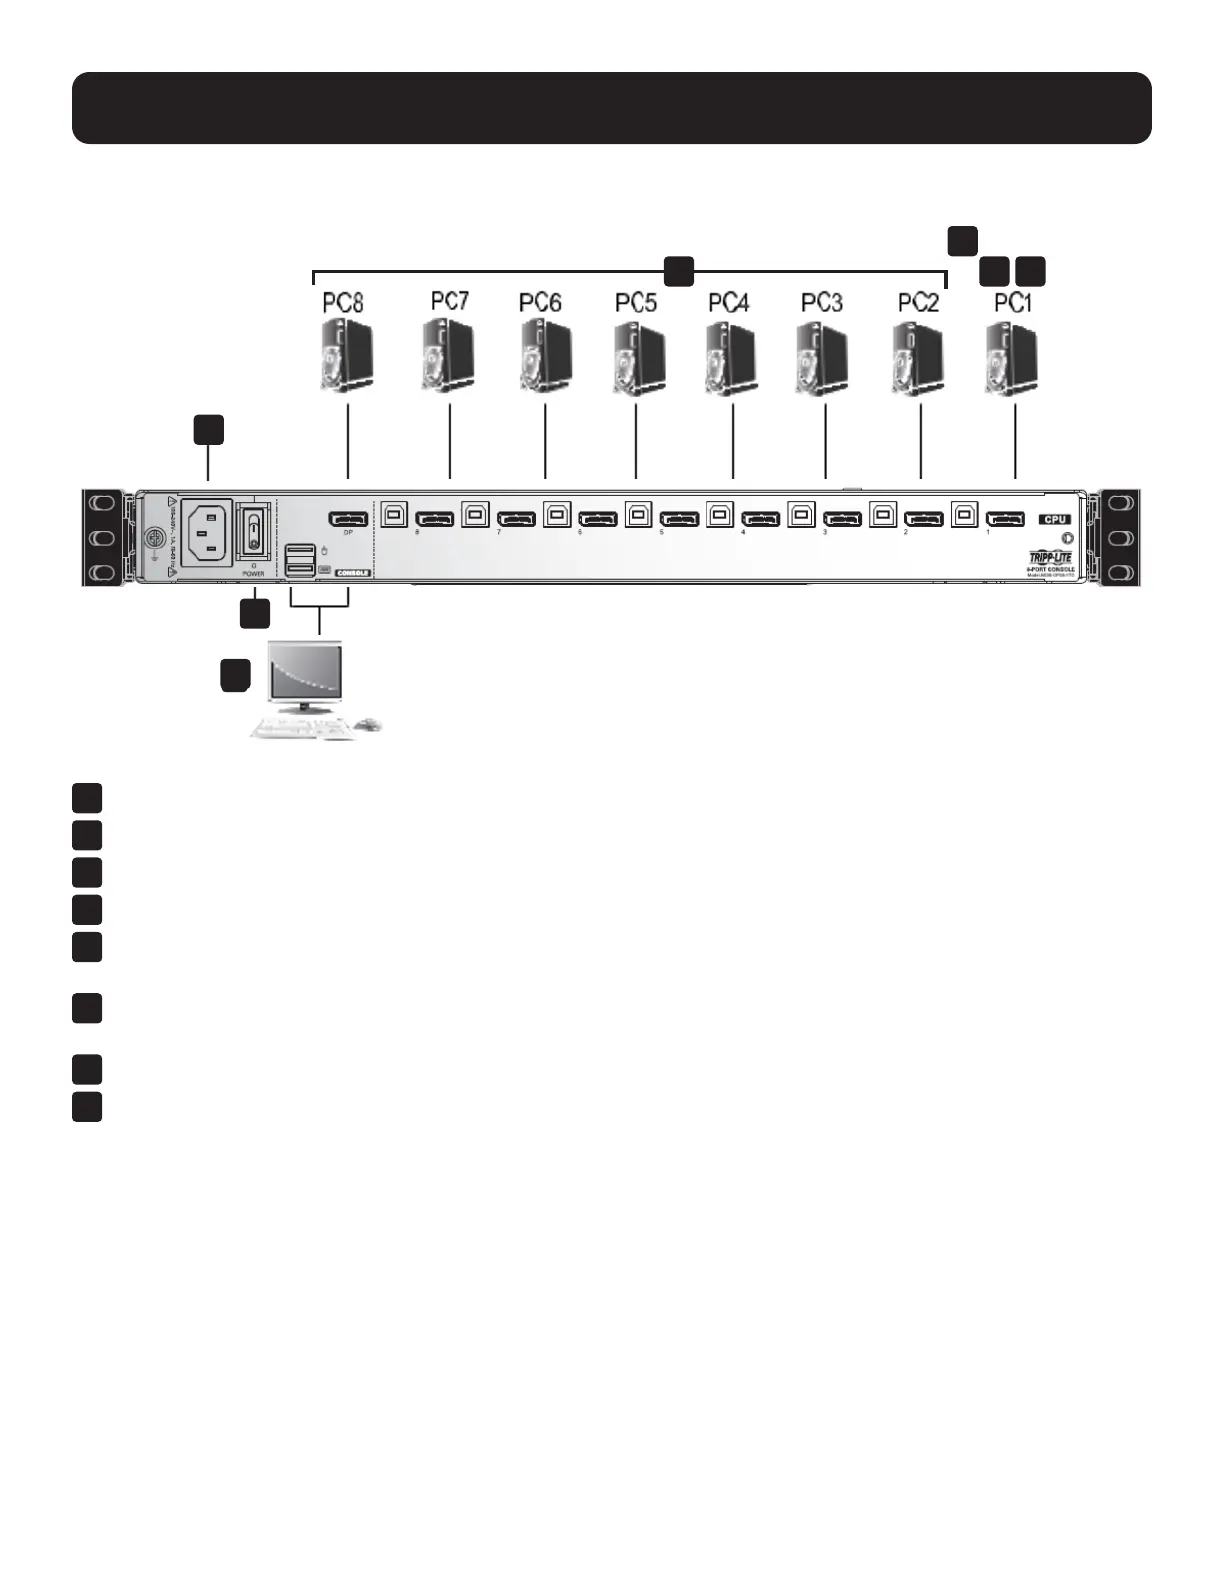
7.4 KVM Switch Installation
To set up the console KVM switch, refer to the following steps and installation diagram.
1
Power off all computers that will connect to the KVM switch.
2
Connect a USB cable from a USB CPU port on the KVM to the USB port on a computer.
3
Connect the DisplayPort CPU port on the KVM to the DisplayPort on a computer.
4
Repeat steps 2 and 3 for each additional computer you are connecting to the KVM.
5
(Optional) Add an external console to the KVM by connecting an DisplayPort monitor and USB keyboard and mouse to
the console ports on the back of the device.
6
Plug the included power cord into a Tripp Lite Surge Protector, Power Distribution Device (PDU), Uninterruptible Power
Supply (UPS) or AC wall outlet.
7
Power on the connected computers.
8
Power on the KVM device.
4
5
8
7
6
2 3
 Loading...