16
4. Telnet/SSH Console
Most of the monitoring and control features available in the Web
console (see Section 3 – Web Console) are also available in the telnet
and/or SSH console. Accessing the SNMPWEBCARD through the
telnet console is ideal for mobile or resource-limited platforms.
Accessing the Telnet Console
Open a telnet client and connect to the IP number of the
SNMPWEBCARD. At the login prompt, enter the admin user name
and password. (Telnet access must be enabled and an admin password
must be dened. Guest users do not have telnet access.) After a
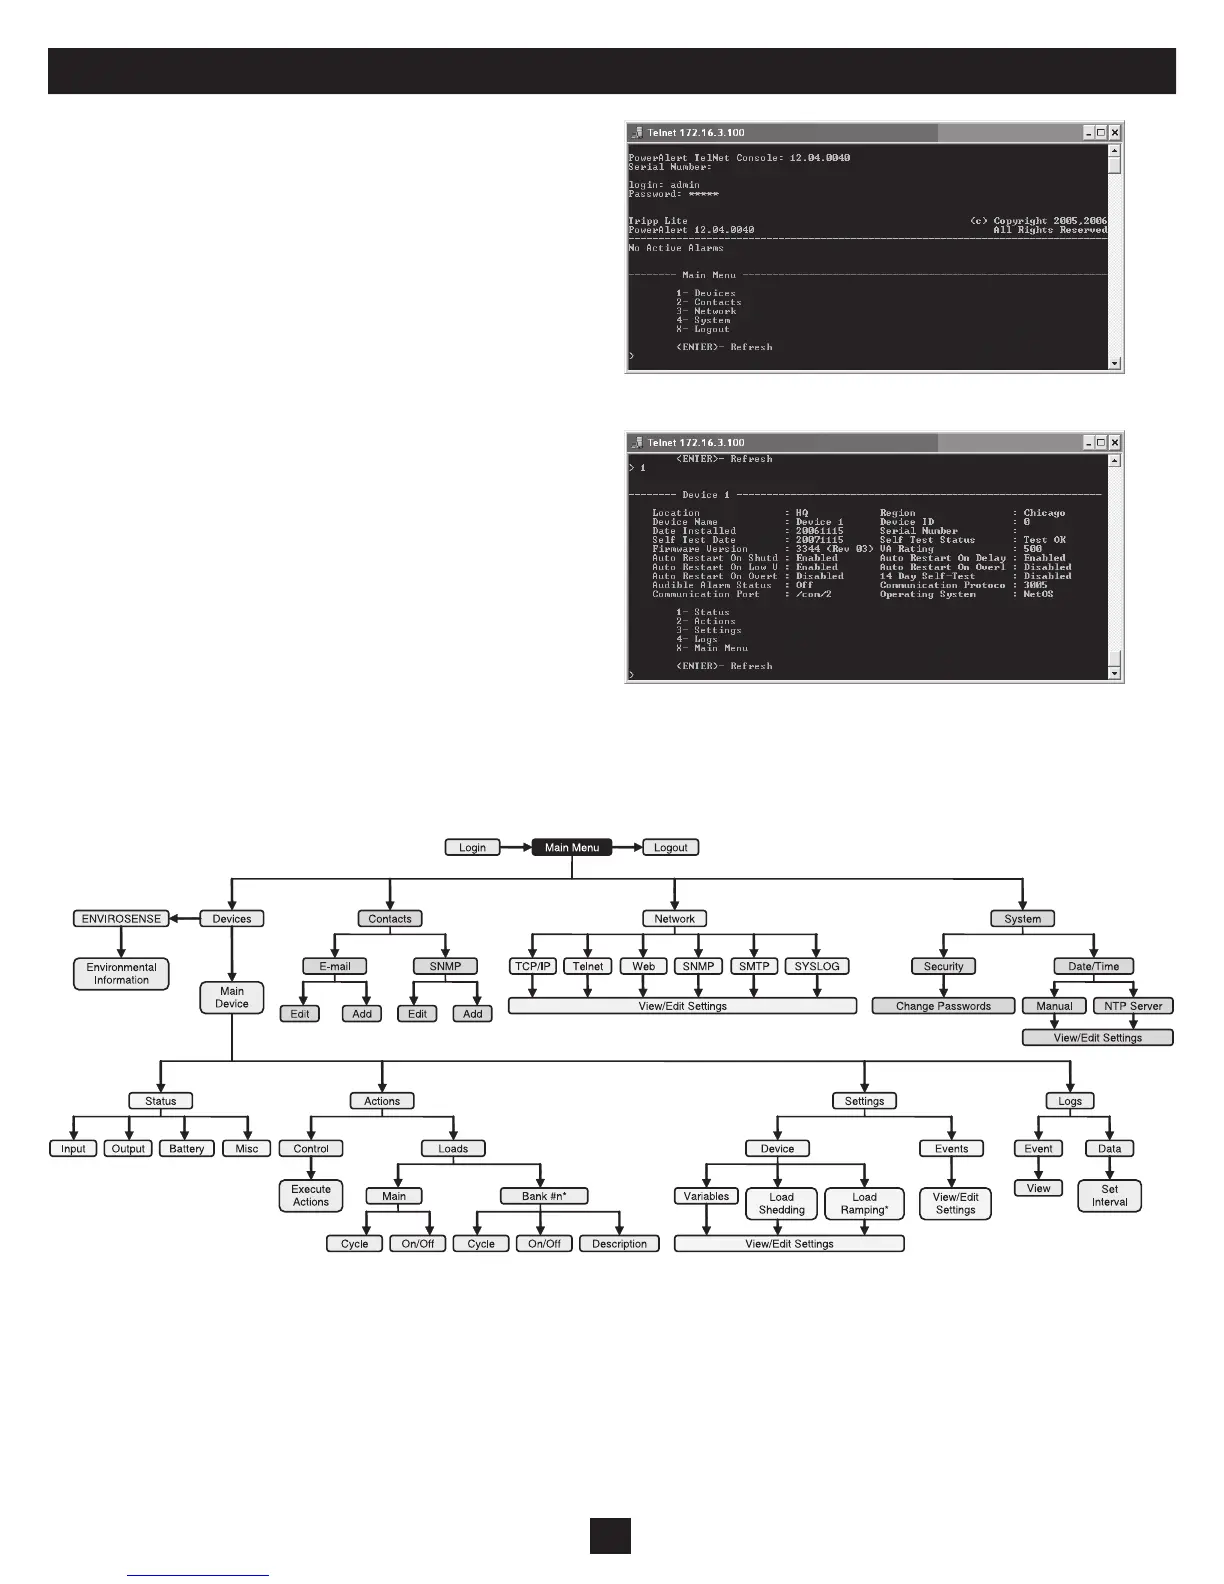
successful login, you’ll see the telnet console’s main menu (Figure 4-1).
The Telnet Console Interface
The telnet console uses a menu-driven, text-based interface. It has
most of the same menus and submenus as the Web console, but they are
arranged differently. Several submenus that were previously grouped
below “Settings” now appear at the top level, and instead of appearing
at the top level, the “Status,” “Actions,” “Settings” and “Logs” menus
are accessible under the “Devices” menu. You’ll see those menu
choices after selecting your device, along with information about the
device (Figure 4-2). Note: You can also select an ENVIROSENSE
temperature/humidity and alarm monitoring device if one is present.
The functional menu hierarchy of the telnet console interface is shown
in Figure 4-3.
Figure 4-1: Telnet Console Main Menu
Figure 4-2: Telnet Console Device Submenu
Figure 4-3: Telnet Console Menu Hierarchy
 Loading...