SeaKing & SeaPrince Imaging Sonars
0374-SOM-00001, Issue: 08 6 © Tritech International Ltd.
2. Getting Started
This section will detail the basic steps required in order to connect up your Tritech Sonar for
the first time to your surface controller (typically a Tritech SCU, PC or Laptop).
A standard Sonar system will comprise of the following elements:
• The Sonar unit - Super SeaKing or Super SeaPrince in this instance
• The Build Record Sheet - This contains detailed information on the configuration and pin
outs specific to this unit
• Accessory kit - this will contain extra o-rings and screws. Depending on the Sonar unit it
may also contain additional items
• Software and Manual CD - This holds a copy of all commercially released Tritech software
as well as electronic copies of manuals for Tritech International Ltd products
• Cable whip - this is an optional item, but is usually supplied for units fitted with a standard
Tritech International Ltd connector
Ensure that the surface controller has Seanet Pro installed onto it, using the supplied CD if
necessary. The CD will contain a version of Seanet Pro that would have been appropriate
at the time of the manufacture of the Sonar unit, but for the latest version it is recommended
that the Tritech website be checked:
www.moog.com/tritech
Before attempting to connect up the Sonar with a test cable, check the communications
setting of the Sonar either by referring to the label on the unit - or by checking the Build
Record Sheet.
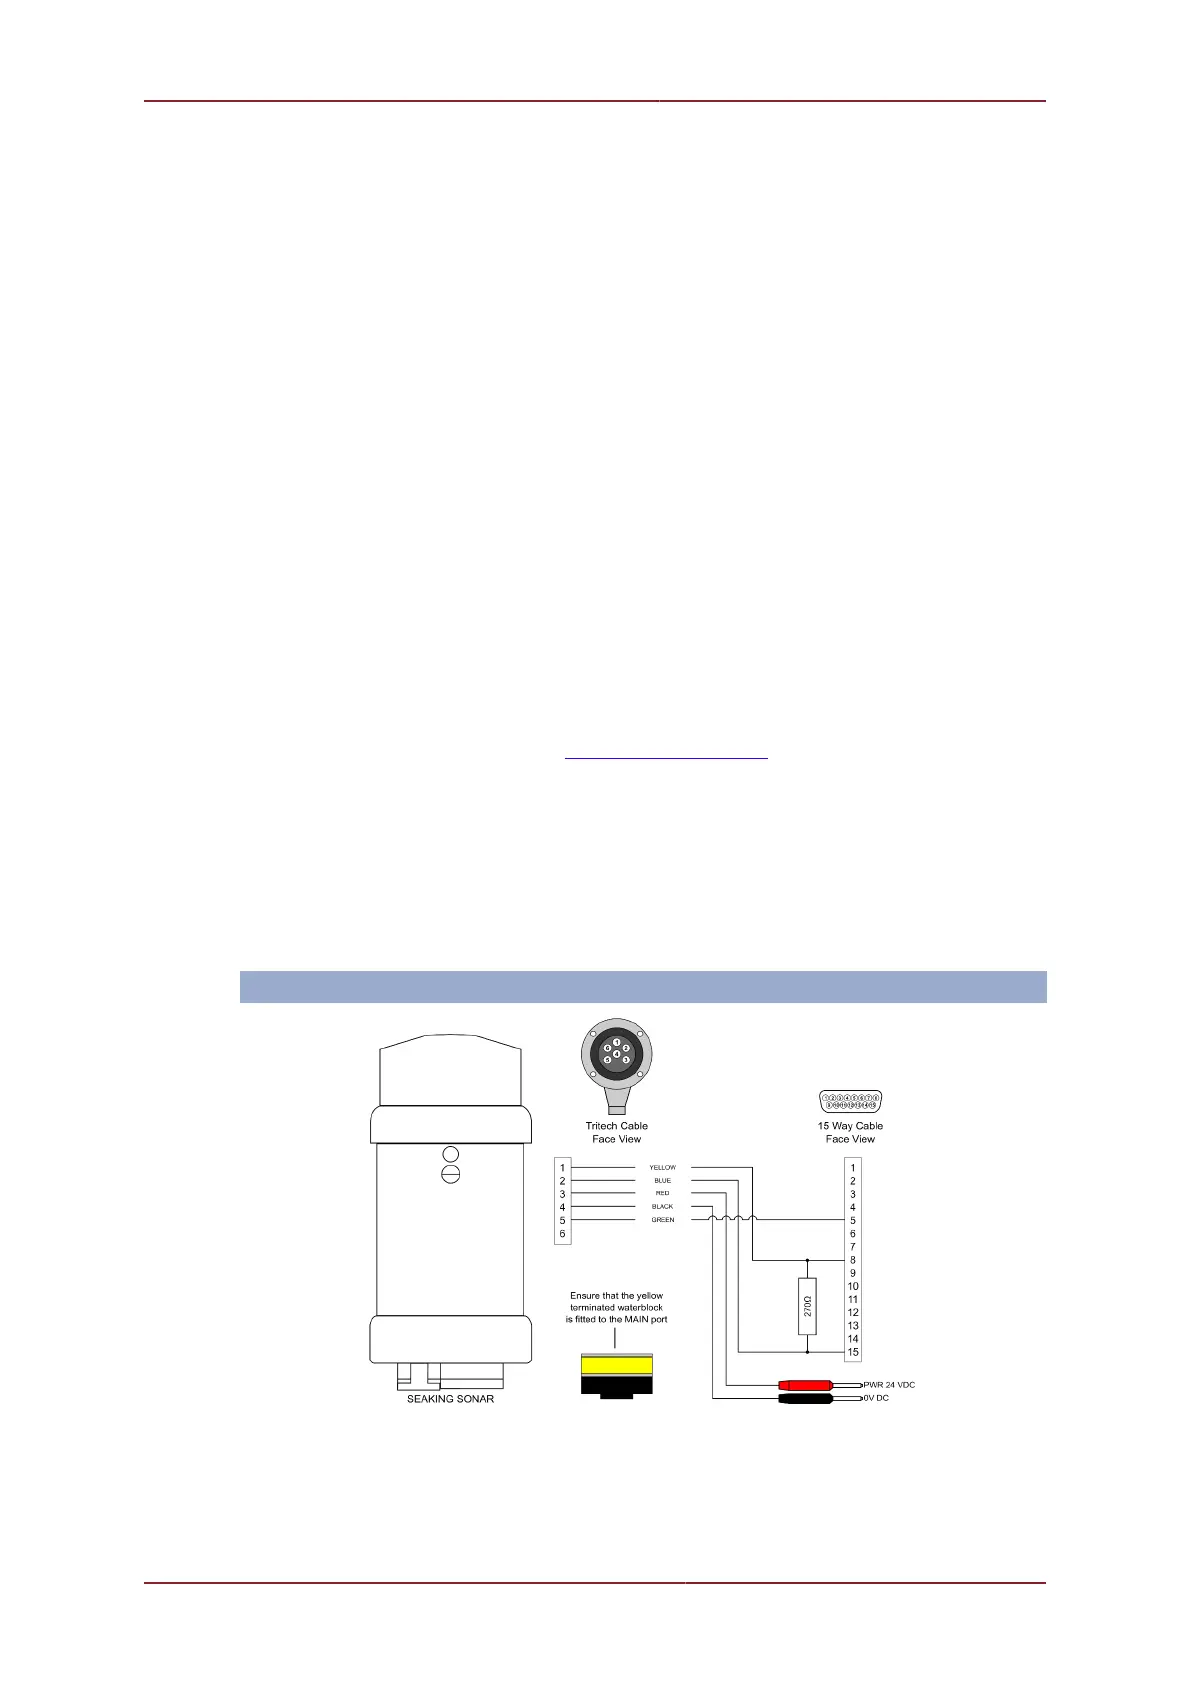
Once the setup of the Sonar is confirmed, use the cable whip (if supplied) to create a test
cable. Depending on the setup of the Sonar, differing cable wiring may be required:
ARCNET