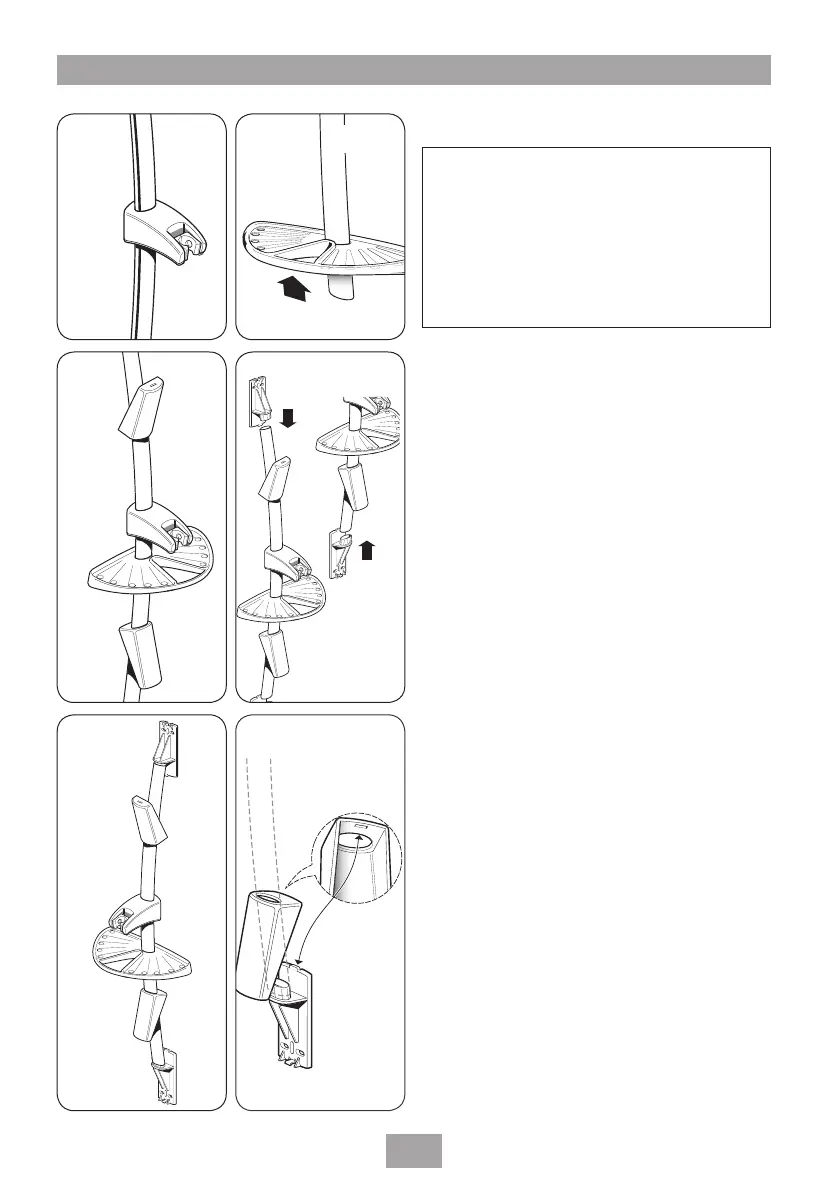
FITTING THE RISER RAIL
Decide the position for the rail on the wall within
the shower area. Proceed as follows:
The showerhead holder is supplied already
attached to the riser rail unit and the angle of
the holder dictates the rail top and bottom.
The correct orientation of the rail is when the
showerhead holder is sloping
DOWN (fig.24).
Slide the supplied soap dish onto the riser rail
below the showerhead holder
(fig.25).
Slide the top and bottom finishing trims onto
the riser rail
(fig.26).
Push the two fixing brackets into the ends of the
riser rail
(fig.27).
Offer the rail assembly to the wall
(fig.28).
Using the brackets as templates, mark two upper
holes and two lower holes. Note there are four
provisions for screws per bracket — select the
two most suitable for your requirements. Make
sure the rail is aligned vertically.
Drill and plug the wall. (The wall plugs provided
are suitable for most brick walls — use an
appropriate masonry drill, but if the wall is
plasterboard or a soft building block, use special
wall plugs and a suitable drill bit).
Screw to the wall with the fixing screws supplied.
Slide the finishing trims onto the brackets. Make
sure the lug on each rail bracket end engages
into the slot on the fatter end of each trim before
push fitting the thinner ends in place
(fig.29).
To remove a trim, push a small screwdriver or
similar through the slot in the trim end and
carefully pull away from the wall bracket.
Slide the soap dish down the rail so that its
bracket engages on top of the lower finishing
trim.
WARNING!
Check there are no hidden cables or
pipes before drilling holes for wall
plugs. Use great care when using
power tools near water. The use of
a residual current device (RCD) is
recommended.
Fig.24 Fig.25
Fig.26 Fig.27
Fig.28 Fig.29

 Loading...