Tuff Torq K92 Hydrostatic Transaxle
A - Ball Bearing
B - Snap Ring
C - Clutch Shaft
D - Needle Bearing
E - Washer
F - O-ring
G - Piston
H - Spring
I - Washer
J - Snap Ring
K - Input Shaft Collar
L - Snap Ring
M - Thick Steel Plate
N - Friction Plate
O - Spring
P - Pin
Q - Steel Plate
R - Clutch Gear/Hub
S - Washer
T - Seal Ring
1. Remove PTO clutch assembly. (See “PTO Brake
Removal and Installation” on page 6.)
2. Remove large snap ring and thick steel plate.
3. Remove parts.
NOTE: Friction plates, springs, steel plates and pins
must be replaced as a set.
4. Replace clutch gear/hub if brake surface is badly
scored or teeth are chipped or damaged.
CAUTION: Avoid Injury! Piston is under spring force.
Use care during disassembly.
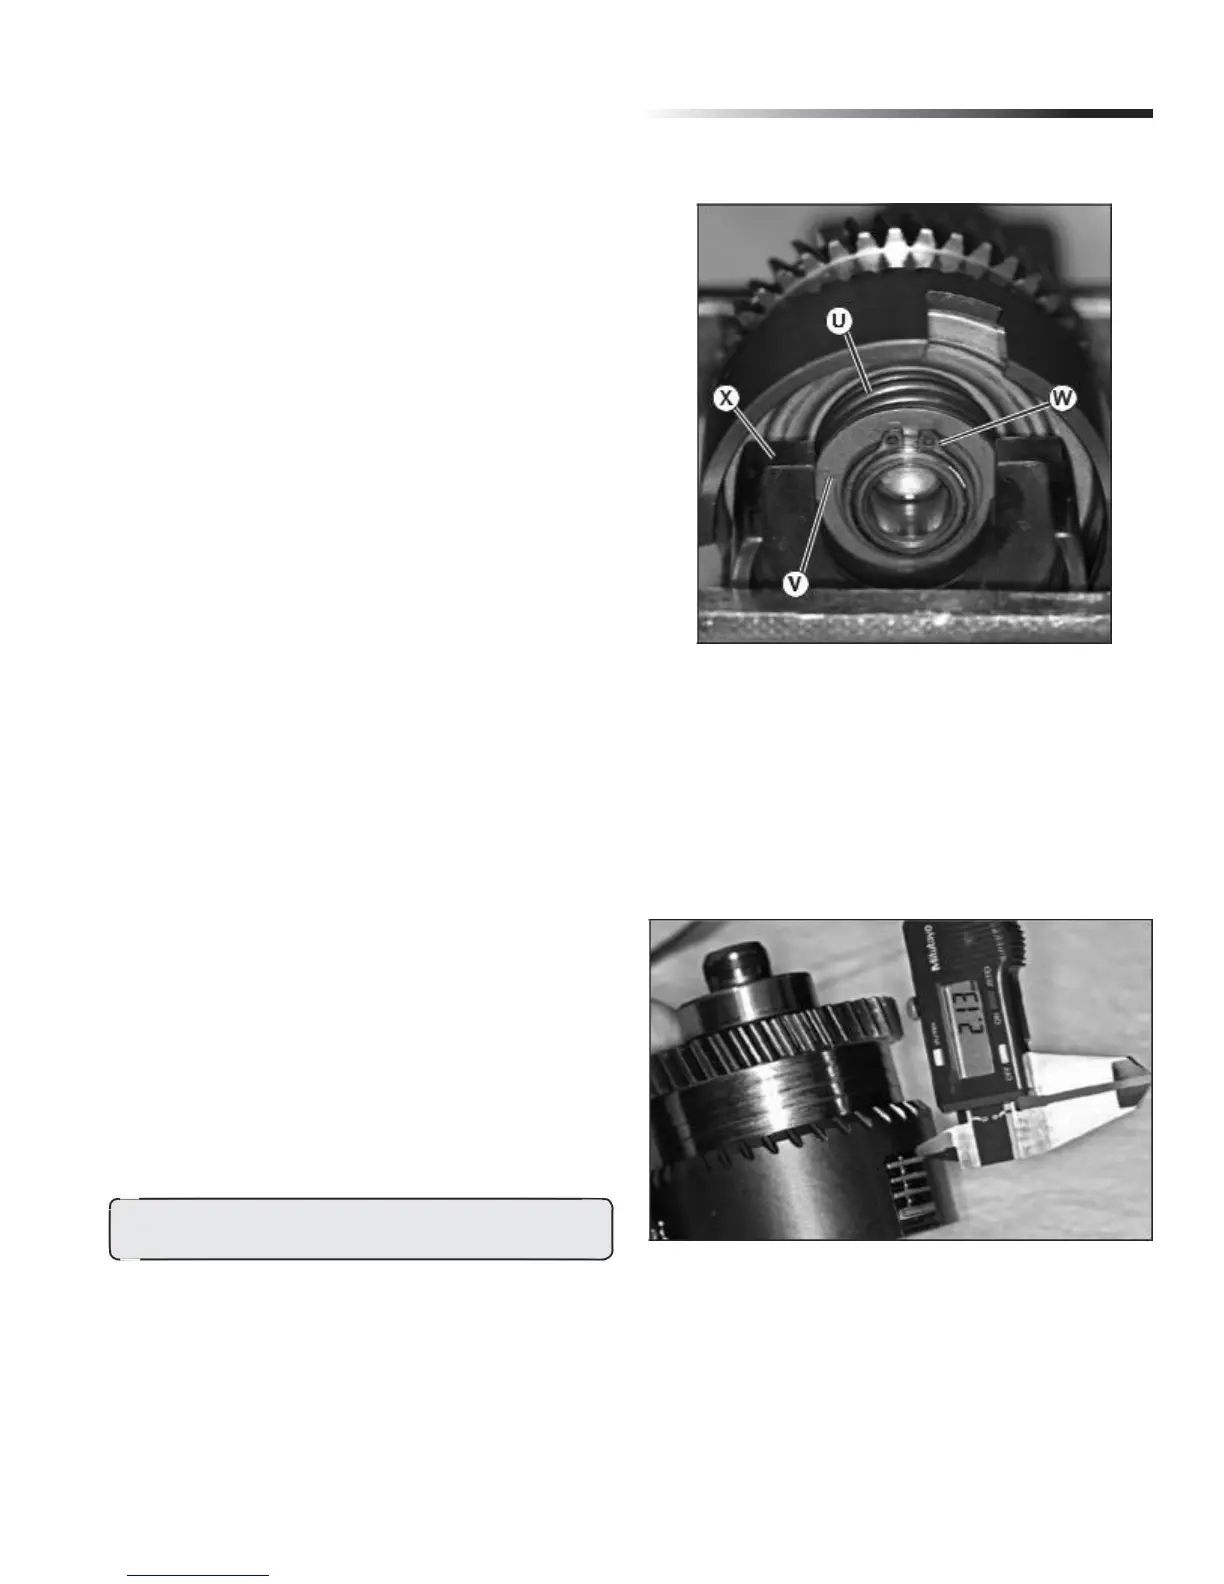
5. Remove piston from clutch gear/hub. Use a transmis-
sion gear spacer (X) to compress spring (U) and washer
(V) in a vise. Remove snap ring (W) and slowly
release force of spring. (Fig. 42)
6. Remove remaining clutch parts.
7. Check bearings for smooth rotation.
8. Inspect clutch gear for worn or damaged teeth.
9. Check inner piston bore for scoring or wear.
Fig. 42, Clutch Disassembly
10. Check steel plates for scoring, discoloration,
warping or wear.
11. Replace worn or damaged springs.
12. Check input shaft collar for burrs, wear or
damaged teeth or splines.
13. Check clutch pack wear. Assemble parts.
Fig. 43, Clutch Disassembly
14. Put clutch gear/hub on bench so steel and friction plates
are against snap ring. Measure clearance between inner
steel plate and bottom of clutch gear/hub.
15. If clearance measures 2.7 mm (0.106 in.) or
more, re-place PTO clutch plates.
16. Apply clean hydraulic oil to all parts.
NOTE: Installation is done in the reverse order of removal.
23