Tuff Torq K92 Hydrostatic Transaxle
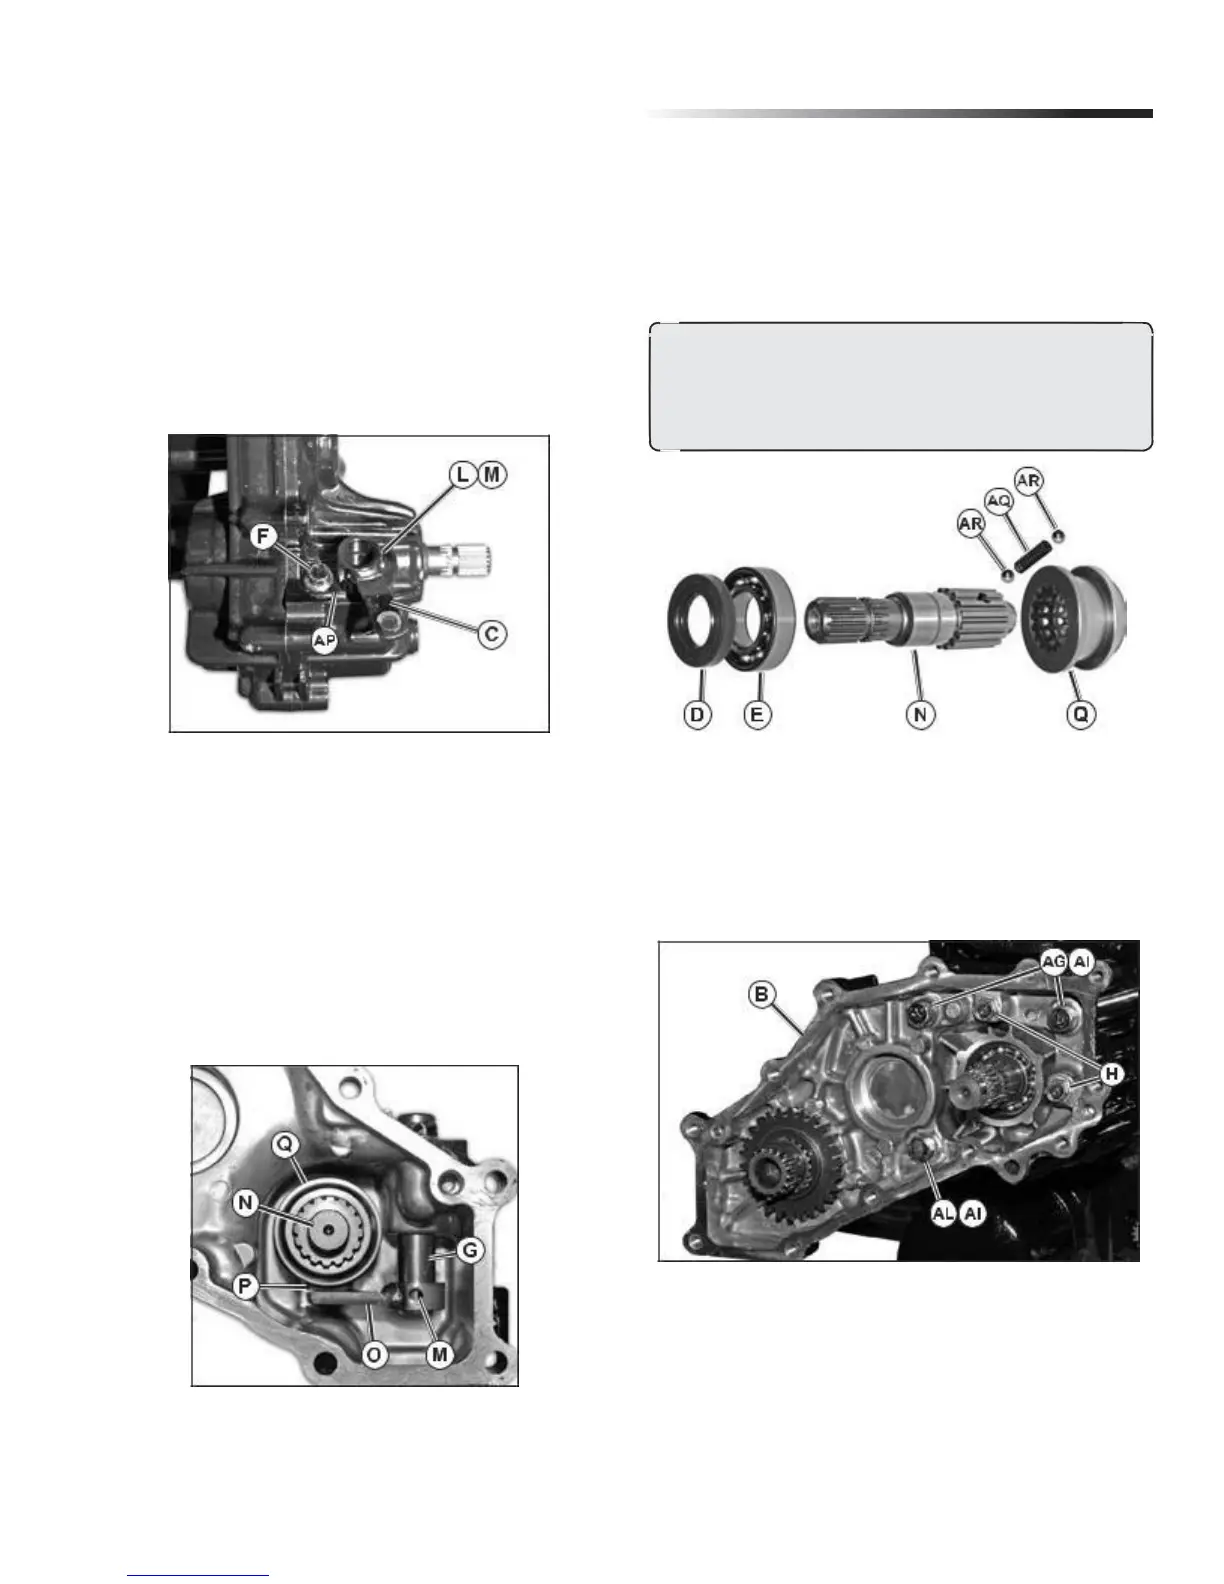
12. Remove bolt (F) and keeper plate (AP) from the
4WD cover.
13. Use drift to drive out spring pin (L) and roll pin ( M)
securing 4WD shift arm (C) to 4WD shift shaft (G);
then, remove 4WD shift arm from the 4WD shift
shaft. Replace if damaged or worn.
NOTE: Replace O-ring (K, see fig. 52) on 4WD shift
shaft when reinstalling.
Fig. 48, 4WD Cover Removal
14. Slide the 4WD shift shaft (G) down into the cover until
bearing shift block (P) is clear of the front shift collar
(Q). Remove the bearing shift block; then, pull out the
front shift collar (Q) and 4WD output shaft (N). Drive
out roll pin (M) from 4WD shift arm (O) by aligning roll
pin with open port in 4WD cover (bolt (I) must be
removed). Replace if damaged or worn. (Fig. 49)
15. Remove 4WD shift arm from 4WD shift shaft by
pulling shaft up from the 4WD cover.
Fig. 49, 4WD Cover Removal
16. Remove the bearing (E) from the 4WD output shaft (N).
17. Carefully remove front shift collar (Q) from 4WD
output shaft. As separation occurs the detent balls
(AR) and spring (AQ) will become visible. (Fig. 50)
CAUTION: Detent Balls are under pressure from spring
while assembled. Care should be taken during
disassembly to in-sure that they do not fly out, possibly
causing damage and/or injury. Safety glasses should be
worn at all times while work-ing on the transaxle.
Fig. 50, 4WD Cover Removal
18. From the 4WD gear case (B), remove (2) bolts with
wash-ers (AG and AI). Remove (2) bolts (H) and (1)
bolt with washer (AL and AI). (Fig. 51)
19. Remove 4WD gear case from motor case assembly.
Fig. 51, 4WD Cover Removal
20. Measure OD of bearing surface. If not within specifica-
tions, replace front wheel drive output shaft.
NOTE: Replace seal (D) if output shaft is removed. (Fig. 50).
25