Tuff Torq K92 Hydrostatic Transaxle
Transaxle Disassembly (continued)
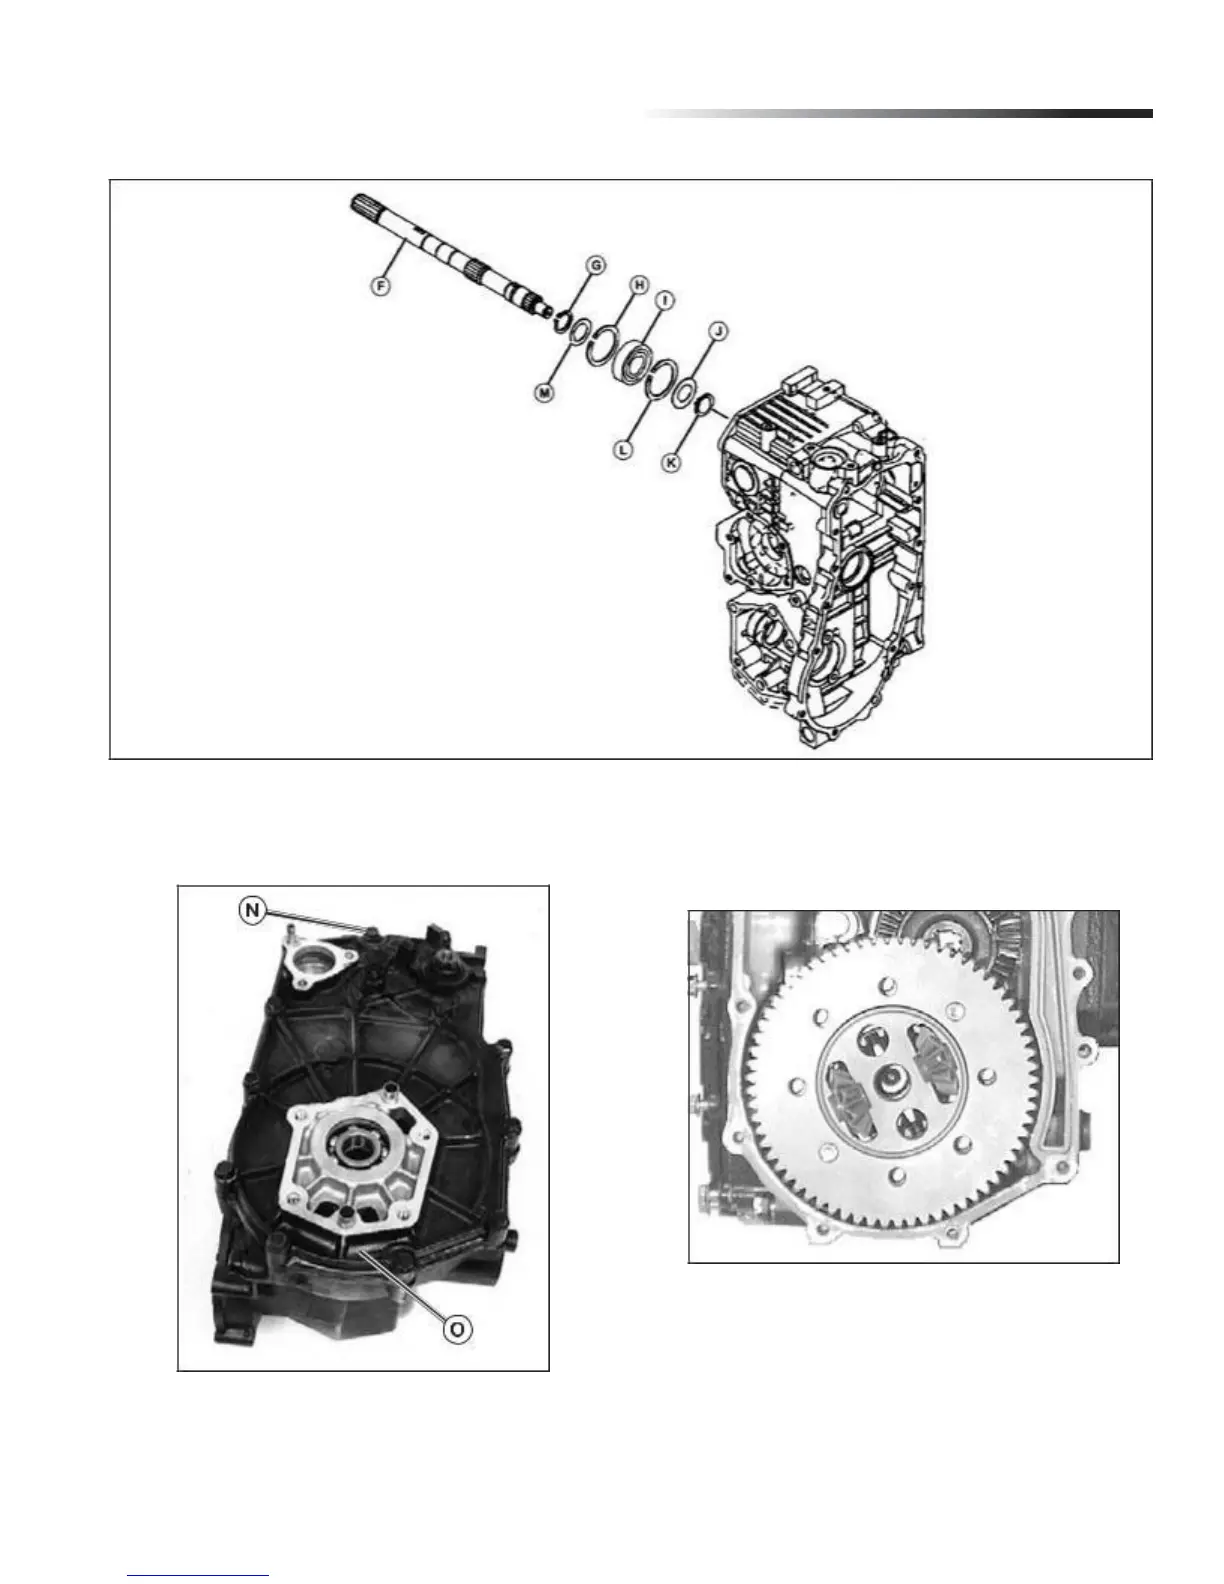
F - Input Shaft
G - Snap Ring
H - Snap Ring
I - Ball Bearing
J - Washer
K - Snap Ring
L - Snap Ring
M - Washer
Fig. 63, Transaxle Input Shaft Disassembly
9. Lay transaxle on left side and remove sixteen (16)
cap screws (N) attaching right cover assembly (O).
IMPORTANT: Avoid damage! Bearing, washer and
differen-tial pinion located on top of differential
assembly are loose. Do not drop or lose parts.
Fig. 65, Final Pinon Gear
11. Lift final gear and differential assembly and differential
lock shaft from transaxle case together as an assembly.
Fig. 64, Right Transaxle Cover 12. Remove final pinion shaft assembly. (Fig. 65)
10. Remove final pinion shaft ball bearing. Bearing
may remain in cover assembly.
37