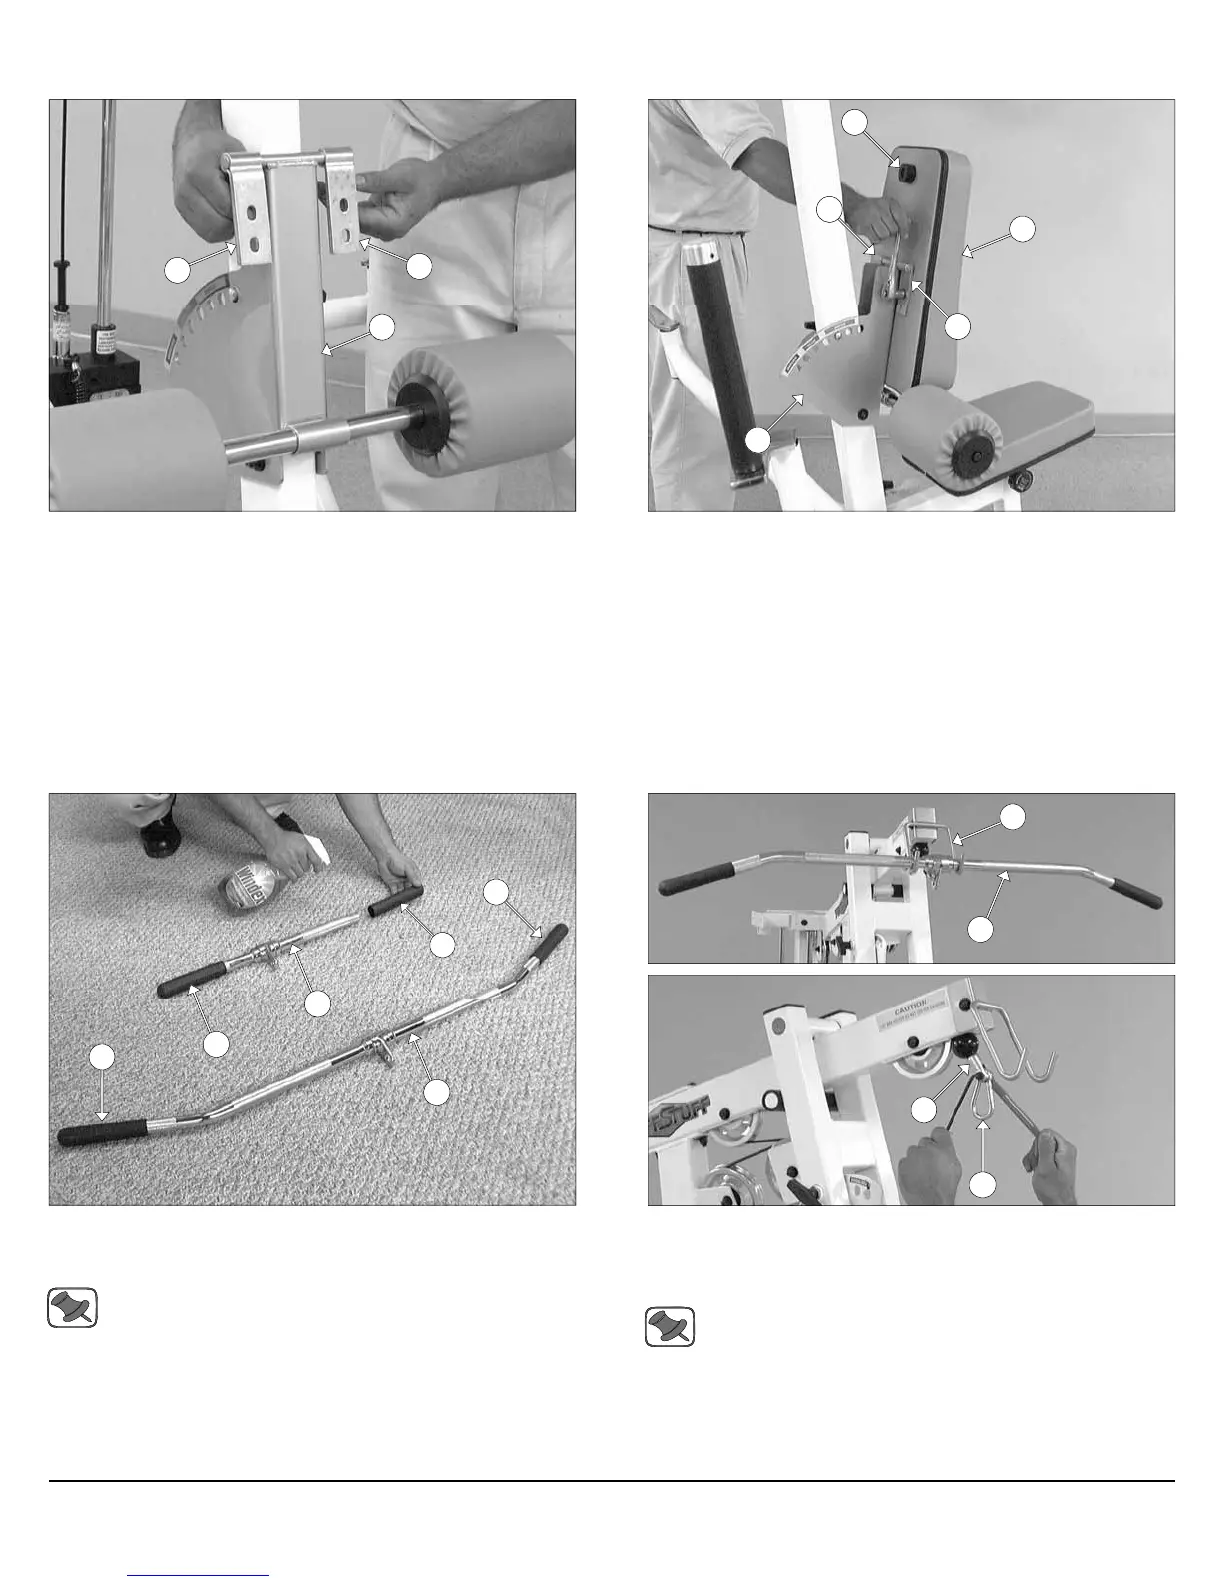
FIG. 45 Attach two Metal Hinges (#113) to the axle of the
Adjustable Back Pad Bracket (#2). Be sure to position the Metal
Hinges (#117) as shown above.
FIG. 46 Attach a Rubber Bumper 3/8 X 1 1/2 (#135) to the Bench
Press Back Pad (#5) using one Hex Head Cap Screw 3/8-16 X 1 1/2
(#95). Next, attach the Bench Press Back Pad (#5) to the Metal
Hinges (#113) using two Hex Head Cap Screws 3/8-16 X 1 1/4 (#96),
and two Flat Washers SAE 3/8” (#93).
2
113
113
5
135
113
2
113
14
Assembly Instructions
FIG. 48 Next, attach one Snap Link (#145) to the Clevis Bracket
(#75) using one Shoulder Bolt 3/8 X 3/4 (#144), and one Nylon Insert
Lock Nut 5/16-18 (#120). Use the supplied Hex Key 3/16” (#107) and a
1/2” combination wrench to fasten this assembly properly.
Note: Refer to Fig. A on fold-out page 21 for further clarification
of this hardware assembly.
Connect the Lat Bar 48” (#111) to the Lat Cable (#22) using the Snap
Link (#145). Rest the Lat Bar 48” (#111) onto the Lat Bar Holder
(#21), when not in use.
FIG. 47 Insert a Rubber Grip (#139) over each one of the tube-ends
of the Low Row Bar 20” (#112) and the Lat Bar 48” (#111), as shown
above.
Note: To facilitate the insertion of these Rubber Grips, use Win-
dex or household glass cleaner.
112
139
111
139
139
139
111
21
145
75
Apollo Modular Gym System (Base Unit)