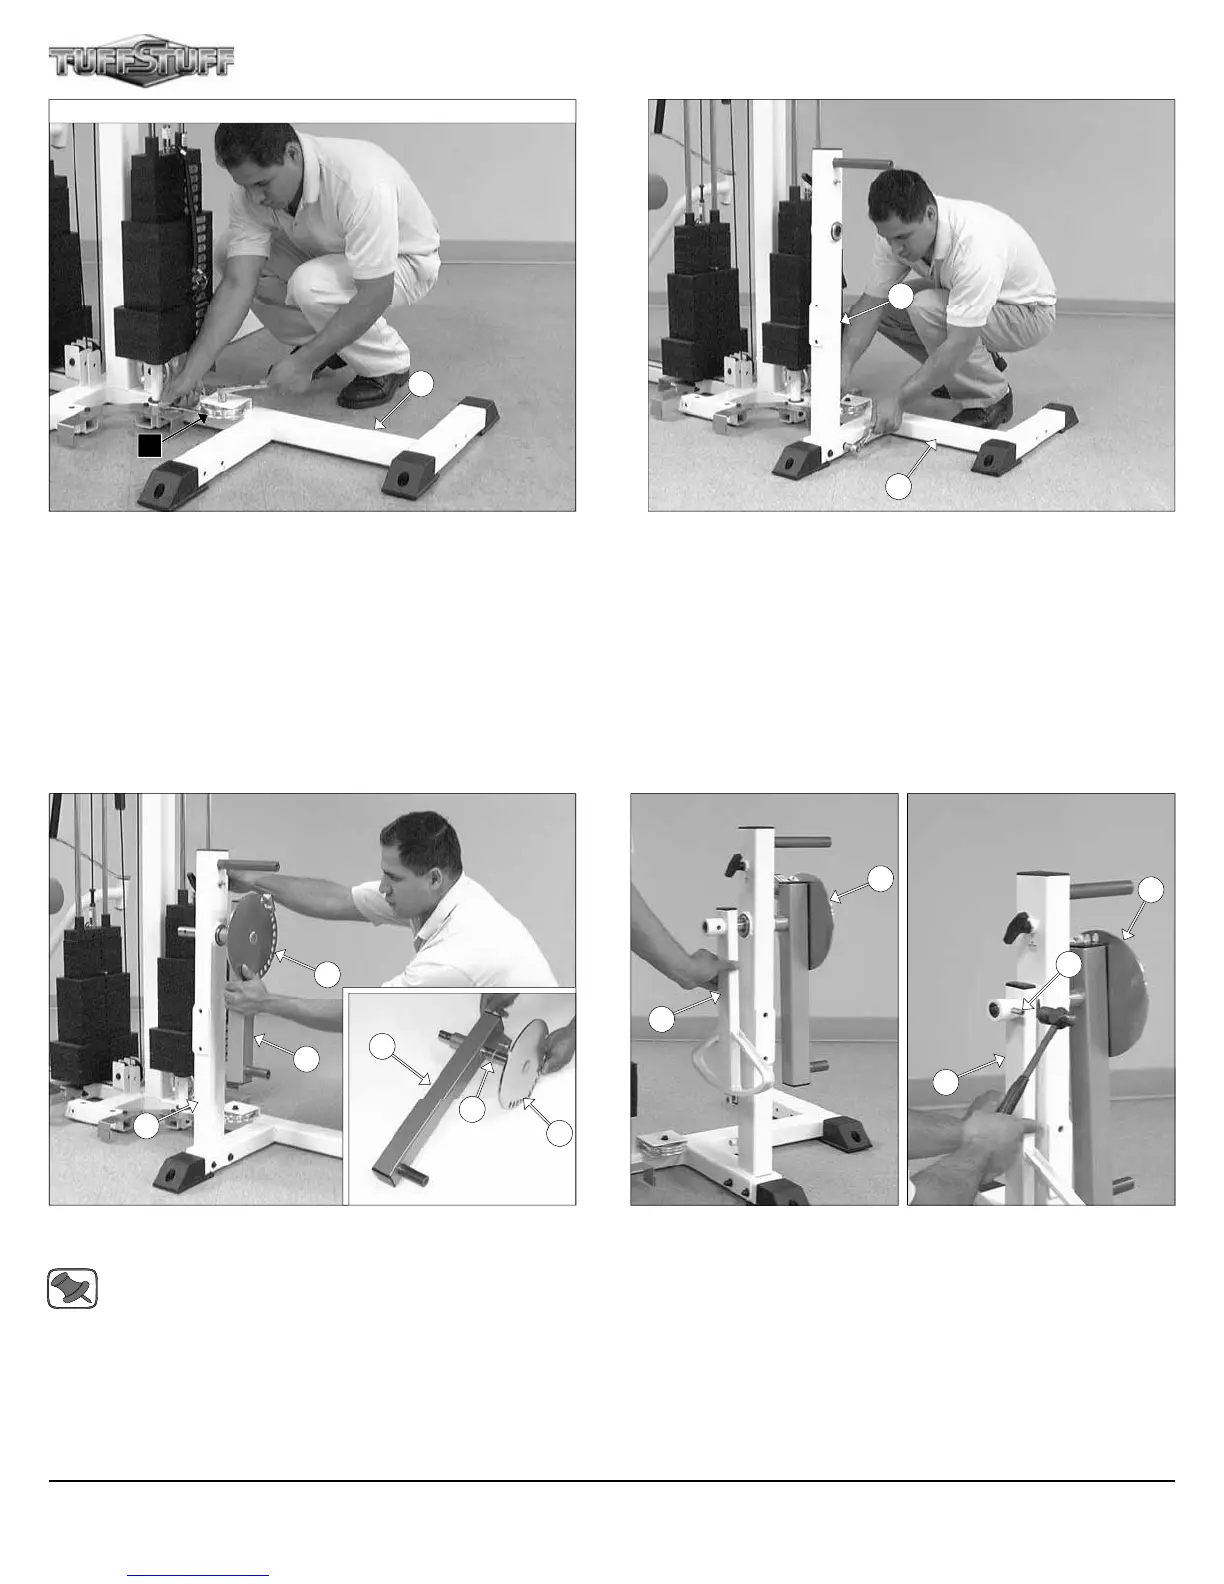
FIG. 51 Insert a Nylon Flat Washer 1 X 1 1/4 (#116) onto the axle of
the Circular Plate (#11).
Note: Lubricate the axle of the Circular Plate (#11) with multi-
purpose grease at this time.
Next, insert the axle of the Circular Plate (#11) into the receptacle of
the Pivot Arm (#38). Then, insert the axle of the Circular Plate (#11)
with the captive Pivot Arm (#38) into the bearing housing of the Leg
Extension Front Frame (#27).
FIG. 52 Attach the Actuator Arm (#1) to the axle of the Circular Plate
(#11). Next, align the hole of the Actuator Arm (#1) to the hole of the
Circular Plate with Axle (#11) and, using a hammer, insert the Roll Pin
3/8 X 1 1/2 (#151).
29
134
1
11
15
FIG. 49 Attach a Pulley 4 1/2” Rd. (#67-Labeled C2) to the Leg Ex-
tension Bottom Connector (#25) using one Hex Head Cap Screw 3/8-
16 X 1 3/4 (#97), two Flat Washers SAE 3/8” (#93), and one Nylon In-
sert Jam Lock Nut 3/8-16 (#118).
FIG. 50 Next, attach the Leg Extension Front Frame (#27) to the
Leg Extension Bottom Connector (#25) using two Hex Head Cap
Screws 3/8-16 X 4 1/4 (#104), four Flat Washers SAE 3/8” (#93), and
two Nylon Insert Lock Nuts 3/8-16 (#119).
Assembly of the Leg Ext / Leg Curl Station Fig. 49 - Fig. 65
25
C2
25
27
11
116
38
11
27
38
1
11
Apollo Modular Gym System (Base Unit)