14
© Turntide Technologies. Condential. All Rights Reserved. DOCT00369-082321 Last Modied: 2023-03-09
5. Installing Turntide VRF Adapter
5.1. Connecting Power
The Turntide VRF Adapter is powered over USB. It does not require external power. Do not connect 24 VDC power to the
Turntide VRF Adapter unless instructed to by Turntide support.
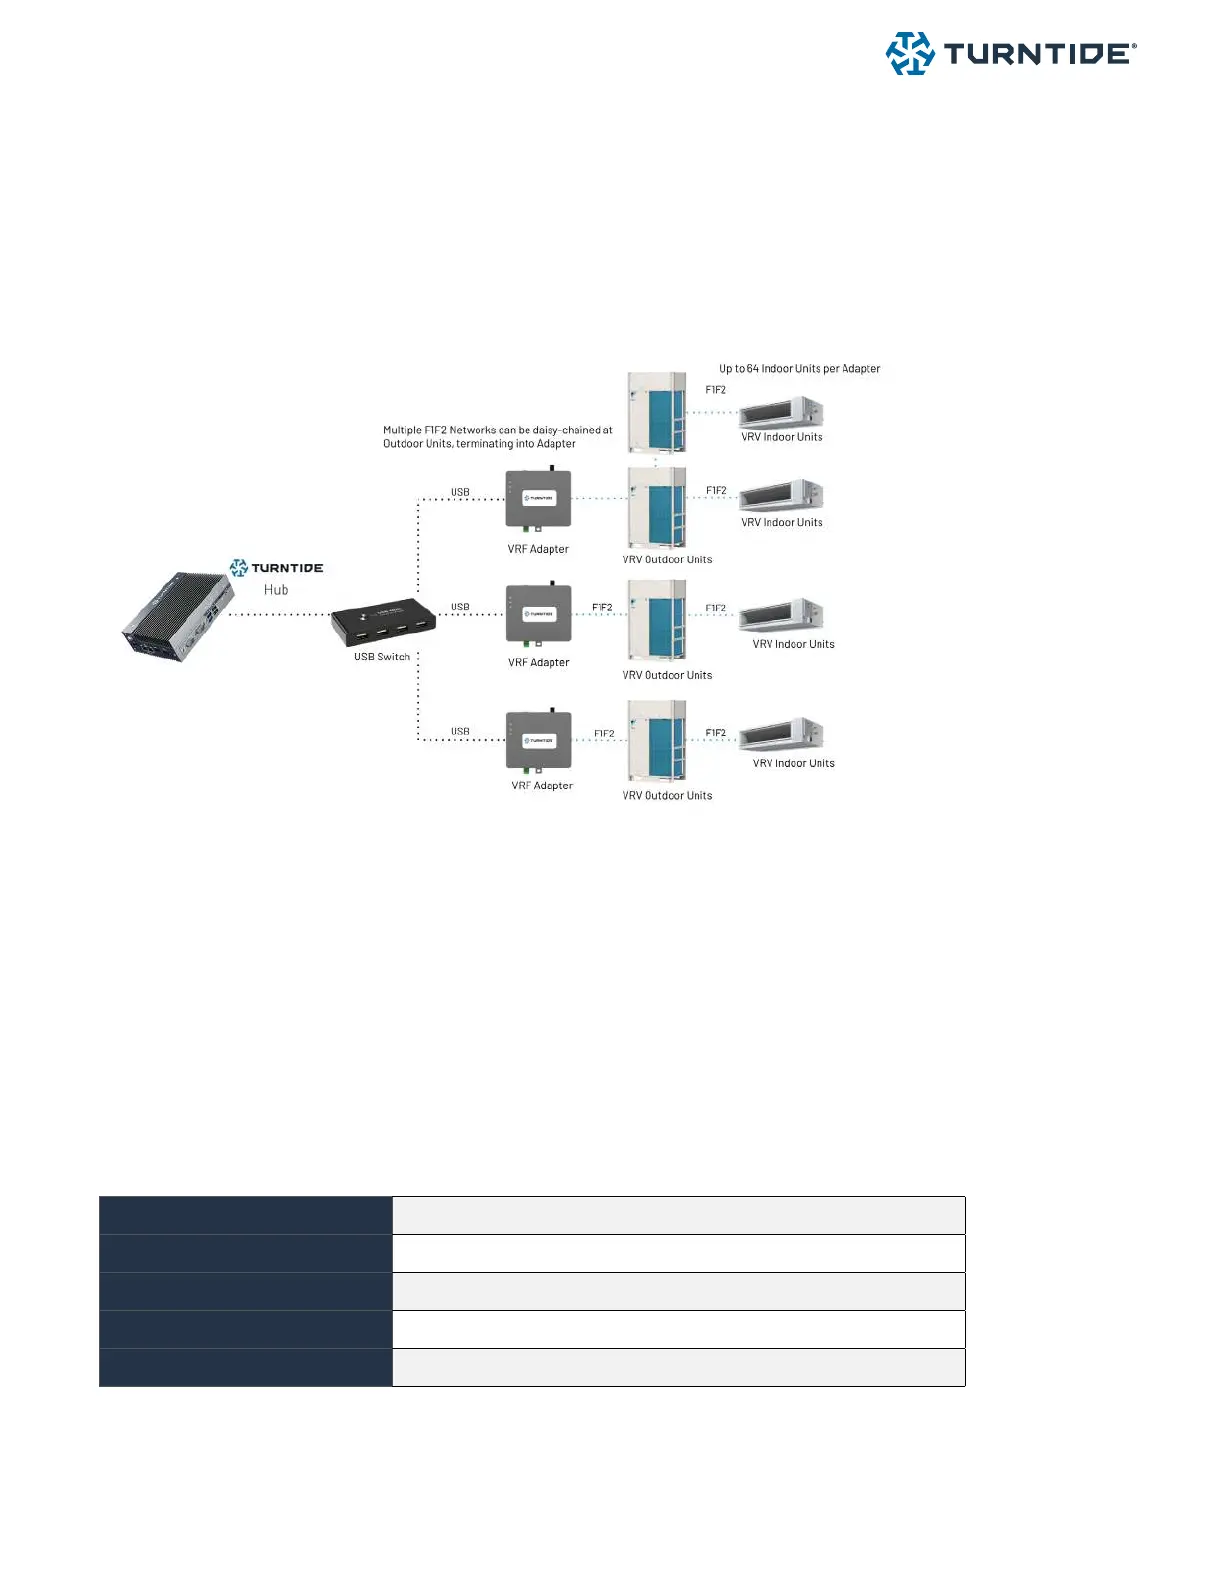
5.2. Network Conguration & Connecting to the Hub
Connect the F1F2 bus directly to the D-Net terminal connection on the VRF Adapter. The VRF adapter
connects to the Turntide Hub using a USB A-B cable. Up to 4 Turntide VRF Adapters can be connected to a
single hub. Customer’s can increase the number of VRF adapters per HUB 7 to a total of 7 using the 7 port USB
Hub expander option available from Turntide.
Note: a single F1F2 network can be connected to the VRF adapter.
5.2.1 Network & Cable Limitations
Allowed cable types
Stranded, Non-shielded, Two Conductor
Cable size
18 - 16 AWG
Termination type
Daisy Chain
Maximum cable length
Outdoor unit - indoor unit: <= 3280 ft (total wiring length: 6560 ft)
Maximum FCUs (per network)
64
We recommend customers follow Daiking wiring guidelines when wiring Dnet devices to the Turntide VRF
adapter