Page 13 of 18
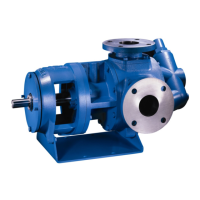
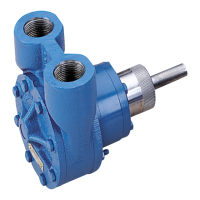
Seal Replacement and Resetting of Clearances
1. Grip the pump rmly across the ports and opposite side of the housing in a vise with the shaft end up.
2. Remove any burrs or nicks on the shaft. Use a small, ne le if needed.
3. Remove the lip seal from the adjustment sleeve.
4. Loosen the setscrew in the adjustment sleeve.
5. Rotate the adjustment sleeve clockwise until it makes contact with the housing plug.
6. Remove the retaining ring from the shaft.
7. Remove the cap screws at the shaft end.
8. Slide the housing plug and thrust bearing o the shaft.
9. Remove the stationary seat of the seal from the housing plug.
10. Slide the seal head o the shaft.
11. Polish the pump shaft with crocus cloth or very ne sandpaper and clean the seal chamber thoroughly with a clean cloth. This will
prevent damage to the new seal and ease installation.
12. Oil the shaft with appropriate lubricating oil.
13. Place the new seal head on the pump shaft and push down with your ngers to a position approximately half way down the shaft.
14. Press the new stationary seat into the housing plug. Make sure the lapped surface is facing up. Protect the lapped surface by
covering it with a piece of paper when pressing down on the face. Use your ngers for this operation. The stationary seat must be
seated squarely in the housing plug.
15. Place a new o-ring on the OD of the housing, if required, and lubricate with oil.
16. Place the housing plug on the shaft and slide into place. Use care when placing into position over the pump shaft. Do not nick the
seal face by hitting the pump shaft.
17. Align the mounting holes and reinstall the cap screws.
18. Place the thrust bearing into the adjustment sleeve.
19. Replace the retaining ring on the shaft.
20. Fill the bearing/adjustment sleeve with light grease for lubrication of the bearing.
21. Press the lip seal into the adjustment sleeve.
22. Rotate the adjustment sleeve counterclockwise until the rotor makes contact with the bracket assembly. At this time the rotor shaft
will not turn freely.
23. Rotate the adjustment sleeve clockwise until the rotor does turn freely.
24. Tighten the setscrew in the adjustment sleeve.
 Loading...