15
4 Loading Material
4.3 Loading Transfer Ribbon
Notice!
With direct thermal printing, do not load a transfer ribbon; if one has already been loaded, remove it.
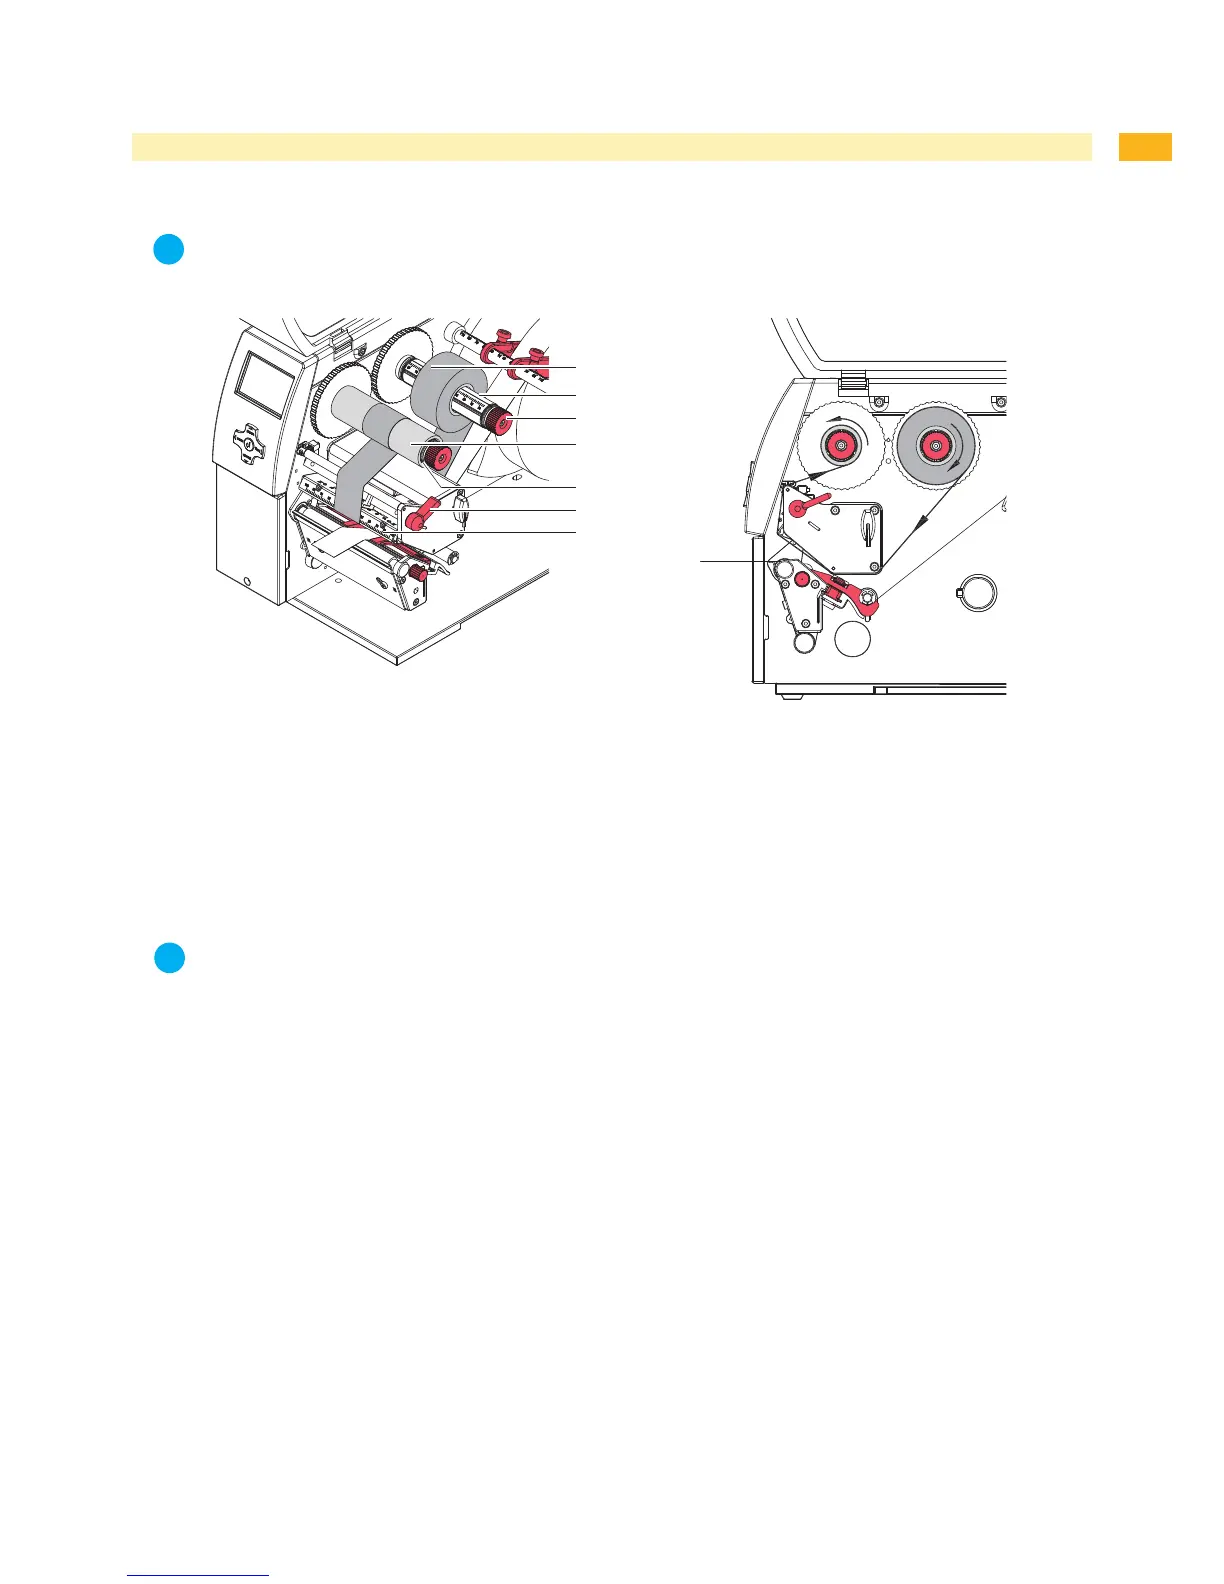
Fig. 9 Load transfer ribbon
Fig. 10 Transfer ribbon feed path
Clean printhead before loading the transfer ribbon ( 6.3 on page 18).
Turnlever(6)counterclockwisetolifttheprinthead.
Slidetransferribbonroll(1)ontotheribbonsupplyhub(3)sothatthecolorcoatingoftheribbonfacesdownward
when being unwound.
Position the ribbon roll in such a way that both ends of the roll show identical scale values.
Holdtransferribbonroll(1)rmlyandturnknob(3)onribbonsupplyhubcounterclockwiseuntilthetransferribbon
roll is secured.
Notice!
To rewind the transfer ribbon use a core with a width between the width of the supply roll and 115 mm.
Slidesuitabletransferribboncore(4)ontothetransferribbontake-uphub(5).Positionandsecureitinthesame
way as the supply roll.
Guide transfer ribbon through the print unit as shown in Fig. 10.
Securestartingendoftransferribbontomiddleoftheribboncore(1)withadhesivetape.Whenusingcores
whicharewiderthanthetransferribbonusethescale(7)attheprintheadretainertoadjustthepathoftheribbon.
Ensure counterclockwise rotation direction of the transfer ribbon take-up hub.
Turntransferribbontake-uphub(5)counterclockwisetosmoothoutthefeedpathofthetransferribbon.
Turnlever(6)clockwisetolocktheprinthead.
1.
2.
3.
4.
5.
6.
7.
8.
9.
10.