24
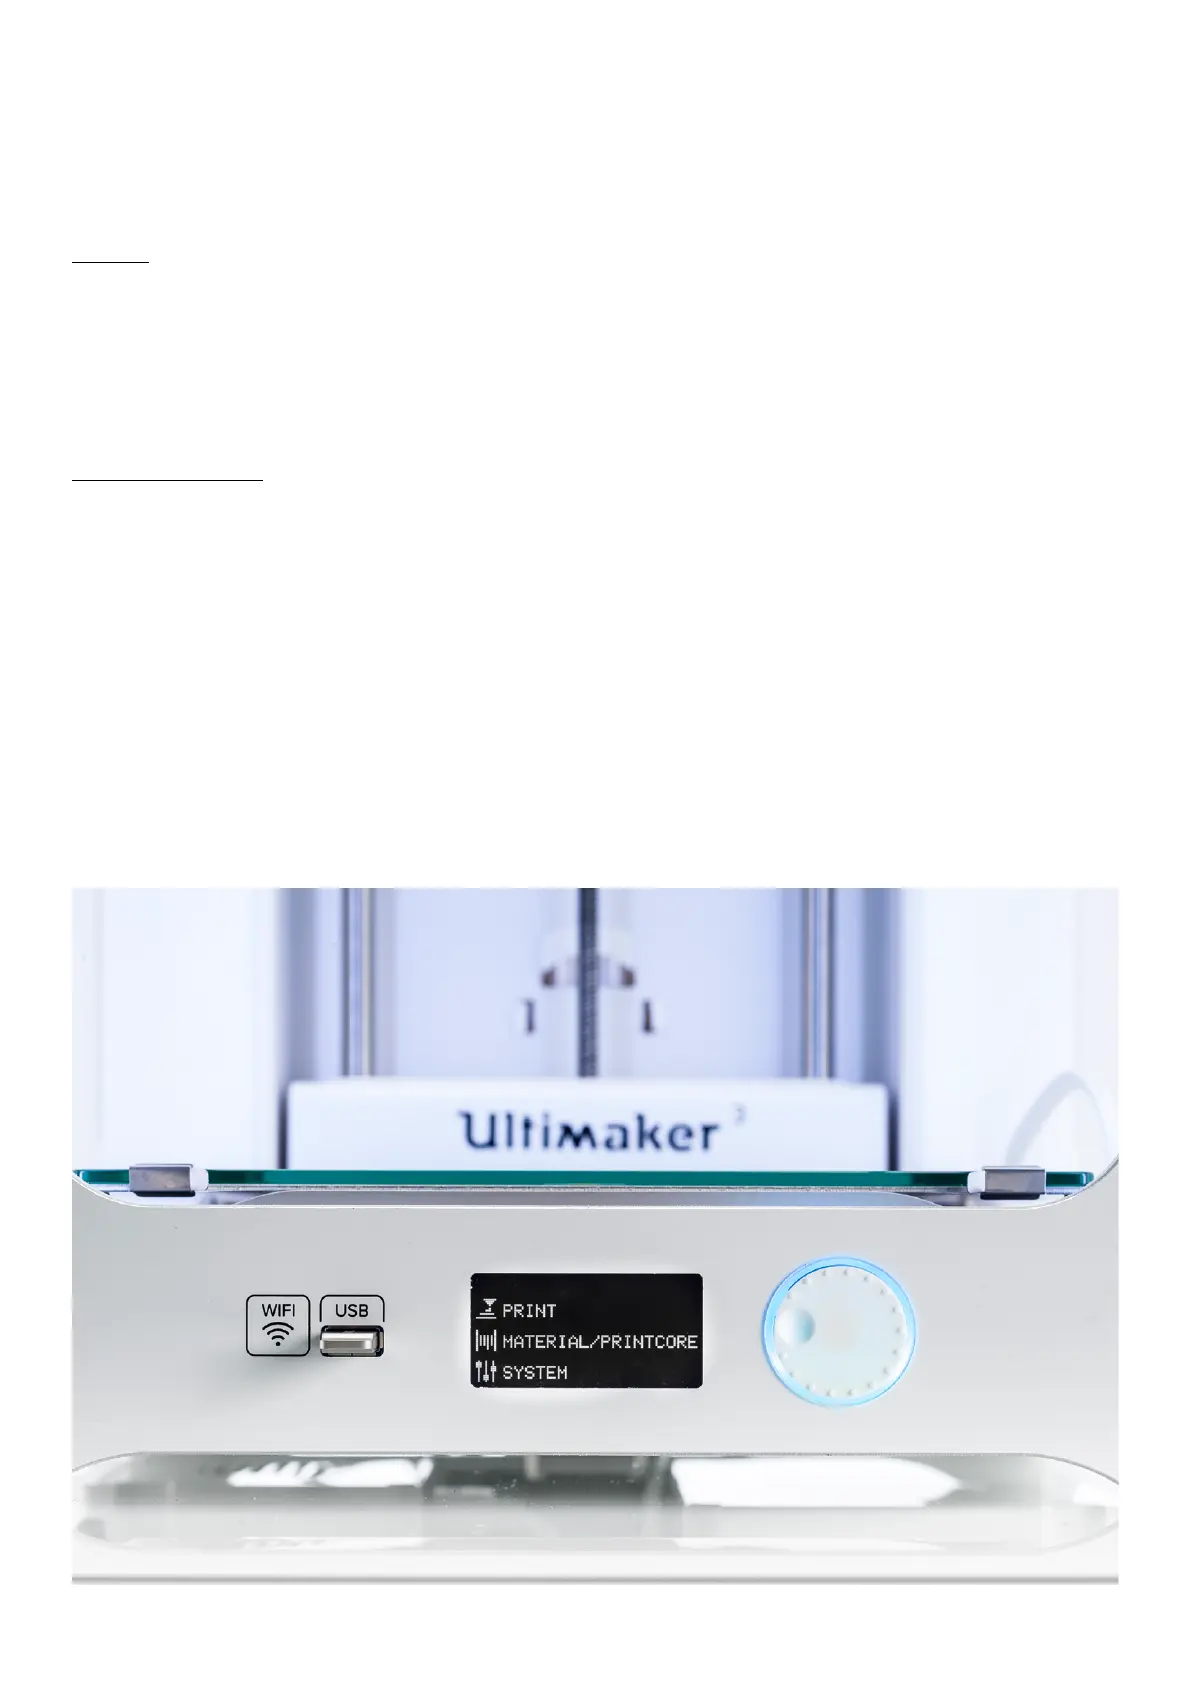
Control and display
Control
After switching the Ultimaker 3 on with the power switch at the back, the printer can easily be controlled with the
push/rotate button at the right side of the display. The button allows the following actions:
• Rotate to scroll through a menu or to select an option.
• Push to confirm a selection or action.
When pushing the button you will hear a “beeping” sound to confirm the action. A blinking button means the Ultimaker 3
is waiting for user input.
Display and menus
The display at the front side of the Ultimaker 3 shows all the necessary information for setting up and using your
Ultimaker 3. When turning on the Ultimaker 3 for the first time you will be guided through the welcome setup. When
turning on your Ultimaker 3 after the first use, you will always see the Ultimaker logo first after which the main menu
appears. The main menu offers three options: Print, Material/PrintCore and System.
Print
The Print menu allows you to select a print, when using a USB stick. While printing, the menu also allows you to tune the
print, and change the settings for instance.
Material/PrintCore
With the Material/PrintCore menu you can change, load and unload materials and print cores. Furthermore, you can move
the material and manually set the temperature of each print core.
System
The System menu offers various options to control the network, build plate, print head and frame light, and to perform
maintenance and diagnostics tests. These options in the menu are especially useful when performing maintenance or
troubleshooting your printer.