36
Calibrations
Build plate leveling
While using your Ultimaker it is necessary to periodically calibrate the build plate for good adhesion of the print to the
build plate. If the distance between the nozzles and build plate is too big, your print won’t stick properly to the glass plate.
On the other hand, if the nozzles are too close to the build plate, it can prevent the material extruding from the nozzles.
The Ultimaker 3 offers two ways of calibration the build plate: active leveling and manual leveling. Active leveling is the
preferred choice, as there’s no chance for human inaccuracies.
Make sure there is no plastic on the nozzles and the glass plate is clean when you want to calibrate the build plate,
as this can lead to inaccurate leveling.
Active leveling
During active leveling, the Ultimaker 3 will measure the distance between the tip of the nozzle and the build plate in
several locations. These positions are stored in the printer, so it can compensate for inaccuracies of the build plate level
during the first layers of the print. It will do this by slightly moving the build plate up or down while printing.
To start active leveling:
1. Go to System g Build plate g Active leveling.
2. Wait for the printer to finish the leveling procedure. This will take a couple of minutes.
Do not touch the Ultimaker 3 during the active leveling procedure. This could affect the measurements.
Manual leveling
If the level of the build plate is off too much (and active leveling cannot compensate for this), manual leveling can be done.
1. Go to System g Build plate g Manual leveling.
2. Wait for the Ultimaker 3 to do its homing procedure and continue when the print head is in the center at the back of
the build plate.
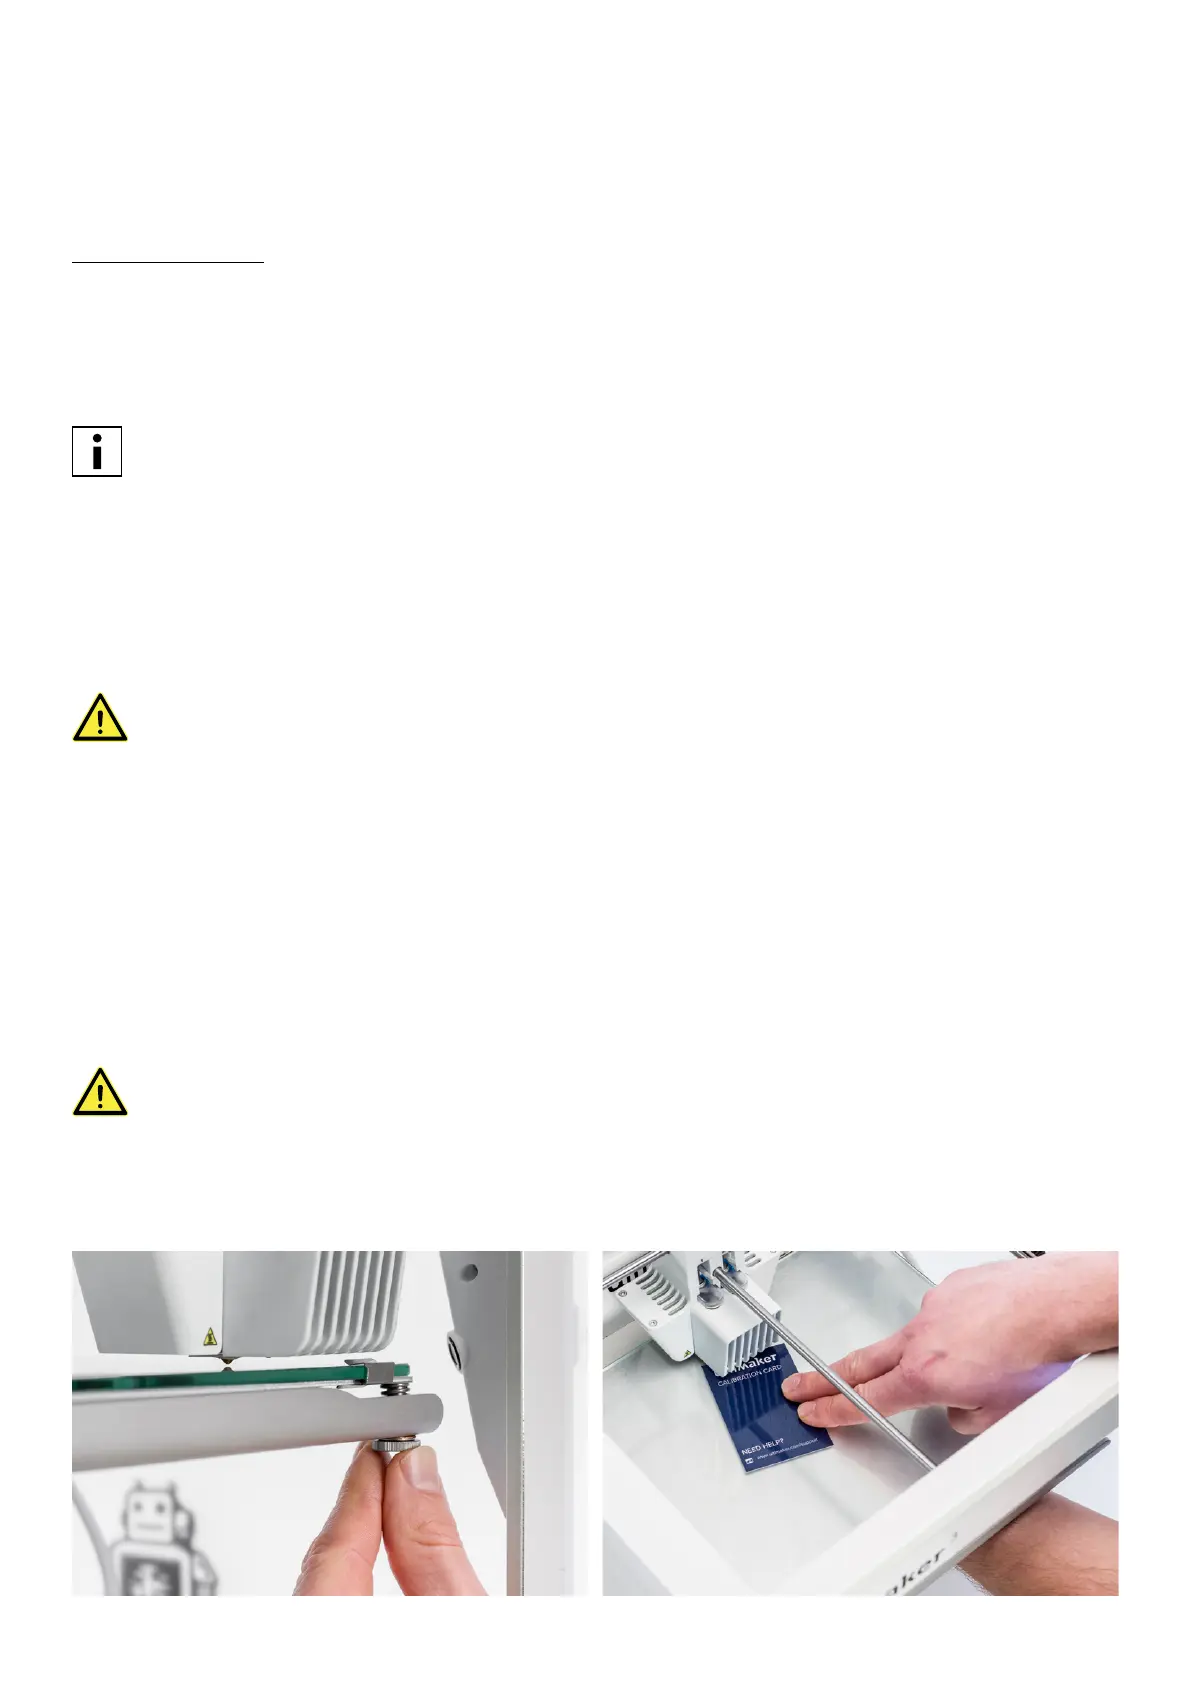
3. Rotate the button at the front until there is approximately 1 mm distance between the first nozzle and the build plate.
Make sure that the nozzle is close to the build plate without touching it.
4. Adjust the front right and front left build plate screw to roughly level the build plate at the front side. Again there
should be a distance of approximately 1 mm between the nozzle and build plate.
5. Place the calibration card in between the nozzle and build plate when the print head is in the center back of the build
plate.
Do not push on the build plate while fine-tuning with the calibration card. This will lead to inaccuracies.
6. Adjust the build plate screw in the middle back until you feel slight friction when moving the card.
7. Press “Continue”. The print head moves to the second point.
8. Repeat step 5 “place the calibration card” and step 6 “adjust the build plate”.
9. Press “Continue” again. The print head moves to the third point.
10. Repeat step 5 “place the calibration card” and step 6 “adjust the build plate”.