EasyManuals Logo

Ultimaker S3 Quick Start Guide

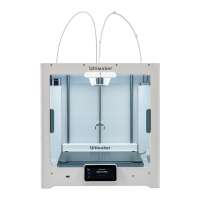
Ultimaker S3
88 pages
To Next Page IconTo Next Page
To Previous Page IconTo Previous Page
Page #4 background imageLoading...
Page #4 background image
1. Insert the spool holder
into the back panel
and push until it snaps
into place
Install the Ultimaker S3
When placing the printer on a shelf or table, take proper measures to prevent the
printer from falling.
2. Connect the spool
holder cable to the
NFC socket and secure
behind the cable clips
3. Open the glass door
and the front build plate
clamps to insert the
glass plate
4. Slide the glass plate
into the rear build plate
clamps, then close
the front clamps and
glass door
5. Connect the power
cable to the printer
and the other end to a
power outlet
A power outlet with
an earth connection
must be used. Be
sure that the building
installation has
dedicated means
for over-current and
short-circuiting.

Other manuals for Ultimaker S3

Questions and Answers:

Question and Answer IconNeed help?

Do you have a question about the Ultimaker S3 and is the answer not in the manual?

Ultimaker S3 Specifications

General IconGeneral
Build Volume230 x 190 x 200 mm
Print TechnologyFused Filament Fabrication (FFF)
Filament Diameter2.85 mm
Number of Print Heads2
Print SpeedUp to 24 mm³/s
Heated BedYes
Dual ExtrusionYes
Operating Temperature15 - 32 °C
Nozzle Diameter0.4 mm
ConnectivityWi-Fi, USB, Ethernet
Supported MaterialsPLA, ABS, Nylon, CPE, PC, TPU, PP, PVA, Breakaway
TouchscreenYes
Feeder TypeDual-geared feeder
Build PlateGlass
Bed LevelingAutomatic
Power Requirements100-240 V, 50-60 Hz
Layer Resolution20 - 200 microns (0.0007 - 0.008 inches)

Related product manuals