6
Setting the kind of sensor to be connected to the device:
Push the Enter button: on the lower display (green) Opr appears. Using the up and down arrows find ConF. Push Enter to confirm. Now on the green
display the group InP appears. Push Enter and InP1 is displaied. Enter to confirm.You are inside InP1; the green display shows Sen1 (sensor type),
while the red display shows the chosen sensor code Push Enter to enter the Sen1 parameter, then choose the desired sensor using the arrows. Push
Enter to confirm and ESC to escape.
Once selected the sensor, you can modify all the other parameters using up and down arrows according to the tables here below :
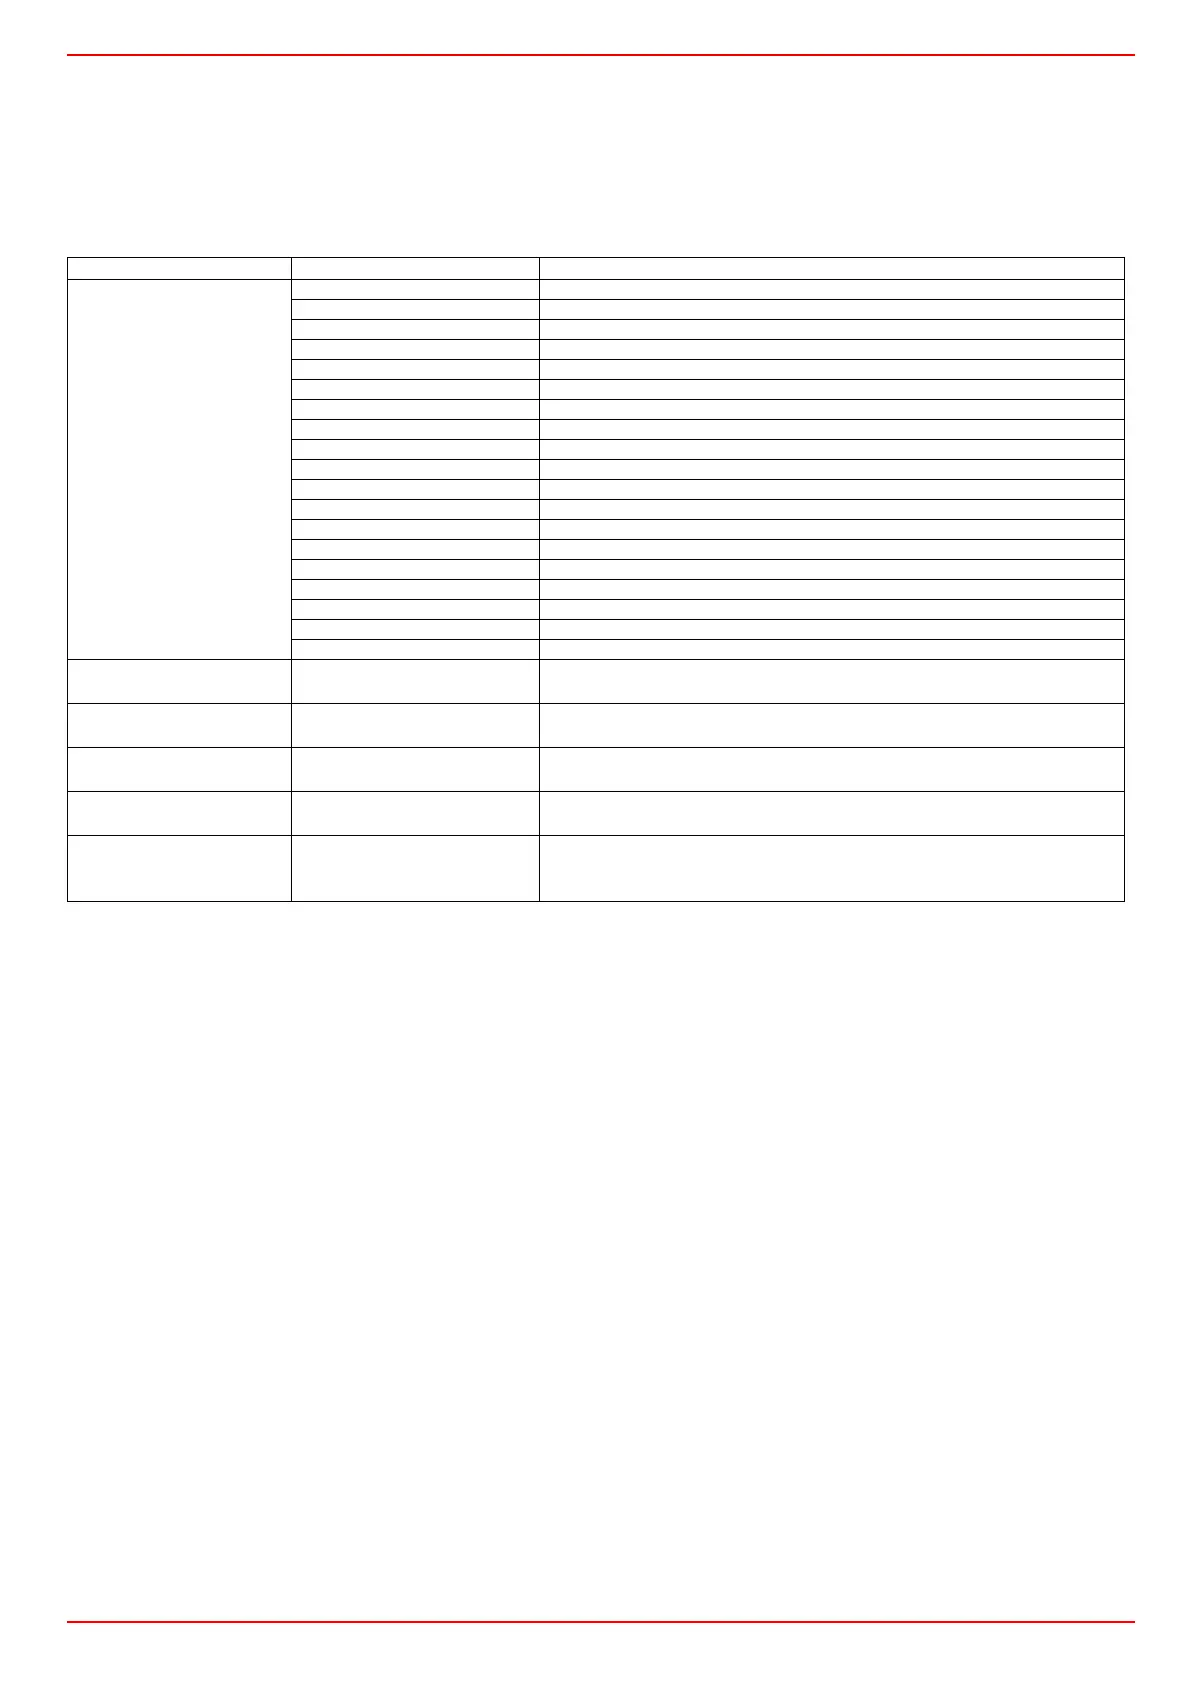
ConF > InP >InP1
(bold = factory settings)
Parameter Value Description
SEn1
type of sensor for analog
input 1
1 Pt100 3 wire
2 Pt100 2 wire
3 Pt1000 3 wire
4 Pt1000 2 wire
5 Ni1000 3 wire
6 Ni1000 2 wire
7 0 ÷ 135 ohm
8 Cu-CuNi T
9Fe-CuNi J
10 NiCr-Ni K
11 NiCrSi-NiSi N
12 Pt10Rh-Pt S
13 Pt13Rh-Pt R
14 Pt30Rh-Pt6Rh B
15 0 ÷ 20mA
16 4 ÷ 20mA
17 0 ÷ 10V
18 0 ÷ 5V
19 1 ÷ 5V
OFF1
Sensor offset
-1999..0.. +9999
Correction value measured by the sensor
SCL1
scale low level
-1999..0.. +9999
minimum scale value(for input ohm, mA, V)
SCH1
scale high level
-1999..100.. +9999
maximum scale value(for input ohm, mA, V)
dF1
digital filter
0…0,6…100
Is used to adapt the digital 2nd order input filter (time in s; 0 s = filter off)
Unit
temperature unit
1
2
1 =
degrees Celsius
2 =
degrees Fahrenheit