also
the
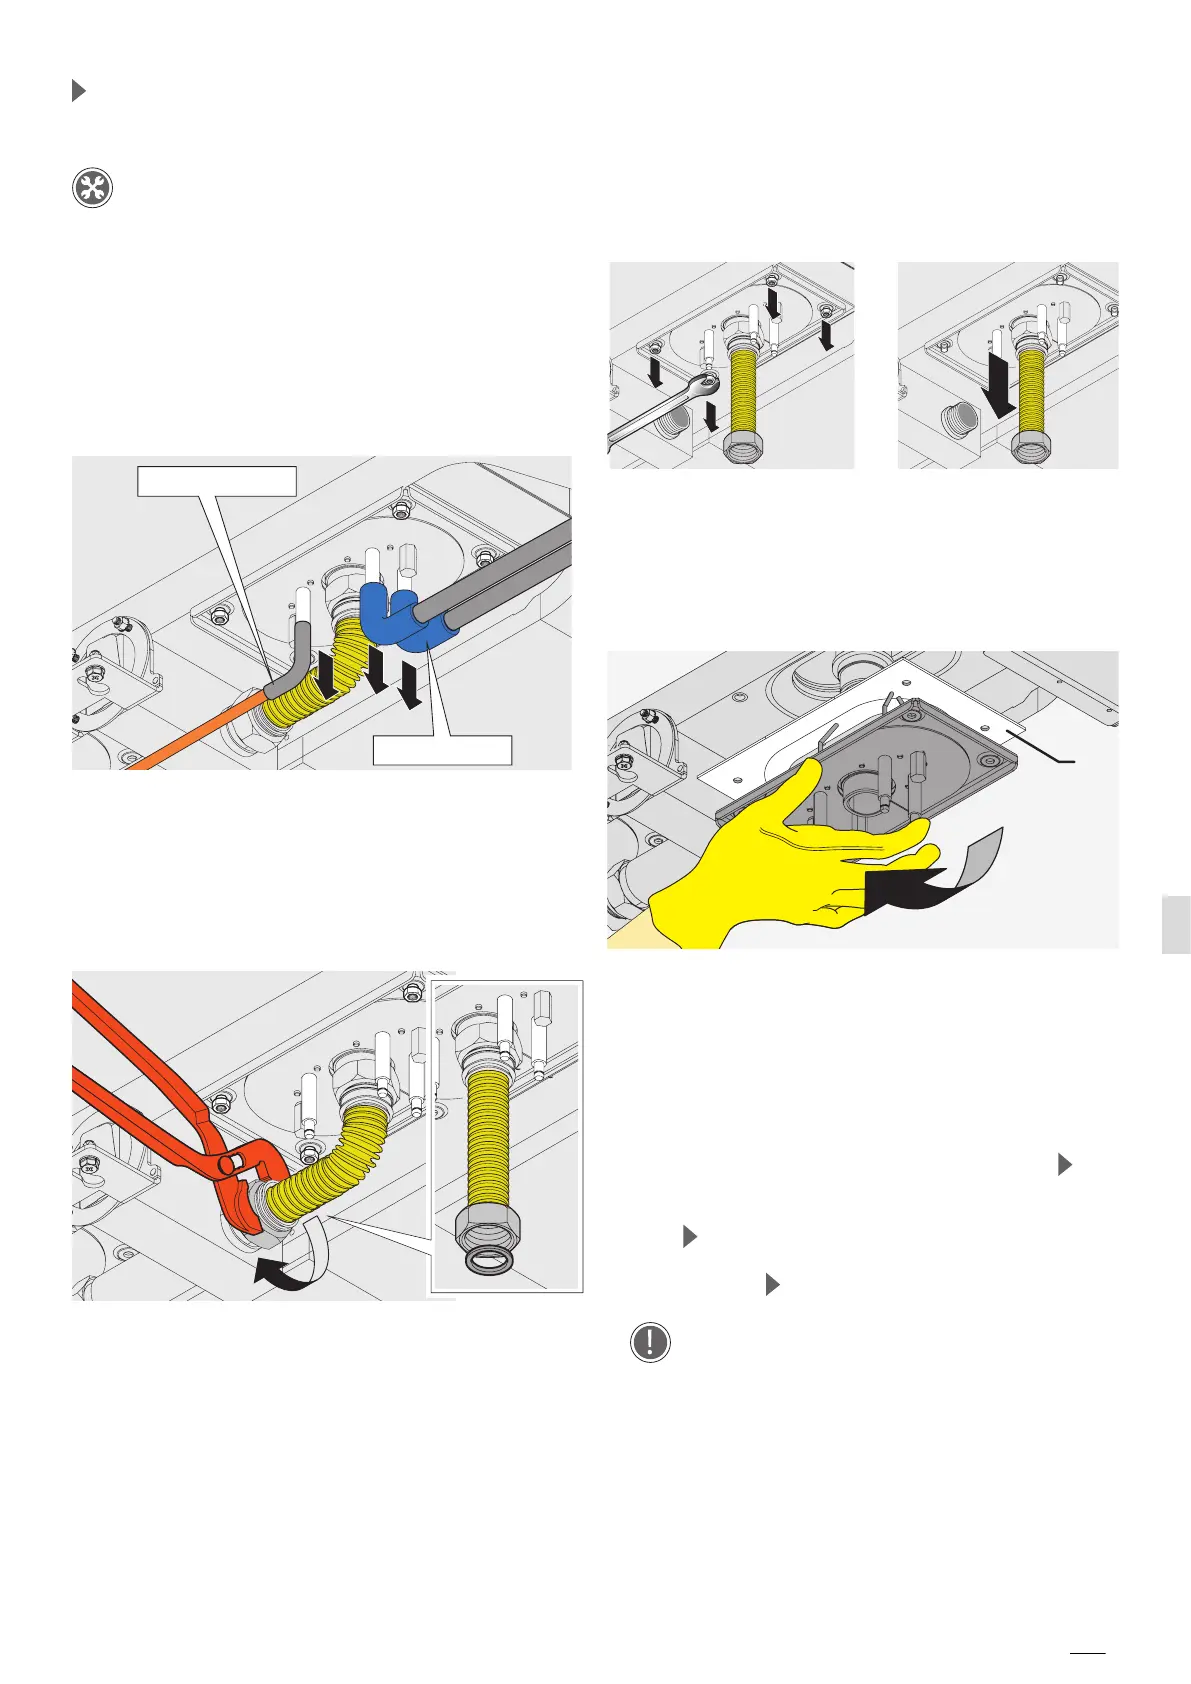
■ c) Remove the four screws of the torch plate
and the 2 or 3 rods nuts that hold each heat
exchanger as shown in Figure 7.
Figure 7
■ d) Remove the torch by sliding sideways as shown
in the Figure 8. In case of countertop ovens, lift the
oven (about 2 cm) and slide the torch sideways.
■ Attention: the gasket between the two plates
must be replaced before fitting the torch.
Figure 8
How to remove the torch
■ e) Once you have removed the torch, replace the
three electrodes per torch ensuring they are fitted
with the proper gap as outlined below (please see
Figure 9 to check the proper electrode distances):
■ Distance between the two ignition electrodes
3
mm
■ Distance between the ignition electrodes and the
torch
7 mm
■ Distance between the flame detection electrode
and the torch)
units).
■
To align the distance between the electrodes,
use one clamp to hold the ceramic part and
one clamp to adjust the metal element.
Necessary tools:
■ 13 mm wrench
■ 7 mm spanner (better if flexible)
■ Phillips screwdriver (PH2x25)
■ Parrot nose pliers
■ 36 mm open end wrench
■ a) Disconnect the cable harness of the ignition
and flame detection electrodes (by pulling the
connection down) as shown in Figure 5.
Flame detection
Cable harness
■ b) Disconnect the feeding air/gas pipe from the
blower pad as shown in Figure 6 by using parrot
nose pliers.
Figure 6
How to remove the feeding air/gas pipe
Figure 5
How to disconnect the cable harness of ignition
and flame detection electrodes
If you note metal dust at the base of the torch,
please remove it and clean the ceramic part of the
electrode carefully. The baffles of the heat
exchanger are made of AISI 310S stainless steel.
7 mm (4 mm for floor standing
 Loading...