24
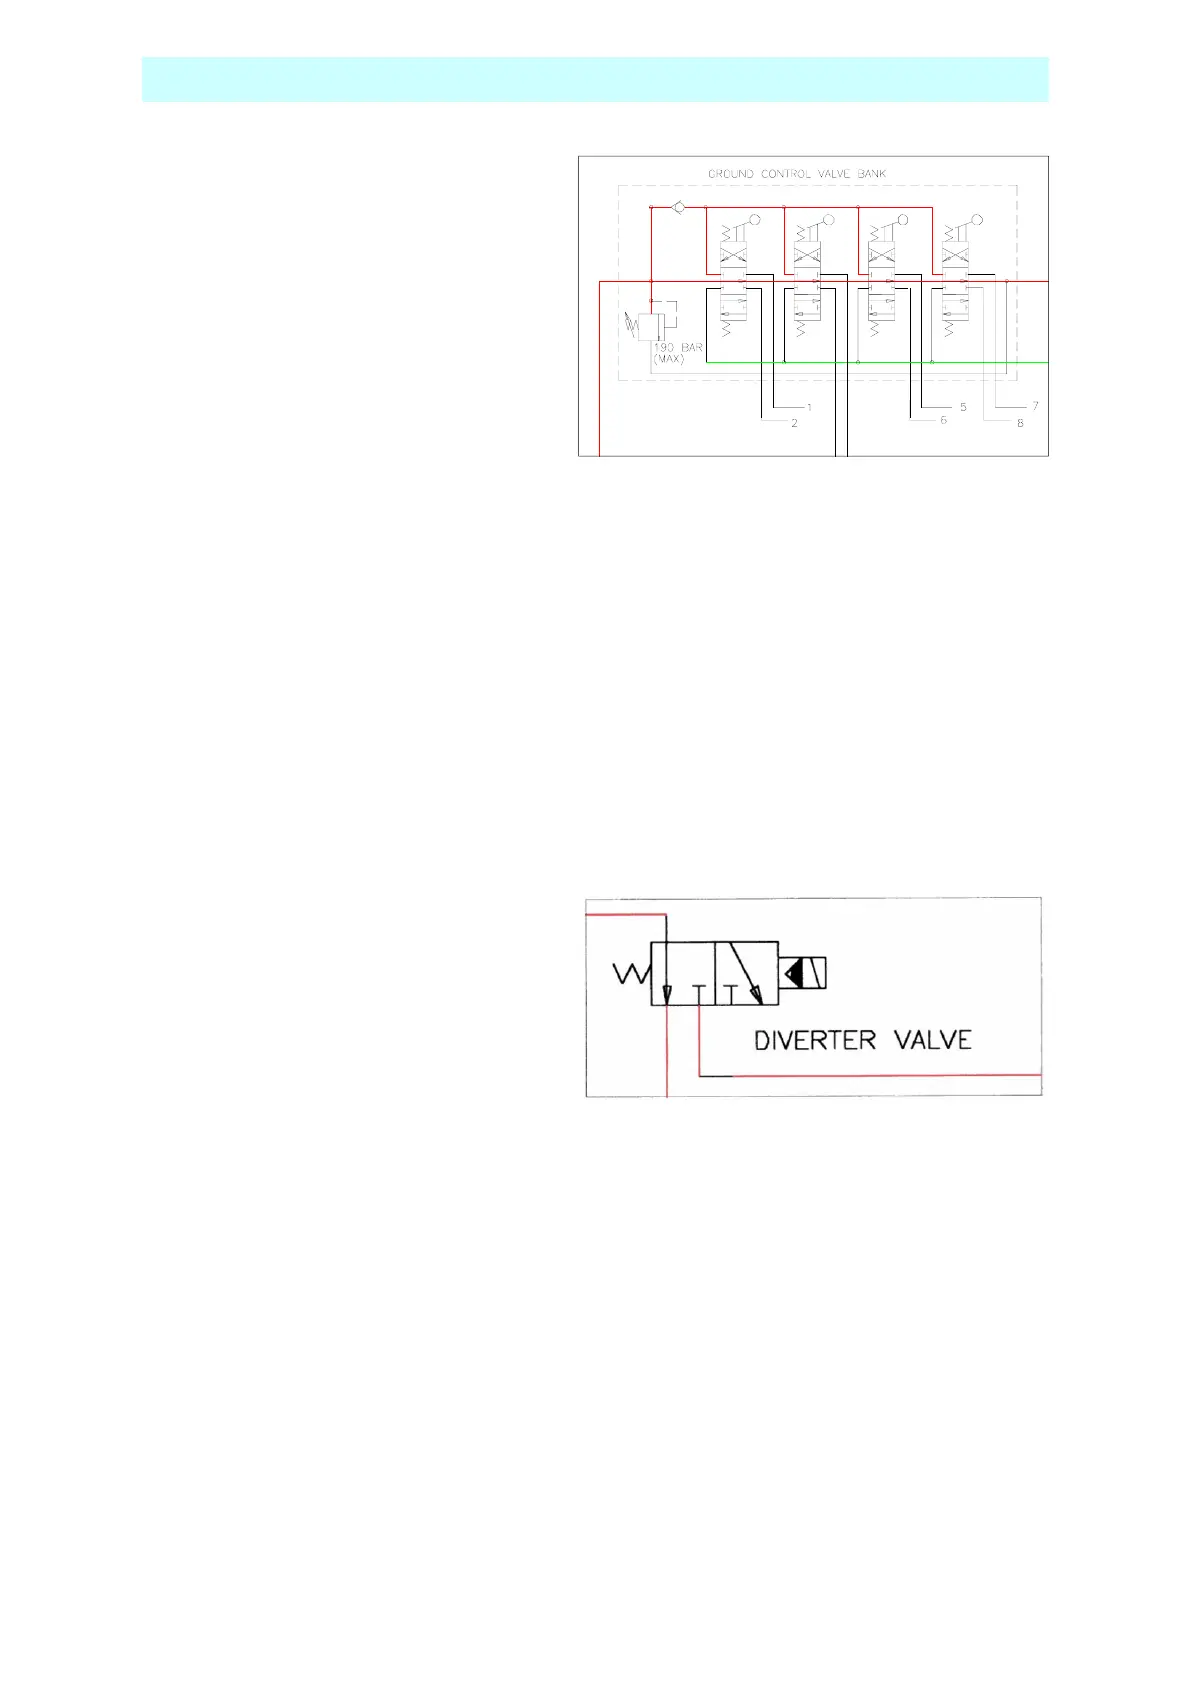
CONTROL VALVE - GROUND
Is identical to the cage control valve apart
from the following:
• Only 4 sections. You are not able to
operate the slewing basket from the
ground. The slewing basket is the last
spool shown on the cage valve drawing
with the two restrictors.
• A high pressure carry over plug has
been fitted to the ground control valve
to allow oil under full system pressure
to pass through it. Without the internal
plug you will not be able to operate the
basket valve as all oil would go directly
back to tank.
If you have to replace the ground control
valve make sure the carry over plug is
fitted. The plug is inside the valve, under
the fitting for the return line. Shine a light
down the port and you will see the Allen
head grub screw. If it is not there, use the
grub screw fitted to the valve you are
replacing.
If you ever experience an oil leak from the
valve block it is most likely to be from the end
cap.
Either the end where the lever is or at the
opposite end where the return spring is. Never
fully withdraw the spool just push it out
opposite to where the leak is coming from
sufficient to clear the “O” ring which you now
can pry out with a small screw driver. Put
plenty of grease and keep well lubricated when
pushing the spool back in.
If the spool is not centring check that the return
spring and the end cap is well secured.
DIVERTER VALVE
When not activated (no power on the coil)
The oil will flow as indicated by the
symbols left hand side.
When activated the oil will flow as shown
on the right hand side.
When you look at the complete circuit you
will see that with no power on the coil., oil
will flow to the outrigger control valve.
Activate the valve and oil flows to the
ground control valve. If you do not get full
flow, or you get a high pressure drop over
the valve, you may have a sticking valve .
Remove the cartridge form the aluminium
body and clean. Also look for
contamination in the valve or the valve
cavity.
To check that power is reaching the coil you
can hold a screwdriver against the end of the
coil. When the coil is activated you will feel a
strong magnetic force pulling the screwdriver
towards the nut securing the coil to the
cartridge.
Do not use great force when securing the coil
to the cartridge as the casing can easily crack
due to thermal expansion when it is heated up
during use.
The coil will fail if water gets in through the
crack.
MAINTENANCE PROCEDURE