Page 3X Series
Figure 2:
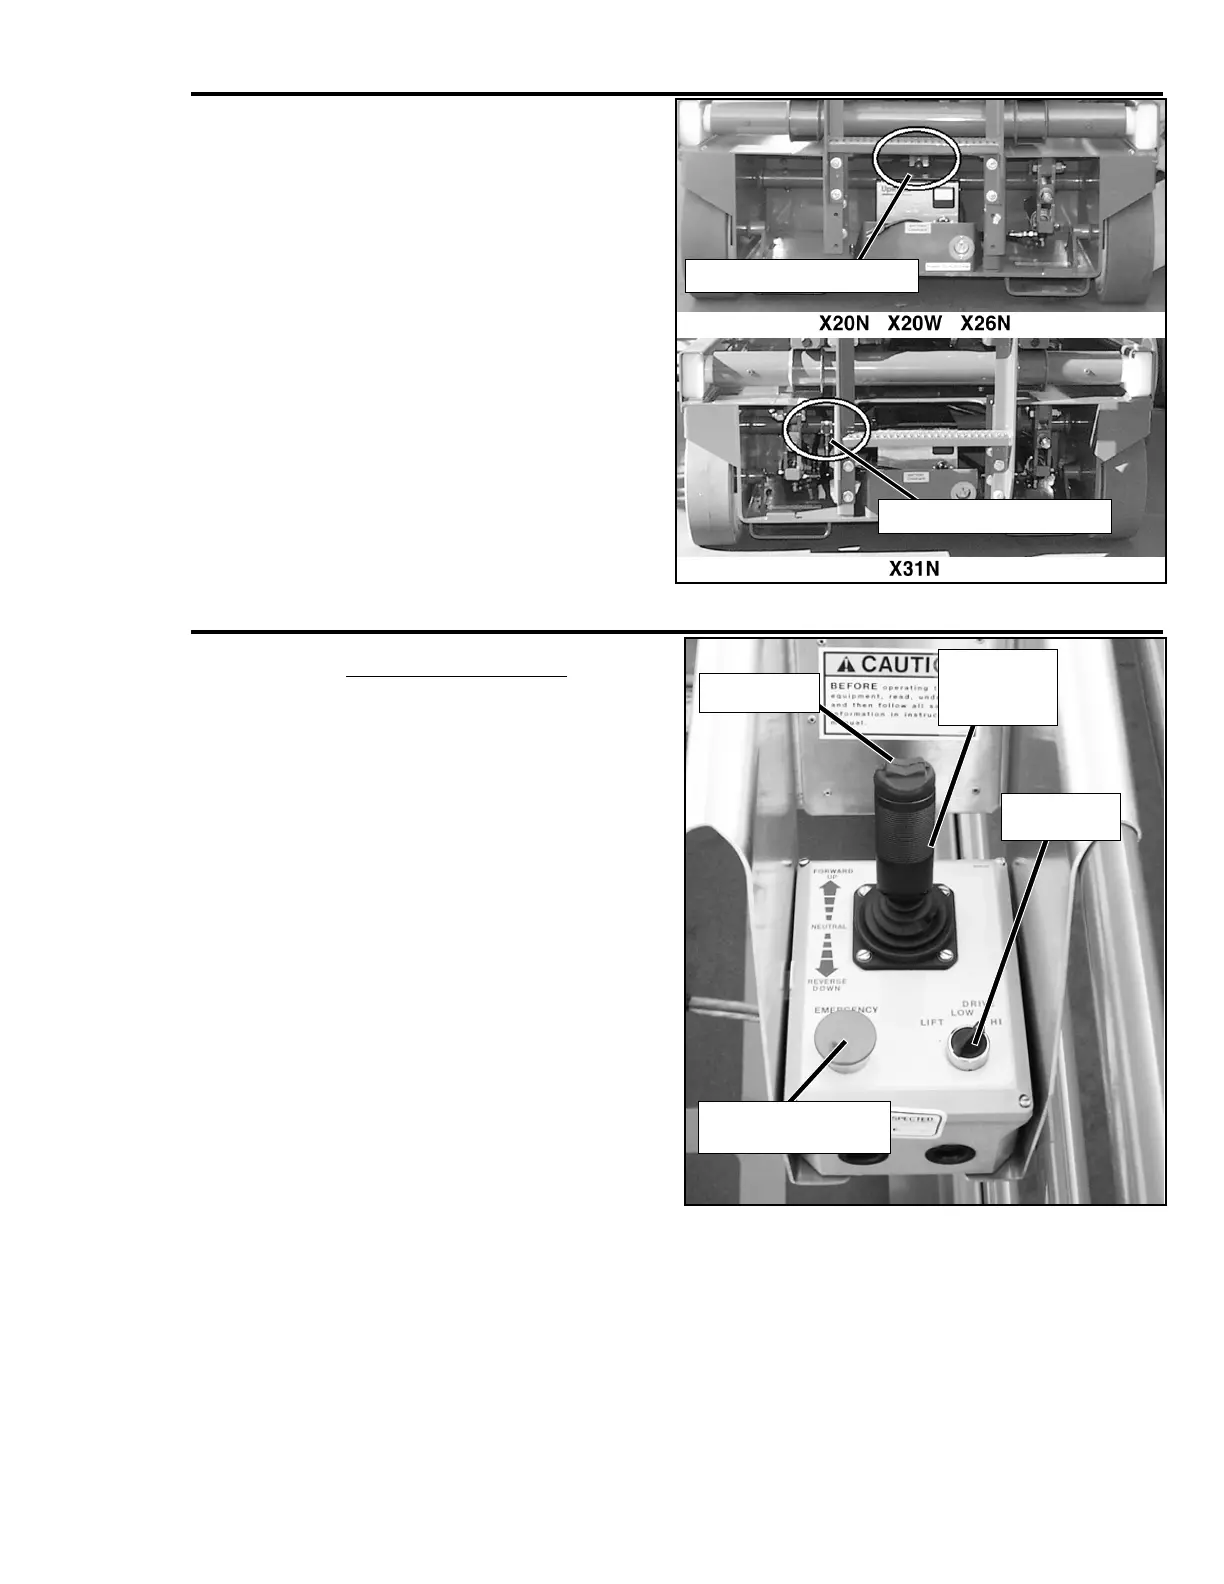
Emergency Lowering
19. Pull out on the Emergency Lowering
Knob to check for proper operation.
Once the platform has lowered,
release the knob.
20. Push the Chassis EMERGENCY
STOP Switch to check for proper
operation. All the machine functions
should be disabled. Pull out the
EMERGENCY STOP Switch to
resume.
21. Turn the Chassis Key Switch to
DECK.
22. Check that the route is clear of
obstacles (persons, obstructions,
holes, drop-offs, bumps, and
debris), is level, and capable of sup-
porting the wheel loads.
23. Mount the platform and properly
close the entrance.
Figure 3:
Platform Controls
24. PLATFORM CONTROLS
, Turn Lift/
Drive Switch to DRIVE.
NOTE: Use both HI and LOW drive (if
applicable) when performing
the following step.
25. Engage the Interlock Switch and
move the Control Handle FOR-
WARD, then REVERSE, to check for
speed control.
26. Push the Steering Switch RIGHT,
then LEFT, to check for steering con-
trol.
27. Turn the Lift/Drive Switch to LIFT.
28. Engage the Interlock Switch and
move the Control Handle forward to
check platform lift controls. Raise the
platform to full elevation.
29. Pull back on the Control Handle. The
platform should descend and the
audible lowering alarm should sound.
30. Lower the platform completely.
31. Push the Platform EMERGENCY
STOP Switch to check for proper
operation. All the machine functions
should be disabled. Pull out the Plat-
form EMERGENCY STOP Switch to resume.
Emergency Lowering Knob
Emergency Lowering Knob
Control
Handle with
Interlock
Switch
LIFT/ DRIVE
Switch
Platform EMERGENCY
STOP Switch
Steering
Switch

 Loading...