9
Assembling the stand
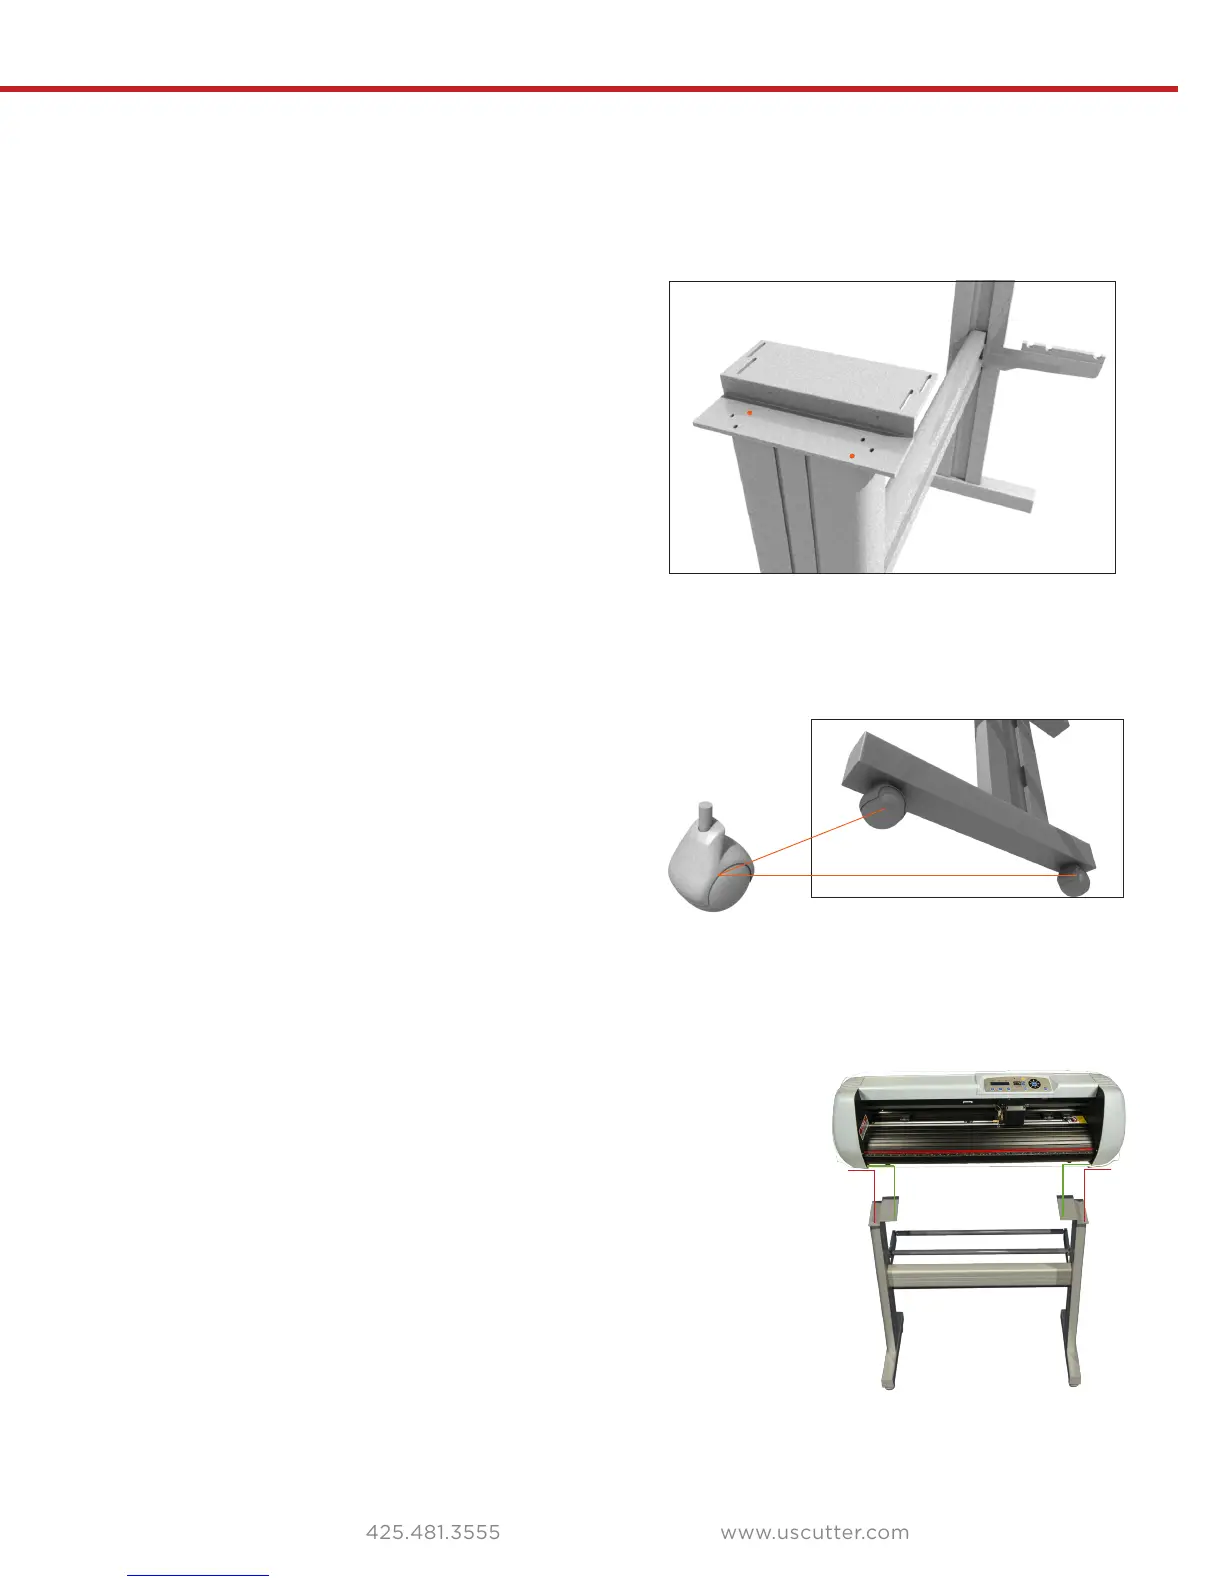
Step 4.
Attach the mounting brackets (G) to the top of the legs (F). This is where you
will mount your SC2 Cutter. Almost done!!
mounting brackets to the legs. The brackets have
a staircase-like shape. you will screw the lower
“stair” to the standleg and will attach your SC
Cutter to the upper “stair” in a later step.
Since you’re only using two screws, position them so that if you drew a line be-
tween them it could make a diagonal line.
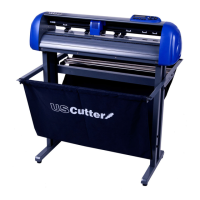
Step 5.
Attach the wheels (C). You won’t need any
screws for this because the wheels have screws
already attached. Simply screw them into the
bottom of the stand feet(A)., two wheels for
each foot.
C
A
C
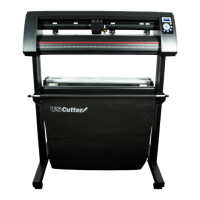
Step 6.
Mount the SC2 Cutter (B) to the mounting brackets (G) on the
stand. Lift the SC2 Cutter onto the brackets so that the plastic
(2 on each side) to secure the cutter to the brackets. The upper
“stair” will appear to have many more slots than you will need
but just use the holes that line up with the slots.
Remember to take the four rubber feet o from the bottom of the SC2
Cutter. Some users place the rubber feet between the screwhead and
the bracket so that the rubber feet remain with the bracket when it is
connected to the stand.
G
B
F
G