8
Assembling the stand
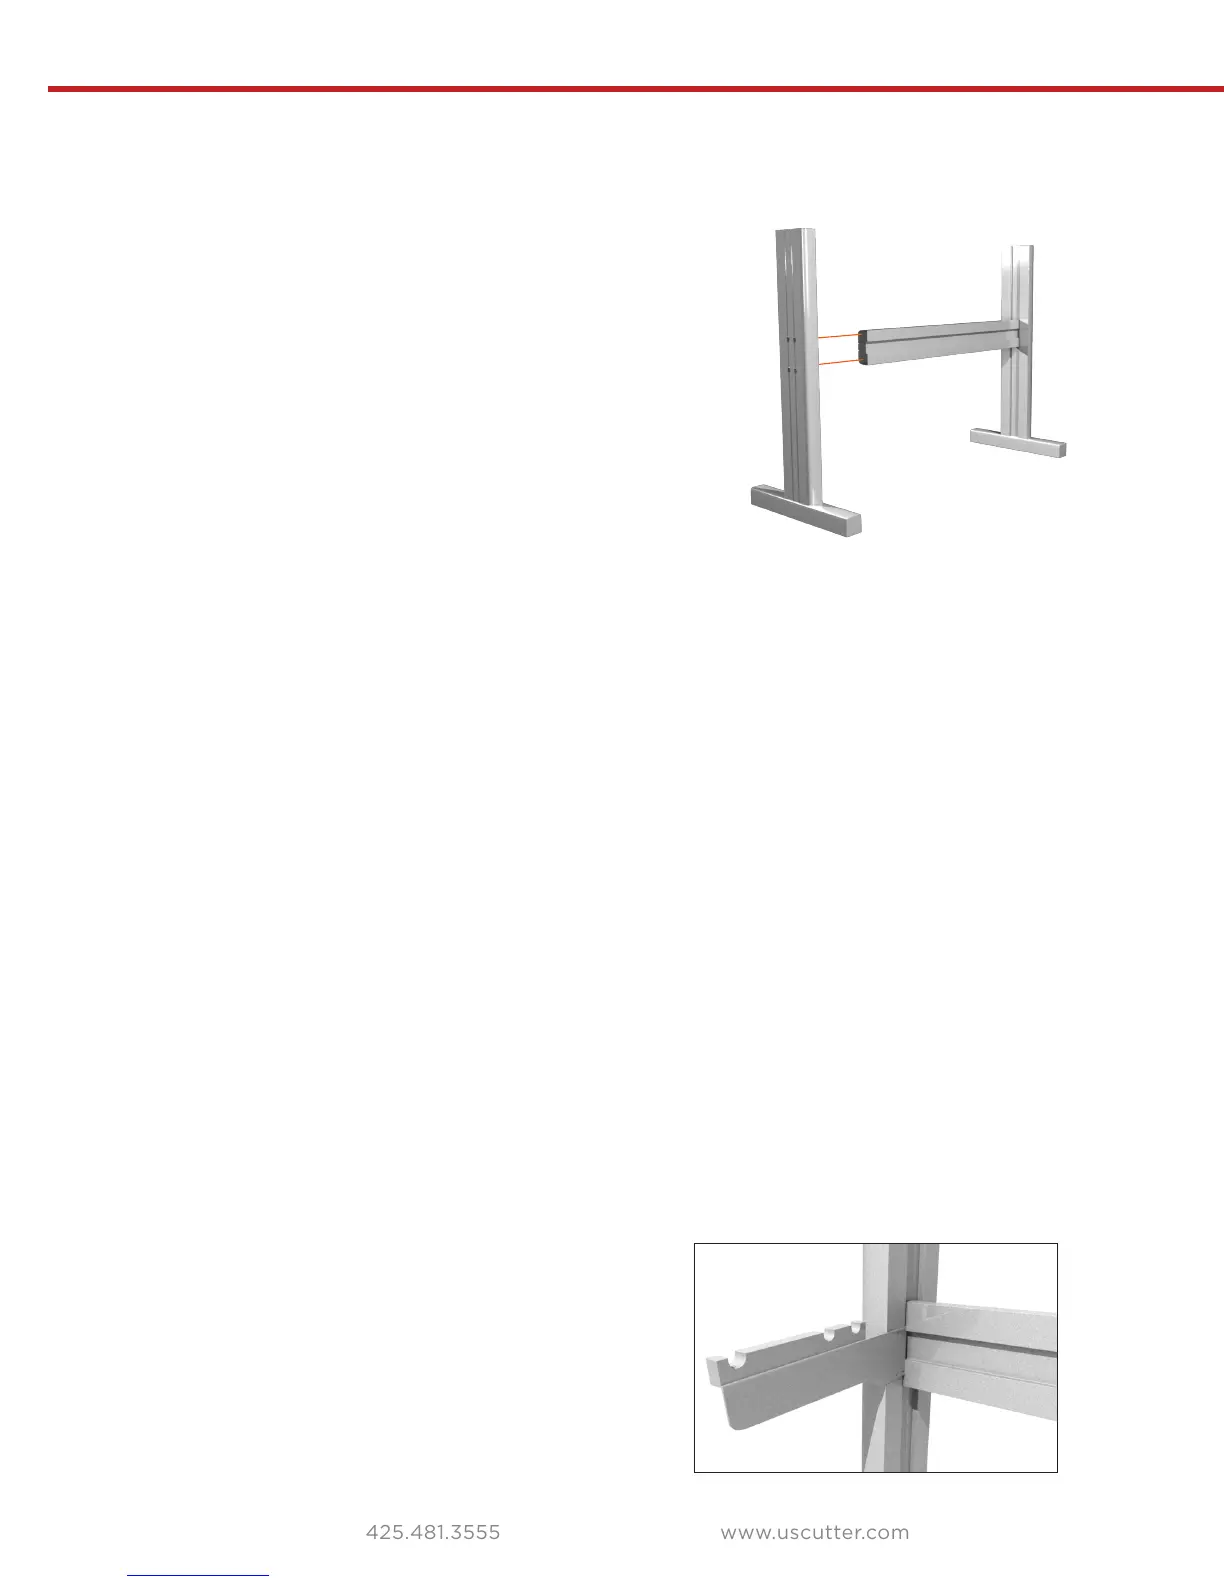
Step 2.
Attach the cross piece (D) to the legs (F
This is where making use of a chair or bench to hold the
come in handy.
That’s where you’ll attach the cross piece.
We’ve got the rounded edge and sharp edge situation again? Which way do I
orient the crossbeam?
It actually doesn’t matter, but the rounded edge looks a little more
aesthetic, so we like to make that the front-facing side.
Here’s the tricky part: You need to insert the #1 screws through both
holes in the stand legs (the outside and the inside), so the screw will be
recessed while you attach it to the cross piece. The leg is hollow and if
your screw falls into the hole, turn the leg upside down so your screw
falls out and you can try again.
Step 3.
Now let’s mount the roller brackets (I) to the legs (F). They’ll attach at the
crosspiece and will create a place for the rollers to sit.
NOTE: If your roller brackets arrived in four pieces instead of two, simply
attach the black plastic roller guides to the metal brackets with those extra six
#3 screws (the smallest ones).
roller brackets to the stand legs. The metal
brackets have a “lip” which the roller guide sits
on. When you attach the bracket, make sure the
lip faces outward like this:
H
F
F
D