EasyManuals Logo

Vacon 10 Quick Guide

Vacon 10
38 pages
To Next Page IconTo Next Page
To Previous Page IconTo Previous Page
Page #5 background imageLoading...
Page #5 background image
installation vacon 3
24-hour support +358 (0)201 212 575 • Email: vacon@vacon.com
2
2. INSTALLATION
2.1 Mechanical installation
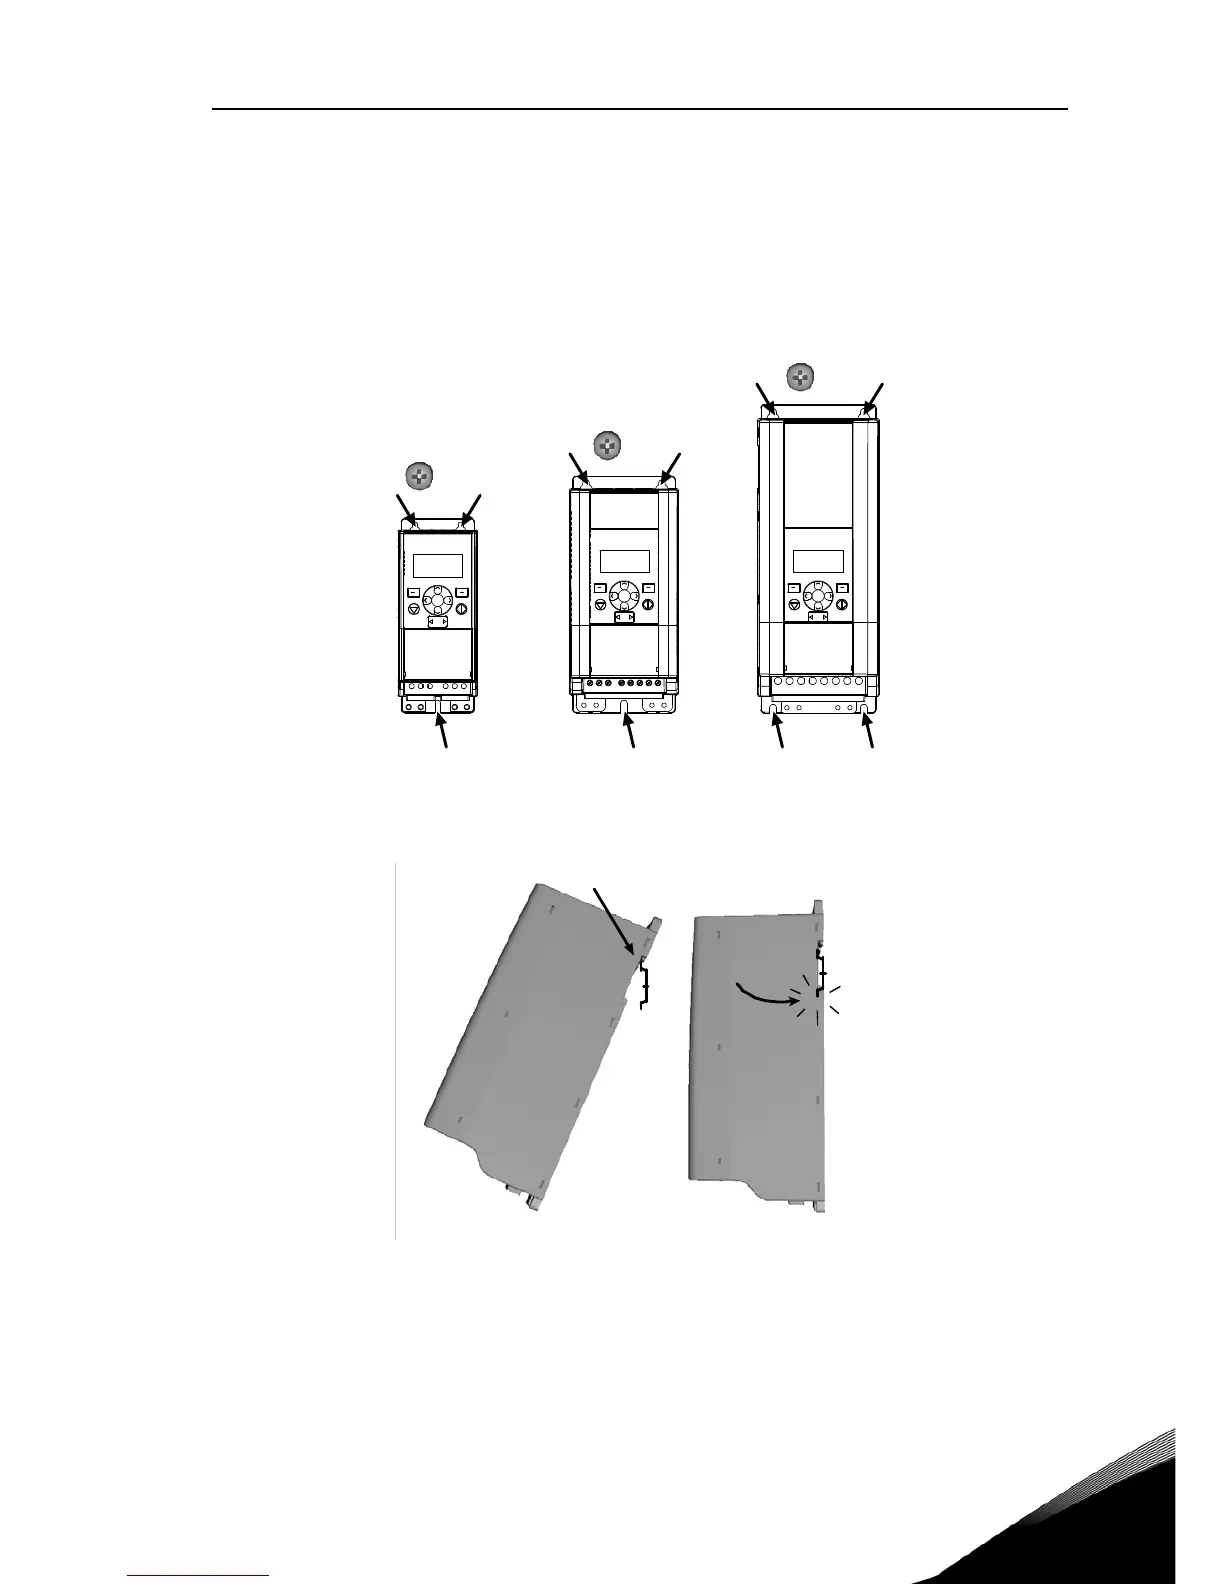
There are two possible ways to mount Vacon 10 in the wall. either screw or DIN-rail
mounting.
Figure 2.1: Screw mounting, MI1 - MI3
Figure 2.2: DIN-rail mounting, MI1 - MI3
Note! See the mounting dimensions on the back of the drive.
Leave free space for cooling above (100 mm), below (50 mm), and on the sides
(20 mm) of Vacon 10! [ side-to-side installation allowed only if the ambient temper-
ature is below 40 °C.]
=
M5
MI3
MI1
=M4
MI2
=M5
LOC
REM
BACK
RESET
OK
LOC
REM
BACK
RESET
OK
LOC
REM
BACK
RESET
OK
12

Other manuals for Vacon 10

Questions and Answers:

Question and Answer IconNeed help?

Do you have a question about the Vacon 10 and is the answer not in the manual?

Vacon 10 Specifications

General IconGeneral
BrandVacon
Model10
CategoryController
LanguageEnglish

Related product manuals