7 Operation
18 Installation and maintenance instructions auroFLOW plus 0020149486_04
9. Tighten the bolts (1).
10. Attach the power cable to the pipe using the clip sup-
plied. Make sure, however, that the power cable is not
positioned flush to the pipe.
11. Plug the power cable (that you pulled out before in-
stalling the second solar pump) into the free bush on
the connection box of the second solar pump.
12. Secure the control cable.
6.6 Wall-mounting the expansion module
Preliminary work
▶ Wall-mount the basic module. (→ Page 11)
1. Wall-mount the expansion module. Route the connec-
tion pipes (1, 2) from the basic module through the
openings in the side panel of the expansion module.
2. Install the connection pipes with flat seals on the ad-
aptors in the storage tank of the expansion module.
7 Operation
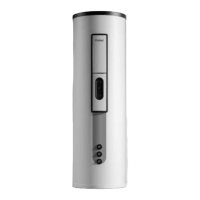
7.1 Operating concept of the solar charger
The solar charger is equipped with a digital information and
analysis system (DIA system). If additional settings are re-
quired, which have not been configured using the installation
assistant (see Start-up (→ Page 18)), additional parameters
can be viewed and modified using the DIA system.
The operating concept and operation of the solar charger
are described in the → operating instructions of the
auroFLOW plus solar system. The read-off and setting
options at the operator level are also described in the
→ operating instructions.
An overview of the menu structure at the installer level is
included in the appendix (→ Page 29).
7.1.1 Calling up the installer level
Caution.
Risk of damage caused by incorrect hand-
ling.
Incorrect settings at installer level may cause
damage to the solar plant.
▶ You must only access the installer level if
you are an approved competent person.
Note
The installer level is password-protected to pre-
vent unauthorised access, as incorrect parameter
settings at this level can cause functional faults
and damage to the solar plant.
1.
Press and simultaneously.
◁ The following menu appears in the display.
2.
Scroll using the or button, until the menu point
Installer level appears.
3.
Press to select the menu point.
◁ In the display, the text Enter code appears along
with the value 00.
4.
Use or to set the value 17 (code).
5.
Press to confirm the code that has been entered.
◁ The installer level appears with a selection of menu
points.
Note
Path details at the start of an instruction
specify how this function can be accessed,
e.g. Menu → Installer level → Test menu →
Check programmes.
Note
If you exit the installer level and then access
it again within 15 minutes, you do not have to
enter the code again.
8 Start-up
To start up the product, you must fill the cylinder charging
circuit and the solar circuit, check the system for leaks, com-
plete the installation assistant and, if necessary, make any
settings to other system components (e.g. on the system
controller).
 Loading...