0020308118_05 Installation and maintenance instructions 57
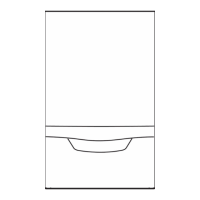
12.8.2 Cleaning the heat exchanger
1. Never undo the four nuts on the stud bolt or tighten
them.
2. Clean the spiral immersion heater (1) of the heat ex-
changer (3) using a plastic brush and, if required, vin-
egar (up to max. 5% acid content).
– Cleaning agent reaction time: 20 min
3. Wipe away the loosened dirt with a damp cloth. Ensure
that the insulating mat (2) on the rear of the heat ex-
changer remains dry.
◁ Moisture may drain out of the heat exchanger via
the condensate siphon.
4. Check the insulating mat on the heat exchanger for
damage.
Result:
Insulating mat damaged
▶
Replace the insulating mat (→ Spare parts instruc-
tions for the heat exchanger insulating mat).
5. Clean the condensate siphon. (→ Section 12.8.5)
12.8.3 Checking the burner and burner insulating
mat for damage
1. Check the surface of the burner (2) for damage, such
as hairline cracks, dents or other deformations.
Result:
Burner damaged
▶ Replace the burner flange. (→ Section 13.7.5)
2. Fit a new burner flange seal (3).
3. Check the insulating mat (1) on the burner flange for
damage.
Result:
Insulating mat damaged
▶ Replace the burner flange. (→ Section 13.7.5)
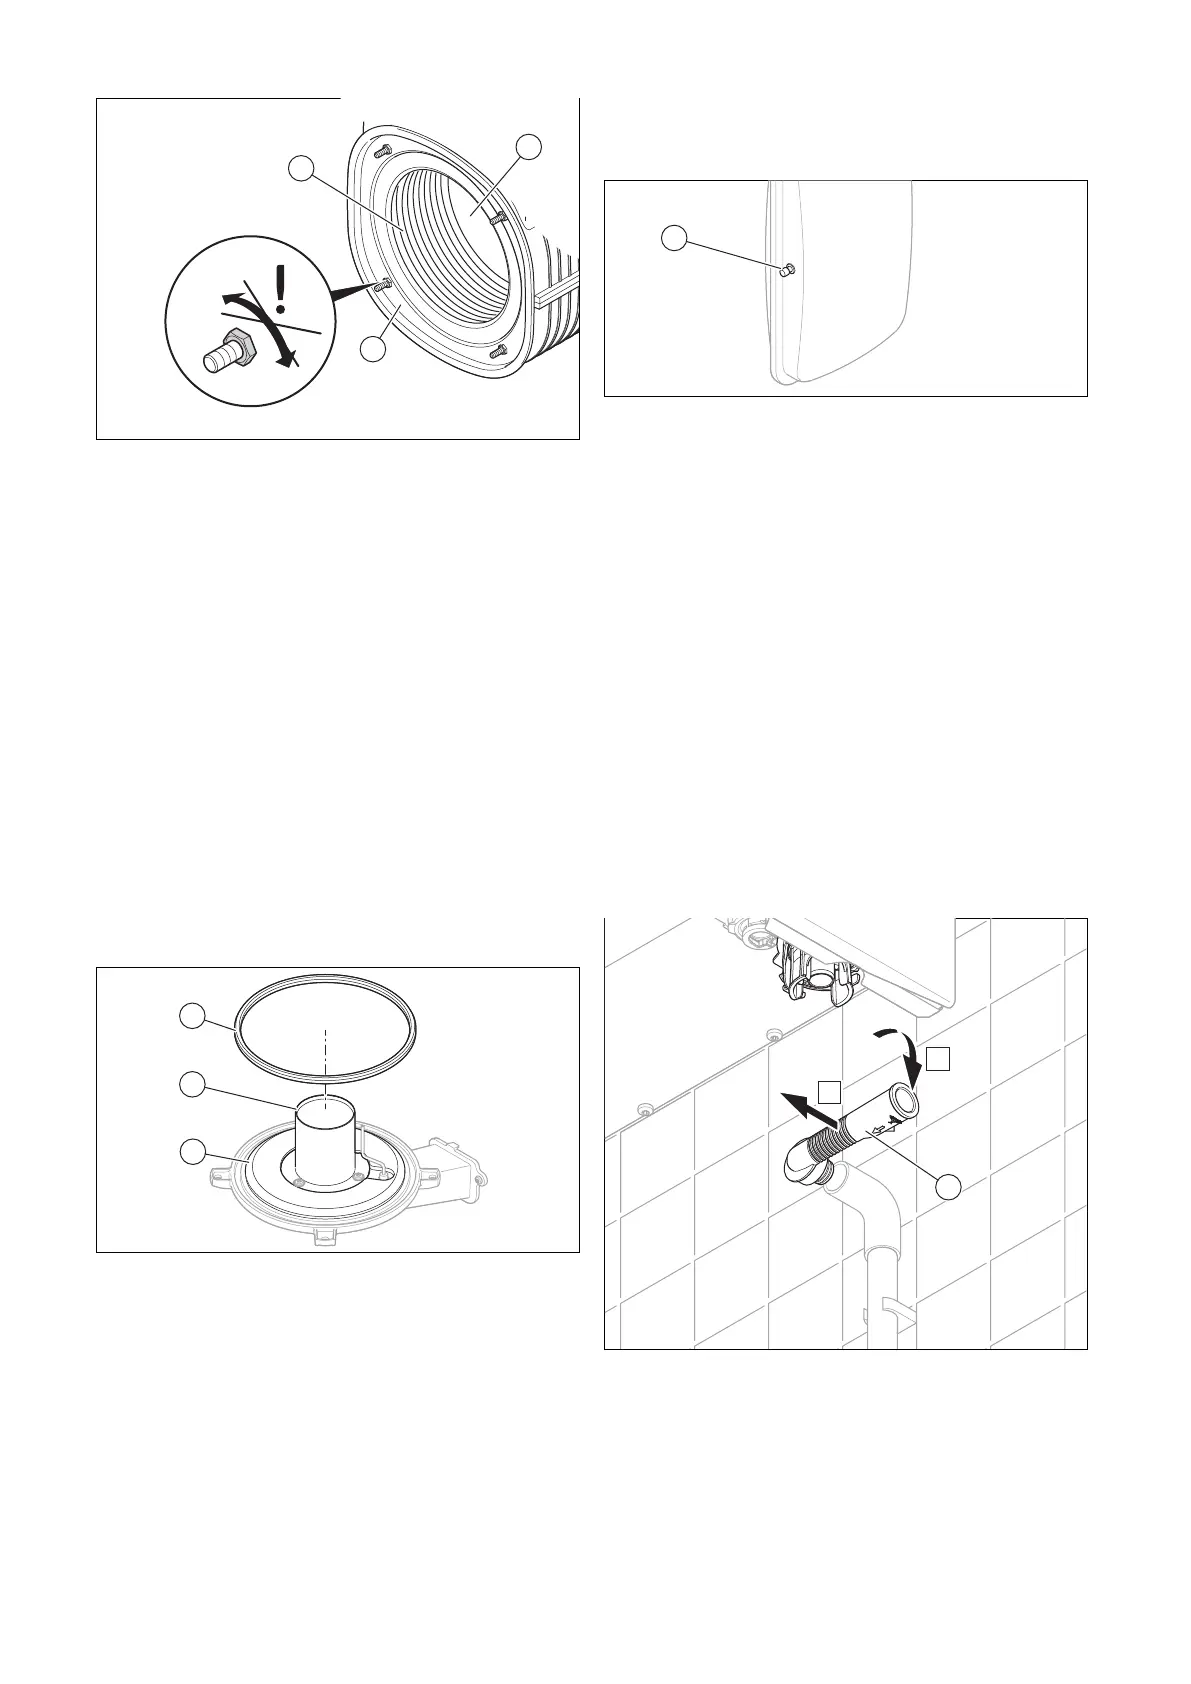
12.8.4 Checking and, if required, supplementing
the pre-charge pressure for the internal
expansion vessel
1. Drain the product. (→ Section 12.9)
2. Check the pre-charge pressure of the expansion vessel
at the expansion vessel valve (1).
– Working materials: U tube manometer
– Working materials: Digital pressure gauge
Result 1:
≥ 0.075 MPa (≥ 0.750 bar)
The pre-charge pressure is in the permissible range.
Result 2:
< 0.075 MPa (< 0.750 bar)
▶ Top up the expansion vessel in accordance with
the static height of the heating installation, ideally
with nitrogen, otherwise with air. Ensure that the
drain valve is open when topping up.
3. If water escapes from the valve of the expansion
vessel, you must replace the expansion vessel.
(→ Section 13.7.9)
4. Fill the heating installation. (→ Section 9.9)
5. Purge the heating installation. (→ Section 9.10)
12.8.5 Cleaning the condensate siphon
1. Remove the condensate adapter (1).

 Loading...