Installation of the vertical roof duct
Installation manual for the flue pipe for ecoTEC plus 0020137851_02 17
6
6 Installation of the vertical roof duct
6.1 Installation instructions
i
You can also use the roof ducts of the external
wall system (stainless steel).
b
Caution.
Risk of damage to the unit.
Very damp air escapes from the channel
vents. This can condense in the air pipe and
cause damage to the unit.
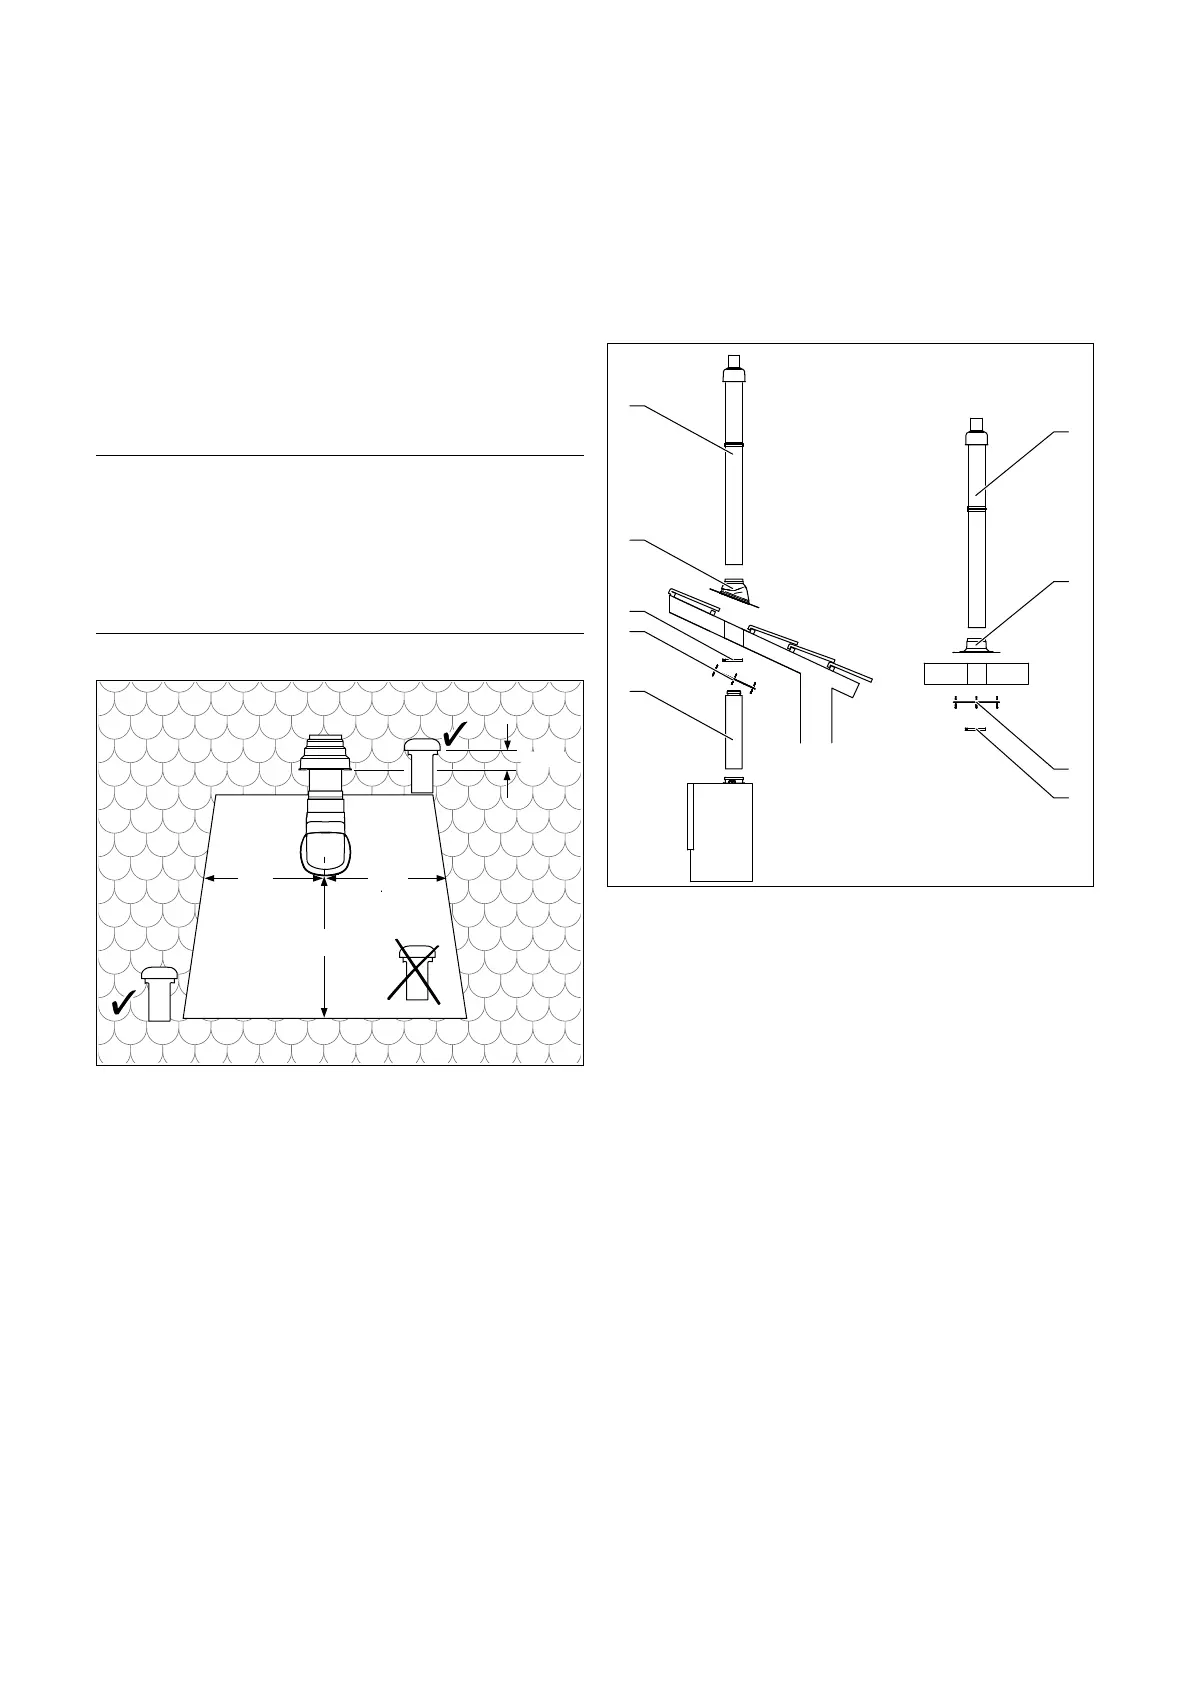
> Observe the requirements for minimum
clearances in (
¬Fig. 6.1).
1 m
1 m
3 m
H 0
6.1 Installation site of the roof duct
6.2 Installing the roof duct
6.2.1 Black roof duct
1
2
3
4
5
6
1
3
4
6.2 Installing the roof duct
i
The installation is described using an example of
a pitched roof. For a flat roof, use the flat roof
penetration collar (6) instead of the flat roof
penetration collar (2).
> Insert the universal tile (2) in the roof.
> Insert the top part of the tile for vertical alignment of
the roof duct.
> Insert the vertical roof duct (1) into the pitched roof tile
(2) or the flat roof penetration collar from above. The
rain penetration collar and the top part of the tile must
form a rainproof seal.
> Align the roof duct vertically and secure the clamp (3) to
a rafter or to the ceiling.
> Fill the gap between the roof duct and the roof or ceiling
construction with insulating material.
> Screw the rosette pipe trim (vapour barrier) (4) to the
ceiling. For a better seal, silicone may be used between
the flange and the ceiling.







 To Next Page