6. FIREPLACE CHECK
6.1 Soundness for appliance attachment.
A primary method of retaining the appliance is provided. This involves using
concealed tension cables fixed to the rear of the fireplace opening together with
secondary fixing to the fireplace floor. This method is detailed in section 10 of this
manual. This method is particularly useful for instances where drilling holes in the
front surface of the fireplace surround is unacceptable to the customer or otherwise
impractical. N.B. It is unwise to attempt to drill into marble without the proper tools
and equipment.
Make sure that the areas at the back and towards the centre of the fireplace floor are
sound enough to take the eyebolts and screws. If these areas have deteriorated due
to prolonged use, they should be made sound with suitable cement.
6.2 Fireplace flue pull.
Close all doors and windows in the room in which the appliance is to be installed.
After confirming with a match that smoke is drawn into the flue, light a 13 gram
smoke pellet and check that there is a definite flow through the flue. Verify outside
that the smoke exits from one terminal only and that the termination is suitable.
Observe where possible, upstairs rooms and loft spaces for signs of escaping smoke
indicating a defective flue. If there is not a definite flow warm the flue for a few
minutes and repeat the smoke pellet test. If there is still no definite flow the flue may
need remedial work – Do not fit the appliance until there is a definite flow
through the flue.
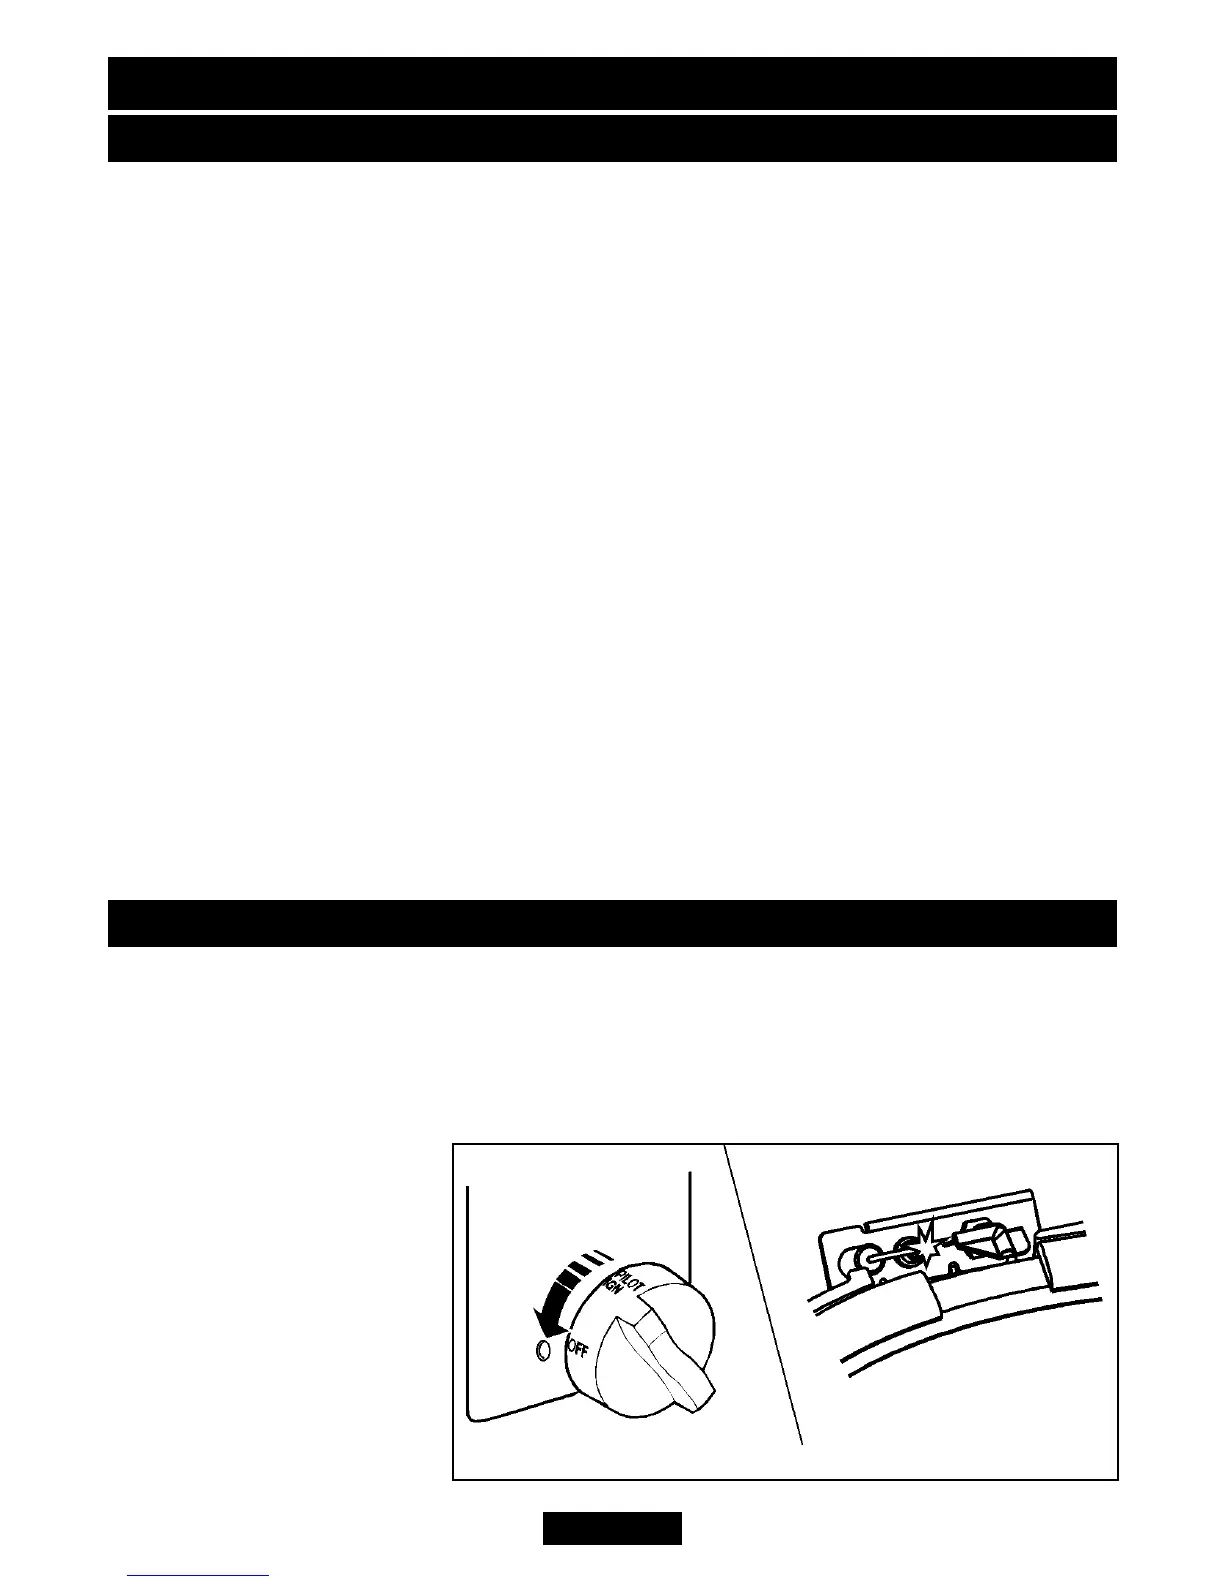
7. IGNITION CHECK
Before attempting to install, it is worth checking that the ignition system performs
satisfactorily.
Set the control knob to the OFF position. Depress the control knob and rotate it
SLOWLY anticlockwise to the PILOT/IGN position (See figure 9). A 'click' will be heard
as the integral piezo operates. A spark should be seen between the electrode and
pilot tip. If there is no spark
check the following: -
Ensure that the electrode
lead is connected to the
terminal at the base of the
electrode.
If the above is correct,
check for damage to the
electrode lead.
Page 19
© Baxi Heating U.K. Limited 2010.
INSTALLER GUIDE
Figure 9. Ignition operation