OPERATING YOUR FIRE
The pilot is part of the flame supervision device, it may be left on without the main
burner operating, however local weather conditions may lead to the pilot being
extinguished - this is not a fault.
It is advisable, that the pilot is turned off if the premises are to be left unoccupied for a
lengthy period.
For your safety the fire is fitted with a flame supervision device which will shut off the
gas supply if for any reason the pilot goes out. This device incorporates a fixed probe
which senses the heat from the pilot flame. If the probe is cool the device will prevent
any gas flow unless the pilot lighting knob is held in. This device also stops the fire
being turned back on until it is safe after
it has been turned off.
If, for any reason, the fire goes out or if
the fire is turned off, always wait at
least 10 minutes before attempting to
relight. If the device starts to shut off
the gas frequently in normal
operation (when the main burner is
on), seek expert advice.
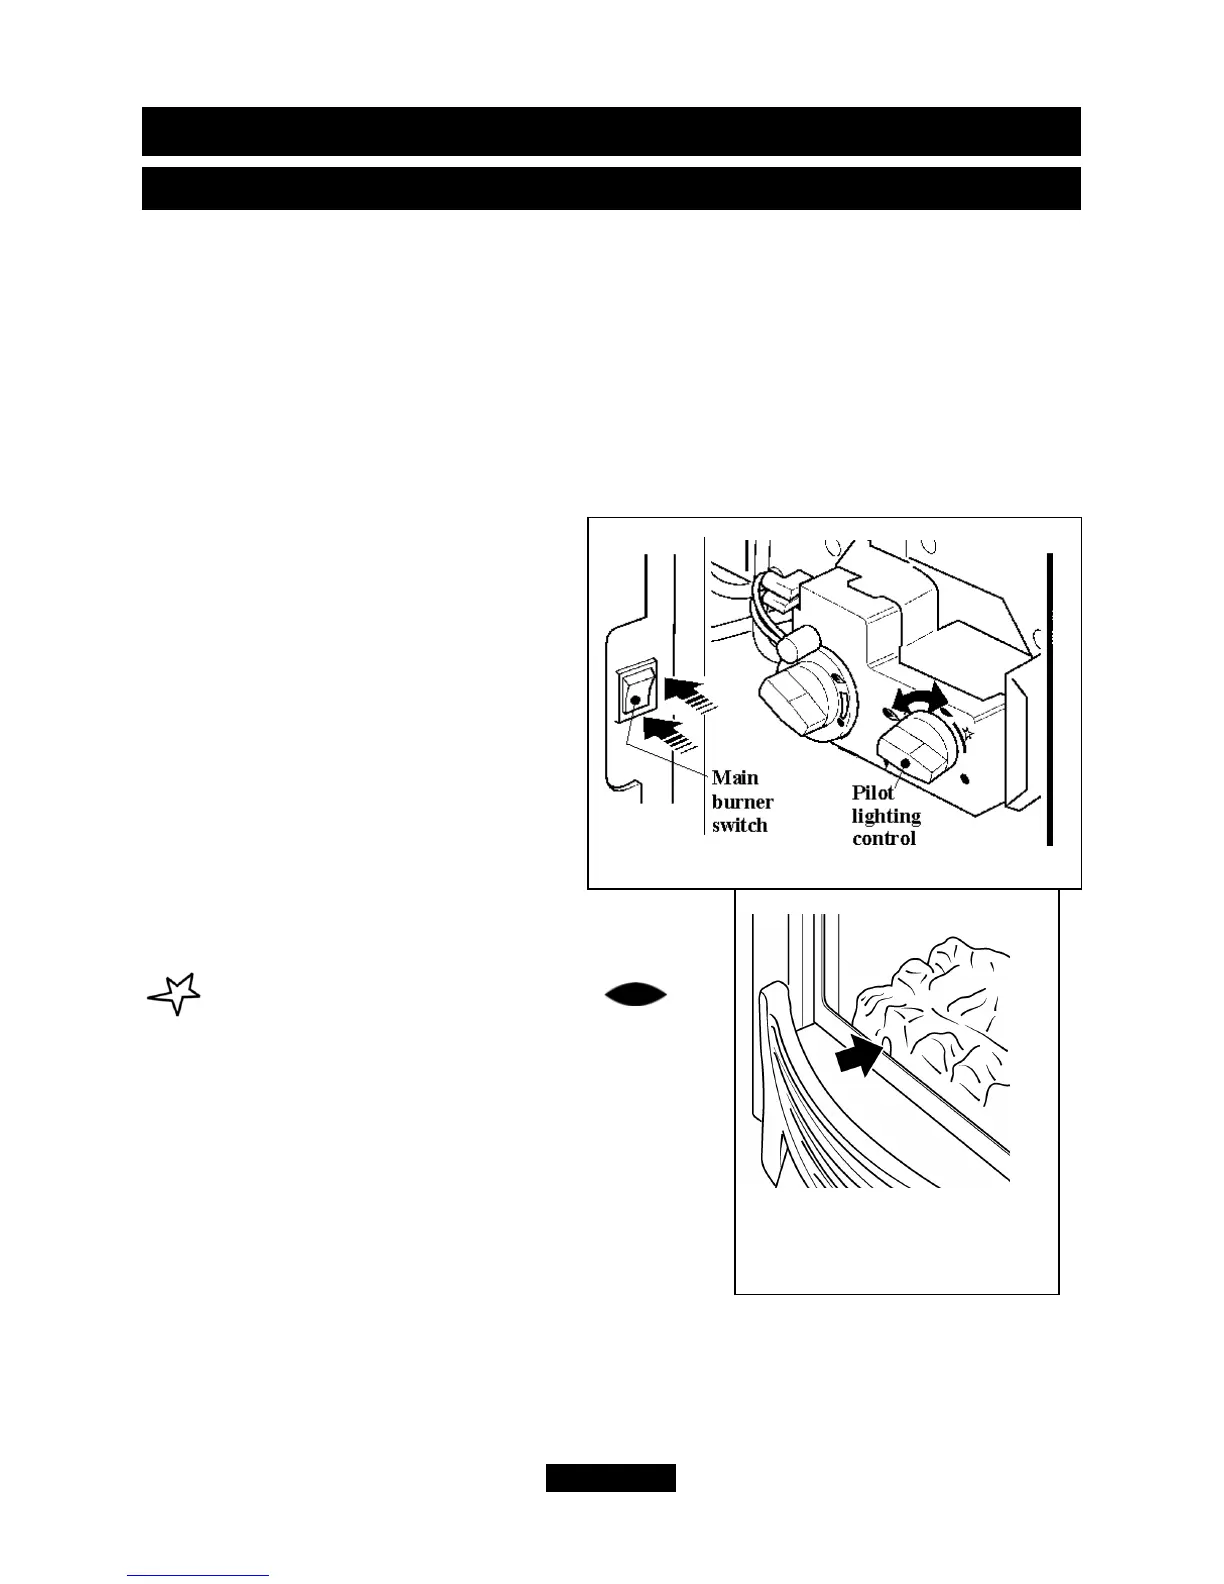
The controls are shown in figure 3.
To light the pilot.
- Push in the right control knob (the pilot
lighting knob) and, while keeping it depressed, turn
anticlockwise through the ignition position marked
and up to the pilot position marked .
The spark should light the pilot. The pilot flame can
be seen by looking through the gap near the front left
side of the ceramic fuel effect (See figure 4).
When the pilot has lit, keep the right hand control
knob depressed for a few seconds to prevent the
flame supervision device from shutting off the gas
supply while its probe warms up, as explained above,
then release it. If the pilot does not remain alight turn
the knob back to the off position marked
•
. Wait a
few seconds and repeat the lighting sequence.
Page 47
© GDC Group Ltd. 2014
OWNER GUIDE
Figure 4. Pilot flame
(Fascia may differ from that
shown)
Figure 3. Controls
 Loading...