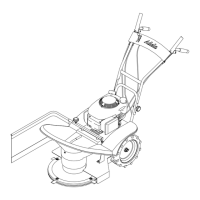
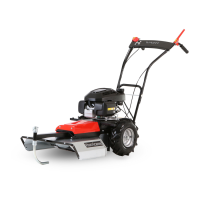
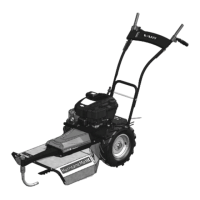
BDR-720D Adela PRO
2.5.5.2 CHECK OF THE BELT TRANSMISSIONS FUNCTION
• WHEEL TRAVEL BELT :
a) The machine with its travel turned ON has to overcome the terrain unevenness of 10 cm high - curb is suitable, for example.
b) The machine must not start spontaneously when its travel clutch lever is released.
• CUTTING DISC BELT :
a) The started engine switches off when the clutch of the cutting disc drive is pressed quickly. The belt starts to carry (rotates) the
cutting disc already in 1/3 step of the clutch lever of the cutting disc drive.
b) when the clutch disc clutch lever is released, the disc stops within 5 seconds.
2.5.5.3 WHEEL TRAVEL TENSIONING PULLEY ADJUSTMENT
1)
Fig. 20
Loosen the inner nut (spanner No. 14) and the outer nut (spanner No. 10) on the upper right-hand adjusting screw on
the machine frame.
2) Unscrew the adjusting screw in the direction of the arrow by approximately 2 turns.
3) Screw the outer nut to the bracket as far as it will go and tighten both nuts.
4) Repeat the wheel travel check per 2.5.5.2
5) The adjusting screw on the plastic lever of the travel clutch on the handlebars can also be used for adjustment –
Fig.
21
- nut
and screw wrench No. 13.
If it is not possible to meet the requirement from item 2.5.5.2 and the belt pulley cannot be tightened more, it is necessary
to replace the V-belt with a new one.
2.5.5.4 CUTTING DISC DRIVE TENSIONING PULLEY ADJUSTMENT
1) Remove the front plastic cover of cutting disc 3 on
Fig.
26
.
2)
Fig. 22
Loosen both nuts on the bowden cable control element (spanners No. 8 and 10).
WARNING! The nut located closer to the groove in the middle part of the adjusting element features a left thread, i.e., it
gets loosen on the opposite side!
3) Tighten the V-belt by turning the middle part of adjusting element 1 on
Fig.
22
for approximately 2-3 turns in the direction of
the arrow.
4) Tighten both nuts on the adjusting element.
5) Repeat the check per 2.5.5 . Continue tensioning until the requirement is met, and at the same time, the belt drive does not
drift
58
when the clutch lever of the cutting disc drive is released.
If it is not possible to meet the requirement from item 2.5.5 and the belt pulley cannot be tightened more, it is necessary to
replace the V-belt with a new one.
Always check the function of the automatic brake when adjusting the pulley of the cutting disc drive belt!
2.5.5.5 CHECK OF THE FUNCTION AND ADJUSTMENT OF THE AUTOMATIC CUTTING DISC BRAKE
• Function check: Every time the disc drive clutch lever is released, the automatic brake must stop the spinning disc within 5 seconds.
Do not continue working with the machine until you clear the automatic brake fault.
If you are not sufficiently manually skilled, have the operations done by an authorised service centre.
1) Remove the front plastic cover 3 on
Fig.
26
.
2)
Fig. 23
Loosen the inner and outer nuts (spanner No. 10) on the lower right rear adjusting screw on the machine frame.
3) Screw in the bowden cable adjusting screw in the direction of the arrow, so that the axial clearance of the bowden cable in the
adjusting screw head is 1 mm.
4) Check the automatic brake function.
If the brake does not brake the cutting disc within
59
5 seconds even after its correct adjustment, contact a specialised service
centre.
2.5.5.6 CHECK OF THE WHEEL BRAKE FUNCTION AND ADJUSTMENT
• Functionality check:
➔ When Neutral is engaged, and the brake lever is locked –
Fig.
4
C
- it must not be possible to manually move the machine.
• Adjustment:
1) Tighten the brake pad pressure adjustment nut located behind the left wheel –
Fig.
24
, tighten it by about ¼ turn.
2) Test the brake function. If the machine is still moving, repeat the procedure.
• Functionality check:
➔
Fig. 25
When the brake lever is released, the brake bowden cable must not feature any axial play in the adjusting screw on the
lever; the brake lever can be depressed and locked.
• Adjustment:
1) Loosen the adjusting screw nut (spanner No. 13) on the brake lever –
Fig.
25
.
2) Tighten the loose cable by unscrewing the adjusting screw, then always tighten the screw nut.
58
It is manifested by the belt rattling and irregular drifting.
59
The condition of the bowden shaft clearance in the adjusting screw is met.
34