EMR
3
Setup and Operation Manual Setup Mode Categories
18
PRINTER OPTION
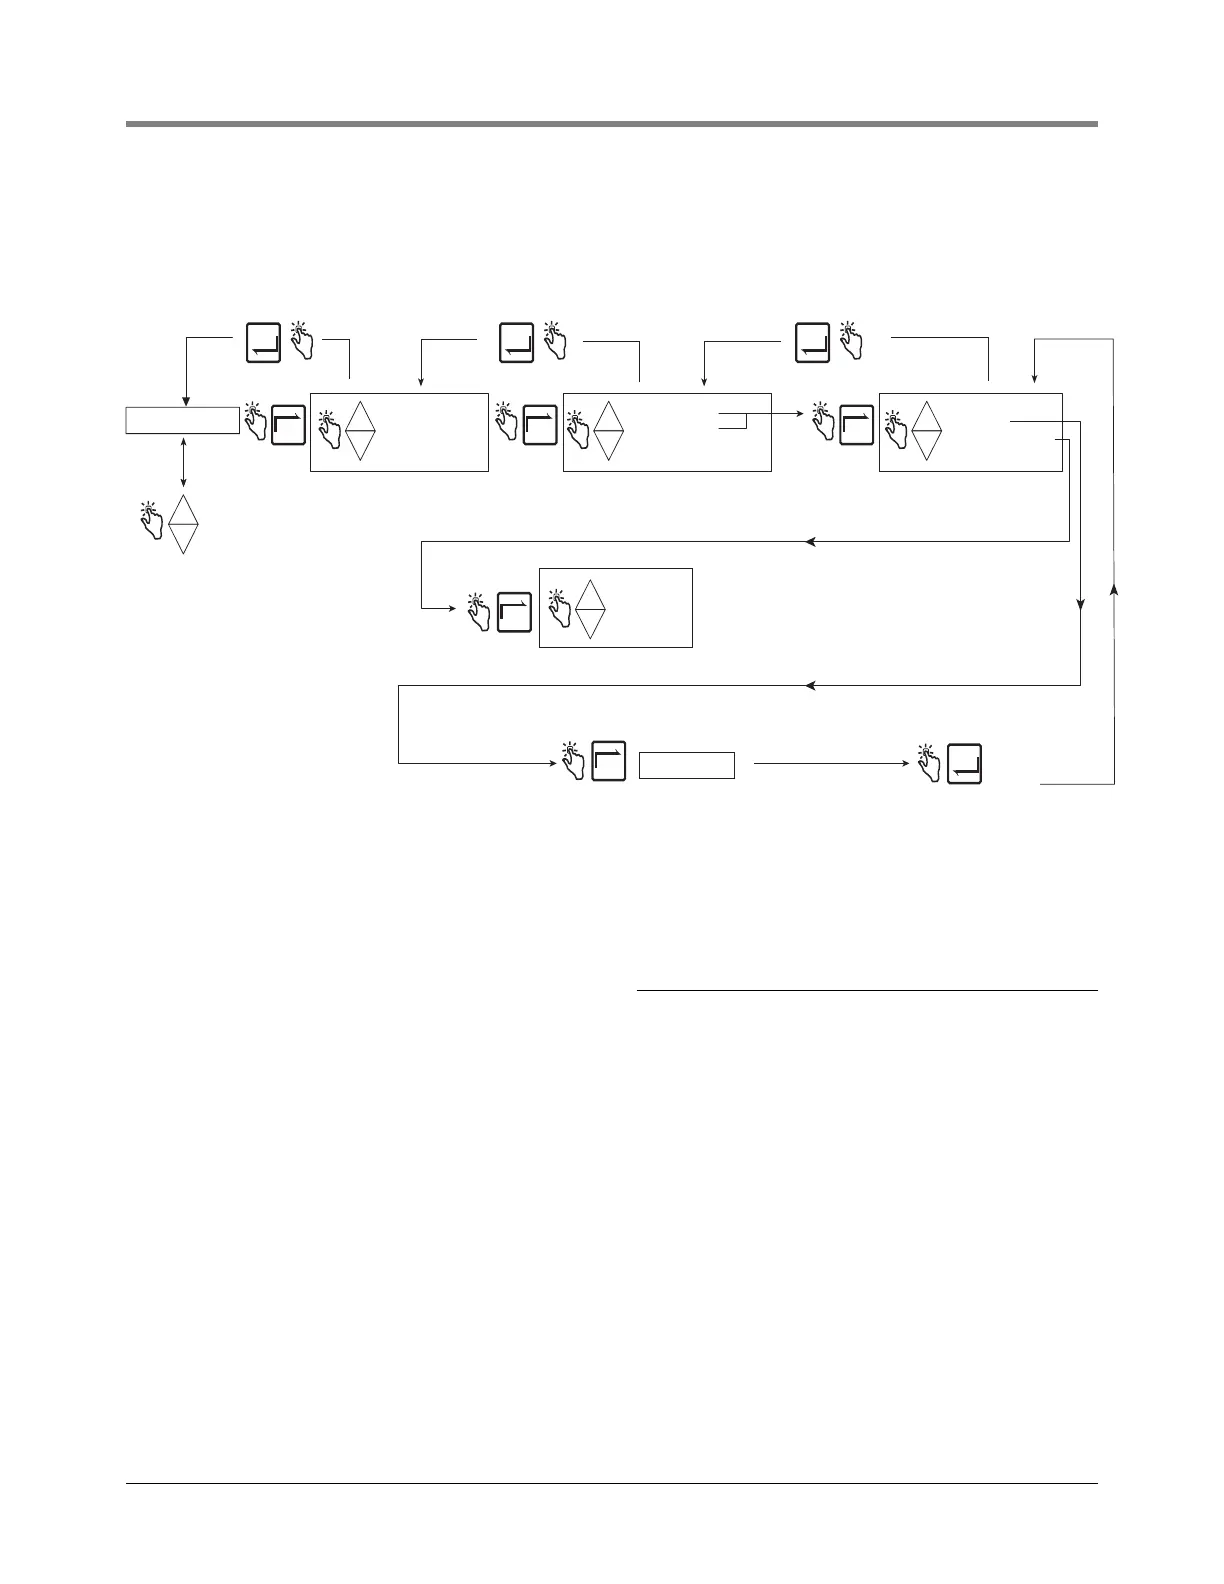
Figure 16 illustrates Printer Option setup in Setup Mode.
Figure 16. Printer Option Setup
An example of Printer Format 1 (Delivery Ticket Format), selectable in the Printer Option setup above, is shown in
Figure 17. NOTE: The availability of certain printer labels is dependent on options selected.
PRINTER OPTION
-
+
+
-
+
ENTER
ENABLE PRINTER
DISABLE PRINTR
+
-
+
SLIP PRINTER
ROLL PRINTER
YES
NO
+
-
+
ADVANCE
PRINT TEST PAGE
NEXT NEXTNEXT
NEXT
SET ADVANCE
Note: The minimum distance from
the top edge of the ticket down to
the first line of printing is 1 inch
and cannot be changed.
To increase the distance from the
top of the ticket to the first line you
change SET ADVANCE.
The minimum advance is 0 inches
ENTER
Press ENTER
to accept
selection and
return to
Each line advance is = to .167 inch. For example,
to have the first line print 2.5 inches from the top
you would need to add an additional 1.5 inches to
the fixed 1 inch space so you would enter 9 as the
advance (9 x .167 = 1.5 + 1 = 2.5"). Press up/down
arrows to select a number and NEXT to move from
one digit of the number to another.
ENTER ENTER
NEXT
+
-
+
Printer type assigned to this port must agree
with the printer type selected in Printer Option setup.
1
1
1
VIEW RECORDS
RESTORE RECORD
SHIFT
DATE FORMAT
TIME/DATE
SYSTEM ADDRESS
TIME DELAYS
VERSION NUMBER
C AND C
ENTER SECURITY CODE
PRICING
TAX/DISCOUNT
DEFAULTS
RELAY CONTROL
SECURITY
Press the up/down
buttons to cycle
through remaining
Setup Mode categories