12
4 Mounting
VEGAPOINT 11 • Transistor with IO-Link
63008-EN-200527
Note that the switching point varies depending on the type of medium
and the mounting position of the sensor.
Protect your instrument against moisture ingress through the following
measures:
•
Firmly tighten the plug connector
•
Lead the connection cable downwards in front of the plug connec-
tor
This applies mainly to outdoor installations, in areas where high
humidityisexpected(e.g.throughcleaningprocesses)andoncooled
or heated vessels.
Makesurethatthedegreeofcontaminationspeciedinchapter
"Technical data"meetstheexistingambientconditions.
The level switch is a measuring device for stationary screw mounting
and must be treated accordingly. Damage to the electrode will destroy
the instrument.
Caution:
The housing must not be used for screwing in!
Usethehexagonabovethethreadforscrewingin.
Aftermounting,makesurethattheprocessttingisscrewedincor-
rectlyandthussecurelysealsevenatmaximumprocesspressure.
4.2 Mounting instructions
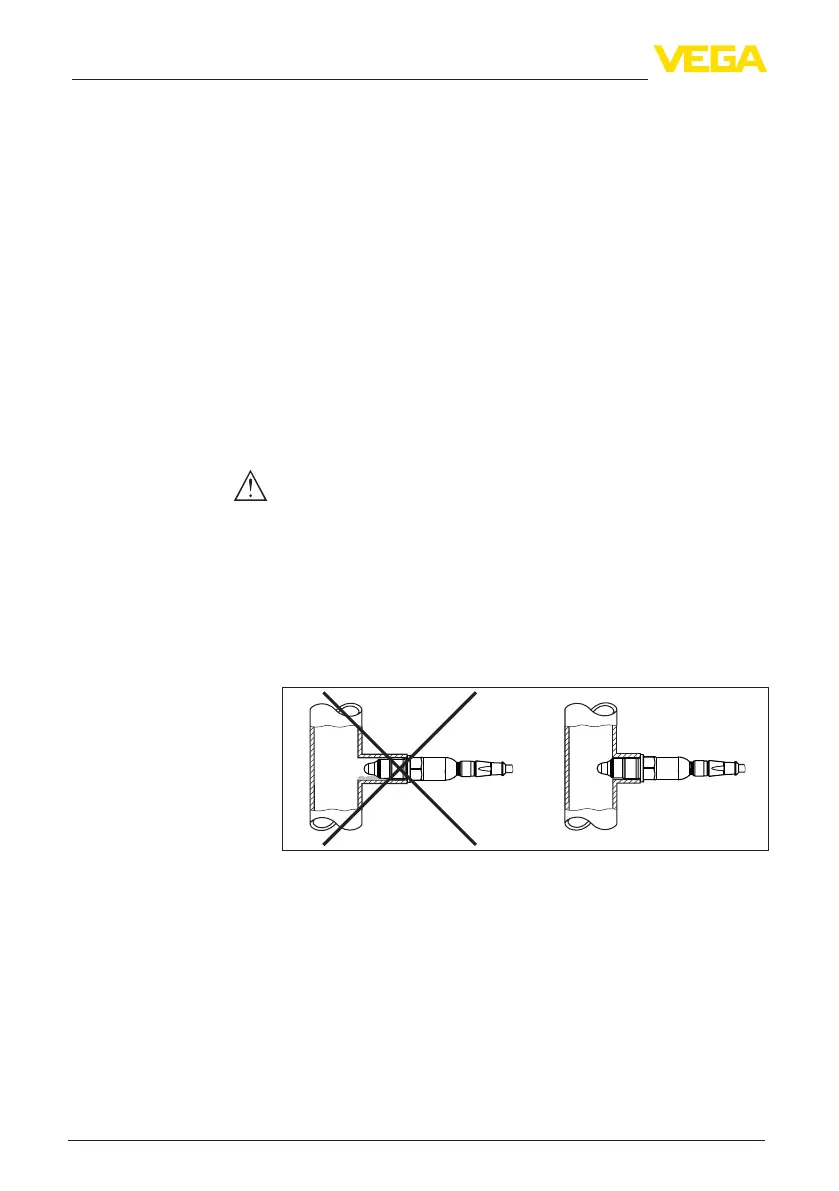
In adhesive and viscous products, the surfaces of the sensor should
protrude into the vessel to avoid buildup. Therefore mounting bosses
shouldnotexceedacertainlength.
Fig. 4: Adhesive products
Inhorizontalpipelines,avoidmountingintheupperorlowerareaof
the pipe.
In the upper part of the pipe cavities can form due to air inclusions.
Solids can settle in the lower pipe area. Both can lead to measure-
ment errors.
Inhorizontalpipelines,lateralinstallationisthereforerecommended.
Protection against mois-
ture
Handling
Adhesive products


 To Next Page