3
2
Table of Contents
Precautions.........................2
Features..............................4
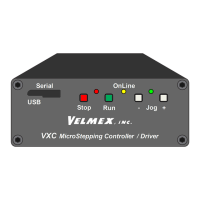
Front....................................5
Back....................................5
RS-232 Port........................5
Auxiliary I/O.........................6
Motor wiring........................6
Limit Switch wiring..............6
Setup...................................7
Jog Mode............................7
Optional Joystick.................7
Communication Methods....8
Linking VXMs for 3 & 4
Motors...............................10
Units & Directions..............11
Command Summary
(Common Commands)......12
Command Summary
(Advanced Commands)....14
Command Reference
(Common Commands)......16
Motor Commands.........16
Program Management
Commands...................19
Looping/Branching
Commands...................20
Pausing & I/O
Commands...................22
Operation Commands...23
Status Request
Commands....................24
Setup Commands.........25
Examples..........................26
Troubleshooting................30
Specifications....................31
COSMOS Software...........31
Warranty..............................1
Contact Information.............1
CAUTION:
Controller and AC power supply should be operating in a
well ventilated area. Do not use in a wet, dirty, or explosive
environment. In industrial environments, repackaging into
a NEMA grade enclosure is required.
Do not disconnect motor while running. Keep Motor and
Limit cables minimum of 2” apart . Only operate with
designated motor. Do not alter cables in any way without
first consulting Velmex
!
!
!
!
WARNING:
TO REDUCE THE RISK OF ELECTRICAL SHOCK, DO
NOT ATTEMPT TO REMOVE COVERS ON POWER
SUPPLY OR CONTROLLER. THERE ARE NO USER
SERVICEABLE PARTS INSIDE. Any servicing should be
done by Velmex qualified service personnel.
CAUTION:
THE VXM MUST BE SET TO THE EXACT
MODEL/TYPE MOTOR(S) BEFORE
OPERATING.
IMPROPER SETTINGS CAN CAUSE
SEVERE DAMAGE TO MOTORS AND
CONTROLLER.
Use Velmex COSMOS software to
configure VXM before use.
CAUTION:
MOTOR(S) GET HOT WHEN RUNNING.
Motor(s) must be mounted to a metal surface
to dissipate internal heat.
Precautions
CAUTION
!!
Mismatched Motor
Settings Damage
Motor & Controller
When Connecting Motor:
Set Controller to the
exact motor model/type
before operating.
CAUTION
!!
Mismatched Motor
Settings Damage
Motor & Controller
When Connecting Motor:
Set Controller to the
exact motor model/type
before operating.
Motors mounted to Velmex actuators/positioners will usually provide
sufficient heat dissipation. Motor surface temperature should not exceed
152° F (70° C.) In continuous duty applications when the motor is not
mounted to a suitable heat dissipating device, motor surface temperature
could exceed 152° F (70° C.)
Appendix A
Appendix B
Appendix C
Appendix D
Appendix E
Appendix F
Appendix G
Appendix H
Appendix I
Appendix J
Appendix K
Appendix L
Appendix M
Appendix N
Appendix O
Appendix P
Appendix Q
Appendix R
Appendix S
Editing/Debugging Tools.........................32
Advanced Input/Output...........................34
The Multifunction User Inputs.................38
Producing Trigger Outputs.......................40
Getting Motor Position When Moving......44
More Feedback/ Precision.......................46
Complex Profiles & Coordinated Motion...48
Advanced Jog Mode................................50
The Analog Input.....................................54
The Analog Joystick Option.....................56
I/O Electrical Specifications......................60
Motor Torque Curves...............................62
Advanced Motor Setup.............................66
Limit Switches and Home Switches.........68
Controller Mode.......................................70
VXM Comparison to NF90/ VP9000........72
Outline Dimensions...................................78
Model Configurations................................80
Pick-and-Place with JM-x..........................82