SERVICE
Service - 46
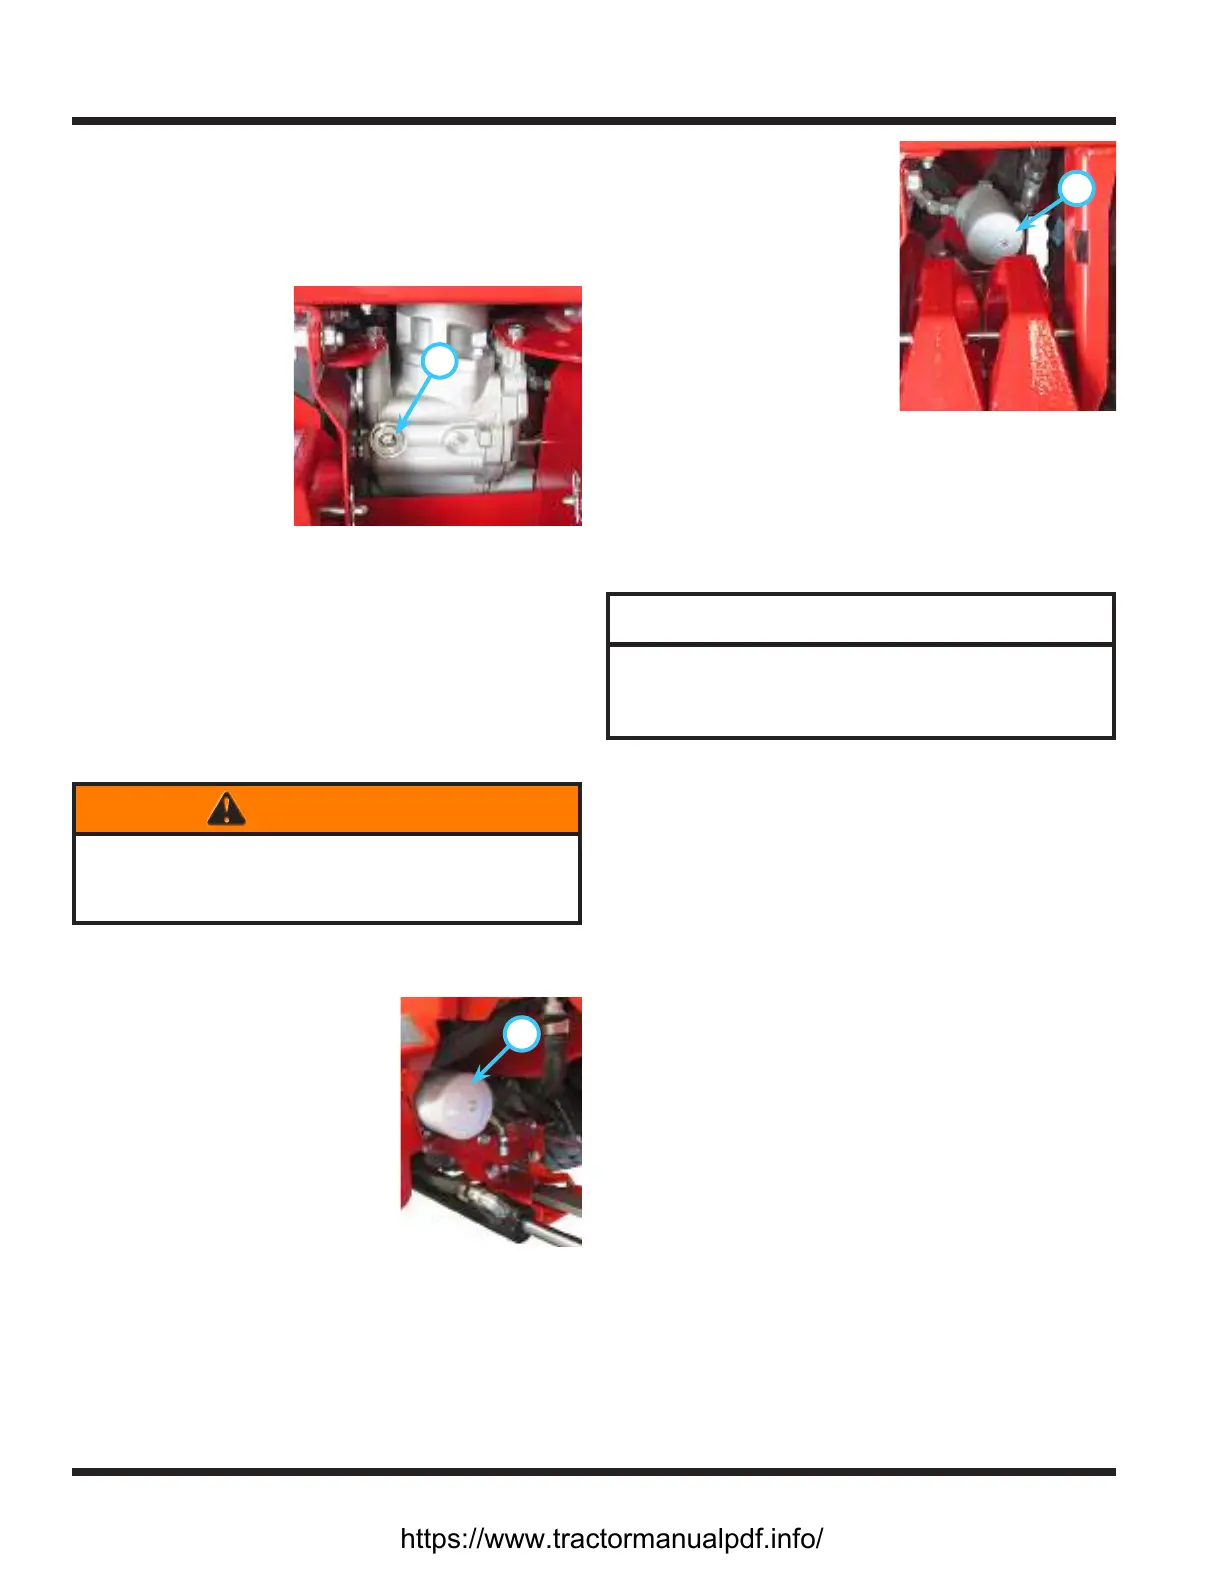
Checking the Rear Transaxle Oil
Check the rear transaxle oil level when the oil is cold,
prior to operating the power unit.
1. Remove the rear weights from the hitch bar (if
equipped).
A
2. Remove the oil
ll plug (A) from
the transaxle and
check to see if the
oil level is even
with the bottom of
the oil ll hole.
3. If the oil level is
low, add Hydro-
Torq XL synthetic
hydraulic oil until
the oil is level with the bottom of the oil ll hole.
4. Reinstall the plug into the rear transaxle and
torque to 34-39 Nm (25-29 ft-lbs).
5. Clean up any spilled oil.
6. Reinstall the rear weights (if equipped).
Changing the Hydraulic Oil Filters
1. If the power unit has been running, allow time for
the hydraulic system to cool.
WARNING
Hot oil can cause severe burns. Allow the oil tem-
perature to drop from hot to warm before changing
the oil lters.
2. Remove the hydraulic lter access cover.
3. Clean the hydraulic lters, the lter heads, and the
area around the lters.
A
4. Place a drain pan (minimum
3.8 liter / 4 quart) under the
large hydraulic lter (A) in
front of the left foot platform.
5. Use a strap type lter wrench
to unscrew the lter from the
lter head and allow the oil to
drain into the pan.
6. Wipe the lter mounting sur-
face with a clean cloth.
7. Apply a thin lm of clean oil to the gasket of the
new lter and screw onto the lter head until the
gasket makes contact with the mounting surface.
Tighten the lter an additional 3/4 of a turn (may
require using a strap type lter wrench).
8. Place the drain pan
B
under the right rear axle
beneath the small hydrau-
lic lter (B).
9. Use a strap type lter
wrench to unscrew the
lter from the lter head
and allow the oil to drain
into the pan.
10. Wipe the lter mounting
surface with a clean cloth.
11. Apply a thin lm of clean oil to the gasket of the
new lter and screw onto the lter head until the
gasket makes contact with the mounting surface.
Tighten the lter an additional 1 turn (may require
using a strap type lter wrench).
12. Clean up any spilled oil and dispose of oil and
lters in accordance with local laws.
ATTENTION
Oil is hazardous to the environment. Drain oil into
an approved container and dispose of used oil in
accordance with local laws.
13. If the hydraulic oil is being changed at the same
time as the lters, skip the remaining steps and
proceed to the Changing the Hydraulic Oil section.
14. Add HydroTorq XL synthetic hydraulic oil to the
hydraulic oil tank until the oil level in the plastic
sight tube is within the proper range indicated by
the oil level decal.
15. Start the power unit and let it run at low idle
engine speed for a few minutes. Turn the steer-
ing wheel to the left and right a couple of times to
purge any trapped air out of the hydraulic system.
16. Shut o the power unit engine and allow the
power unit to sit for a minimum of ve minutes.
17. Check the hydraulic oil level. Refer to the Checking
the Hydraulic Oil Level section.
18. Inspect both of the hydraulic lters for signs of
leakage. If any leaks are evident, the lter may
need tightened further, or the lter may need to
be removed, the gasket and lter mount cleaned,
and the lter reinstalled following the procedures
for changing the lter.
19. Reinstall the hydraulic lter access cover.
https://www.tractormanualpdf.info/