MECHANICAL INSTALLATION
8 B001686
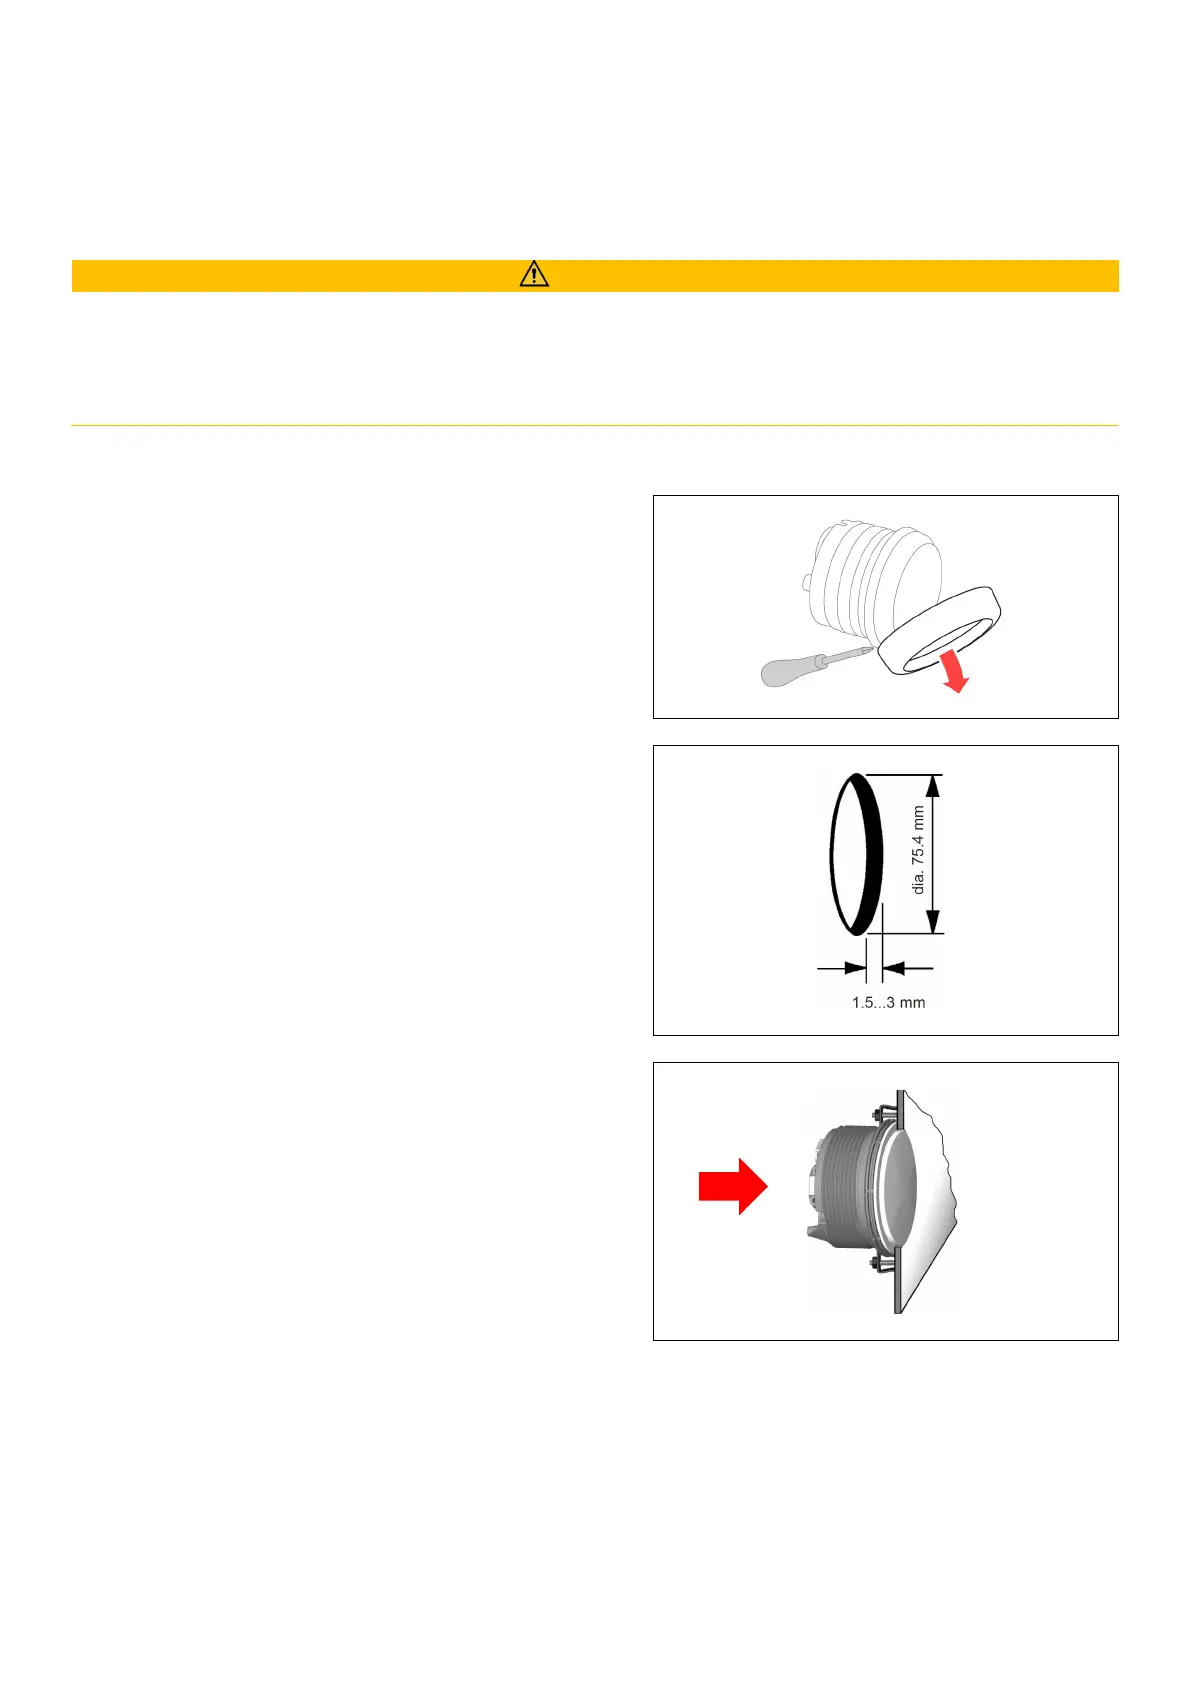
FLUSH MOUNTING
The recommended panel thickness is 1.5 to 3 mm.
The drill hole must have a diameter of 75.4 mm.
Ensure that the installation location is level and has no sharp edges.
WARNING
• Do not drill holes or ports in load-bearing or stabilizing stays or tie bars!
• Note the necessary clearance behind the drill hole or port at the installation location. Required
mounting depth: 65 mm.
• Drill small ports; enlarge and complete them, if necessary, using taper milling tools, saber saws,
keyhole saws or files. Deburr edges. Follow the safety instructions of the tool manufacturer.
1. Gently remove the bezel using a screwdriver.
Note:
the bezel cannot be used after removal
since it might be damaged.
2. Create a circular hole in the panel considering the
device dimensions.
3. Place the flush mount seal A2C53215641 (not
included) on the instrument glass.
4. Put the instrument into the drill hole from the
back.
5. Adjust the instrument so that the gauge is level
and fasten it to the stud bolts on the rear side of
the panel, using the flush mount fixing bracket
A2C59510864 (not included).
 Loading...