INSTALLATION
2-1
VersaPulse Select Service Manual
0621-499-01 12/95
®
®
2.0 INSTALLATION
2.1 INSTALLATION INSTRUCTIONS
These installation instructions are provided for use by Coherent Service Engineers who have completed
certification service training on the VersaPulse Select. Installation by untrained persons is a potential hazard
to the person or persons doing the installation, others present, and to the equipment itself. In addition,
improper installation is a potential hazard to the user, persons present during use, and patient.
Perform the following steps to install a VersaPulse Select system.
1. Check for proper site set up. This includes proper AC service and adequate space for the console.
AC power configuration: The VersaPulse Select requires 220 VAC ±10%, 50/60 Hz, 30 amp single
phase electrical service. The power cord is a 26 foot cable with 3 conductors. A terminal board
behind the right side cover allows for tapping of the isolation transformer to the setting closest to the
incoming electrical service. The system can be hard wired to electrical service or installed to electrical
service with a plug and receptacle. The plug and receptacle are shipped in the site preparation kit.
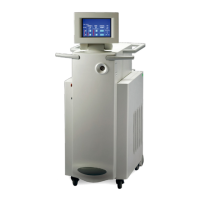
Console dimensions and weight: The console measures 39" l x 18" w x39" h. It weighs approximately
325 lbs. A minimum of 18" of air space is required around the unit to provide adequate cooling air
circulation.
The system requires approximately 2.5 gallons of deionized water for its closed loop cooling system.
The coolant must be added as described in this procedure.
Complete specifications for the VersaPulse Select are included in the VersaPulse Select Operator
Manual. Contact Technical Support in Palo Alto, CA, if there are any questions concerning site
preparation.
2.) Check the crate/carton for any shipping damage.