Chapter 6: Optional Forklift Frame Installation
Optional Forklift Frame Installation
(11/96)
6 Optional Forklift Frame Installation
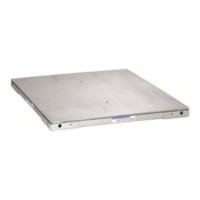
The 2158, 2160, and 2161 Forklift Channel Option is easy to assemble.
The standard Vertex scale assembly (platform and frame) is mounted
within the separate forklift frame. The assembly sequence is as follows:
Remove the junction box access plate from the platform and withdraw
the manual and instrument cable. The eight flat head screws shipped with
the scale will not be used.
Inspect the separate forklift frame. Along with the frame there should be
(4) clamping bars, (8) 1/ 2-13 flat hd. screw x 1-1/ 2" lg. and (4) 5/ 8"
spacer (10,000 lb capacity scale only). Each clamping bar should contain
two tapped holes. These parts are used for mounting the scale frame to
the forklift frame.
Also included is a level bubble assembly which mounts on the side of the
forklift frame as shown in Figure 6-a. The level bubble is used to check
the suitability of the chosen location. Mount the level bubble first before
beginning assembly of the scale to the forklift frame.
Remove the platform from the standard Vertex frame.
Place the standard Vertex frame into the forklift channel frame. Line-up
the eight mounting holes in both frames, two per corner. Insert the eight
mounting screws into the holes and through both frames.
Install a clamping bar beneath each frame corner by threading the two
projecting screws into the tapped holes provided. Tighten all screws until
they are “finger-tight”. (See Figure 6-a)
Ensure that an equal gap exists on all sides between the two frames. The
oversized mounting holes in the forklift frame allow for any required
adjustment. Once an equal gap is attained, finish tightening all mounting
screws.
While the platform is removed from the frame, wire the instrument cable
to the junction box PCB. Route the cable out the appropriate corner of
the platform. Place the rocker pins into the load cells.
Reinstall the platform into the frame, carefully routing the instrument
cable out the appropriate corner of both cells.
Continue with the installation and calibration in accordance with the
Mettler Toledo Digital Indicator manual.
Note: The 10k capacity Vertex
uses a
5/8” spacer between the Quick-Pit
frame and the Standard frame.