7Liebert PCW - UM - 273895 - 04.10.2018
5 - Water connections
5.1 - General warnings
ENSURE THAT THE TUBING DOES NOT OBSTRUCT THE AIR
FLOW(Under only).
IF THE TUBING IS TO RUN OUTDOORS, ADD ETHYLENE GLY-
COL TO THE CIRCUIT AS DESCRIBED IN PARA. 5.3.
5.2 - Water connections
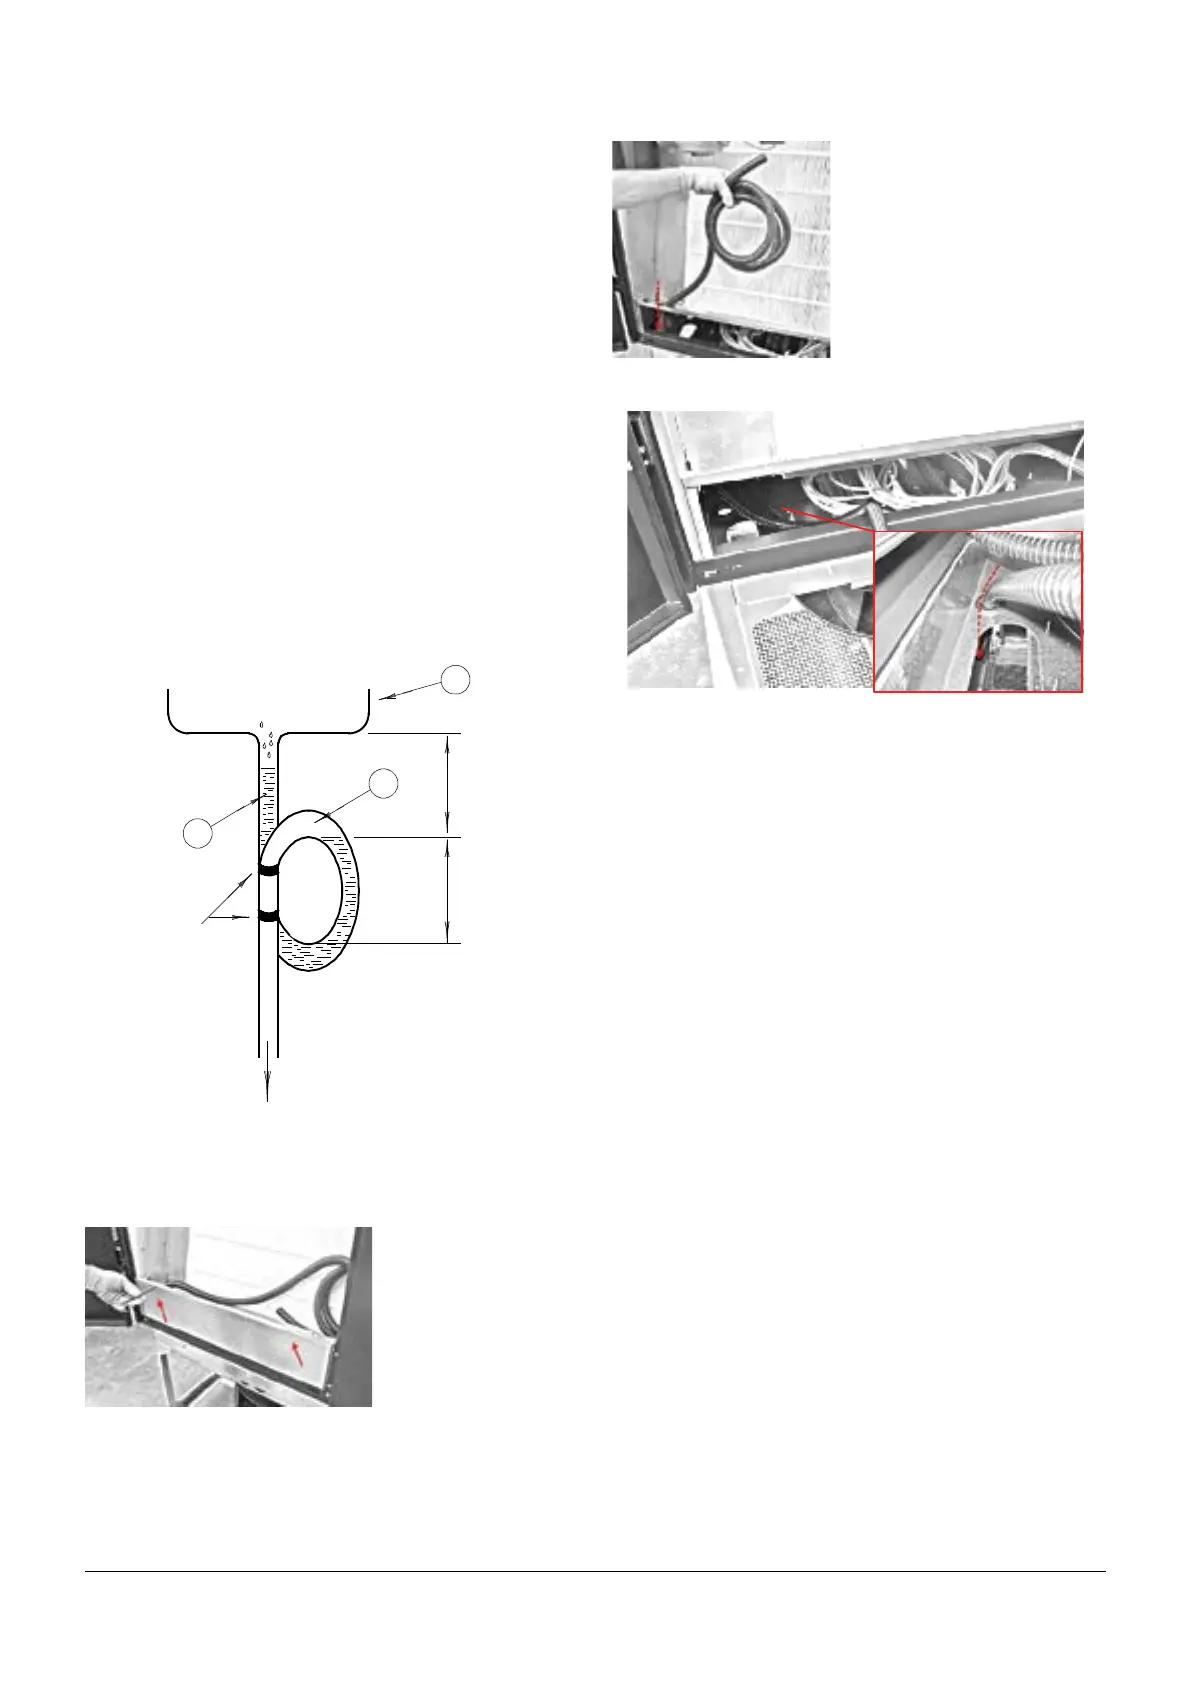
5.2.1 - Condensate drain (for unit without condensate
pump) (Fig. a):
• Use galvanized steel, PVC or exible polythene tubing.
• Allow a 2% gradient towards the drain.
• It is necessary to make a drain trap (1) place at least 20 cm
below the drain tray (2). In the Upow conguration units the
drain trap must be placed under the unit, in the false oor.
Caution: If the drain trap is done inside the fan module in
the Downow congurations attach the tube and the drain trap
properly to the fan module frame using a cable tie, avoiding
the risk of contact with fans.
• Fill the drain trap with water before the start- up to avoid spray-
ing the condensate (3).
Fig. a - Condensate drain
5.2.2 - Condensate drain for the Extended Height
Downow Up and Downow Down units
Place the condensate pipe inside the fan module before making
the drain trap.
• Remove the inter-
nal bottom cover by
unscrewing the two
screws that hold it.
BRACKET
to be
connected
by user
2
3
min.
1
20 cm
min.
10 cm
• Remove the drainpipe
from the hole on the drain
panel by pulling it down
- Pass the drain pipe through the cable bushing on the top of the
fan module along the entire tube length.
- Reposition the internal bottom panel and x it with the two
screws.
5.2.3 - Condensate Pump.
As an option it is possible to have Upow unit with a condensate
pump that allows draining of the water up to 3m above the oor.
The pump discharges both condensate water from exchange coil
and drain water from humidier (if installed).
Maximum discharge total head allowed 3m (head + hydraulic
connection loss); the nal drain must be able to receive 10l/min
water at high temperature (max water temperature 100° C).
5.2.4 - Humidier (optional): See Enclosure A.
5.2.5 - Hot water (optional):
• Use copper or steel (Mannesmann) tubing.
• Insulate both tubes using proper insulation.
5.3 - Chilled water connections
• The PCW units from PH070 to PH201, single chilled water
circuit, and from PH110 to PH201, double chilled water circuit
are supplied with VICTAULIC
®
connections.
The chilled water piping has to be suitable for these connec-
tions (see Victaulic connections details below). Otherwise two
smooth pipe stubs are provided with the units and can be used
to create the connection. Or as an option two threaded pipe
stub scan be supplied on request.
See Enclosure D - “Hydraulic and Electric Connection“ for di-
mension details.
• In case of threaded connections use hemp and paste to get a
reliable pressure- tight joint.
• Use copper or steel (Mannesmann) tubing.
• Place the tubing on supporting saddles (1).
• Insulate both tubes using Armaex insulation (2).
• Place shut- o ball valves (3) at the conditioner inlet and outlet
to allow easy maintenance.
• It is useful to install a thermometer (4) and a manometer (5) on
the conditioner inlet and outlet.
• Install a water drain tap (6) at the lowest point in the circuit.
• Fill the circuit with water/glycol (see Fig. b).