10Liebert PCW - UM - 273895 - 04.10.2018
6 - Electrical connections
6.1 - Electrical connections
1) Before proceeding with the electrical connections, ensure that:
• All electrical components are undamaged;
• All terminal screws are tight;
• The supply voltage and frequency are as indicated on the unit.
6.2 - Wye vs. Delta Connection Power Supply for
PCW
The Liebert PCW EC Fan Model is designed to operate with Wye-
connected power. It will not operate properly with Delta connected
power.
A eld - supplied isolation transformer or other power solutions will
be needed for proper function. The electronically commutated mo-
tors included in the Liebert PCW are suitable for connection to
power supplies with a solidly grounded neutral.
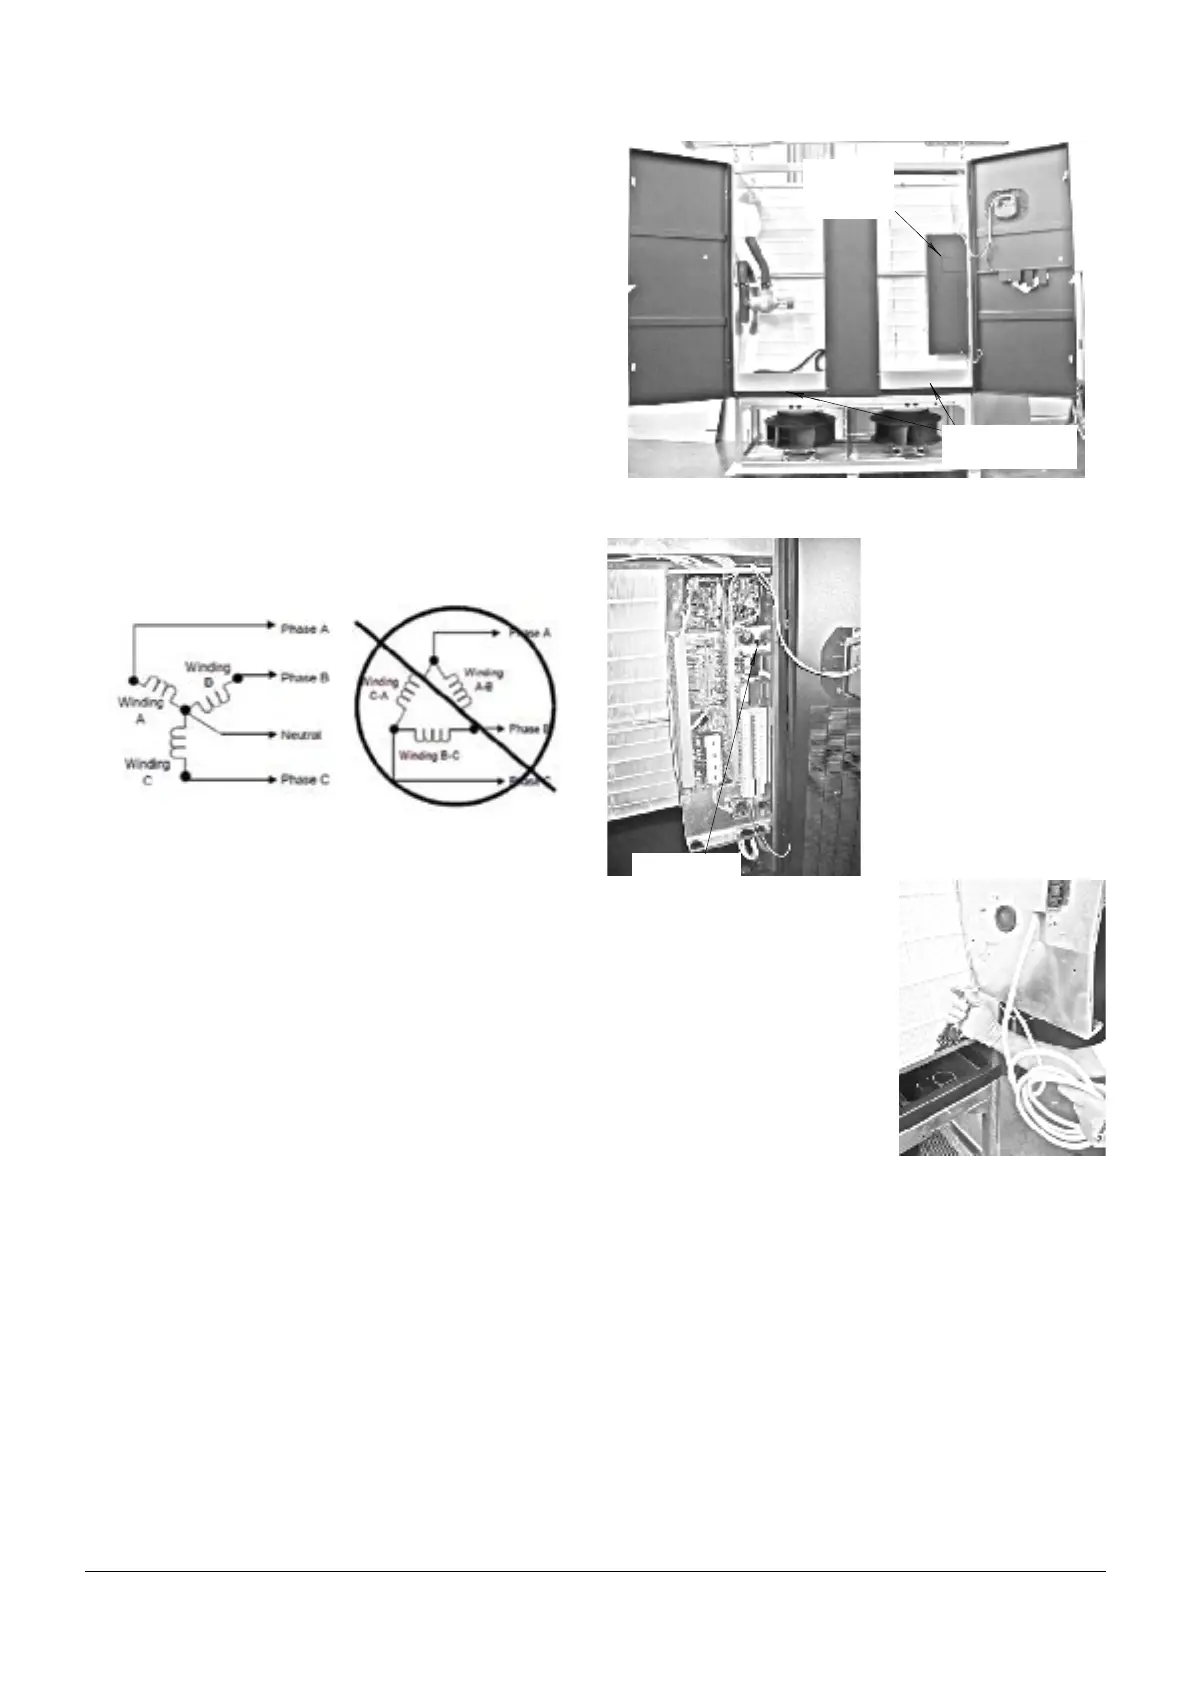
Fig. c - Wye vs. Delta power supply connection diagram
Acceptable Power Supplies- 380V to 460V Nominal Units (TT
System, TN-S System or TN-C System)
• 380V wye with solidly grounded neutral and 220V line-
to-ground
• 460V wye with solidly grounded neutral and 277V line-
to-ground.
Unacceptable Power Supplies-380 V to 460 V Nominal Units
(IT System)
• Wye with high- resistance (or impedance) ground
• Delta without ground or with oating ground
• Delta with corner ground
• Delta with grounded center tap.
If the unit must be installed in the IT System, contact Vertiv Techni-
cal department prior to installation.
6.3 - Fan Module Electrical connections (Extended
Height unit only)
Downow Up & Downow Frontal:
1) Open the front door to get access to the electrical panel and to
the internal bottom panels.
2) Remove the electrical panel cover by unscrewing the 4 screws
that hold it.
3) Remove the internal bottom panels by unscrewing the 2 screws
that hold each panel.
Wye Power Supply
Connection
Delta Power Supply
Connection
4) Remove the frontal panels or frontal grids from the fan module
and remove the electrical connections cover in the fan module.
5) Unscrew and remove the
two screws positioned on the
right, pull and swing the elec-
trical panel to access the
back of the panel.
6) Loosen the fan power electrical
cable on the back of the electrical
panel and run it through the cable
bushing on the drain panel.
screws
Electrical
panel
cover
Internal bottom
panels