VESDA Maintenance Guide VESDA
30 www.xtralis.com
8.3 VESDA VLF
8.3.1 Replacing the VESDA VLF Filter Cartridge
The VESDA VLF detector uses a disposable air filter cartridge. This filter removes dust contamination from
sampled air and provides a clean air bleed to preserve the detector chamber optics. The detector constantly
monitors filter efficiency. To maintain the operational integrity of the smoke detector, it is recommended that
the filter be replaced every 2 years or when a filter fault occurs. More frequent filter replacement is necessary
in environments where there are high levels of contamination.
A fault is raised on the detector when the filter needs to be replaced. During the replacement process, the
detector must be told that a new filter has been installed.
Notes:
l Prior to any work or maintenance being carried out on the VESDA VLF, take the necessary steps to
advise the monitoring authority that power may be removed and that the system will be disabled.
l Ensure that the area surrounding the filter is clear of dirt and debris, prior to replacement.
l The filter is for single use only, it cannot be cleaned and re-used.
l Ensure that the detector remains powered up during filter replacement and that a new filter cartridge is
available:
Replacement Procedure
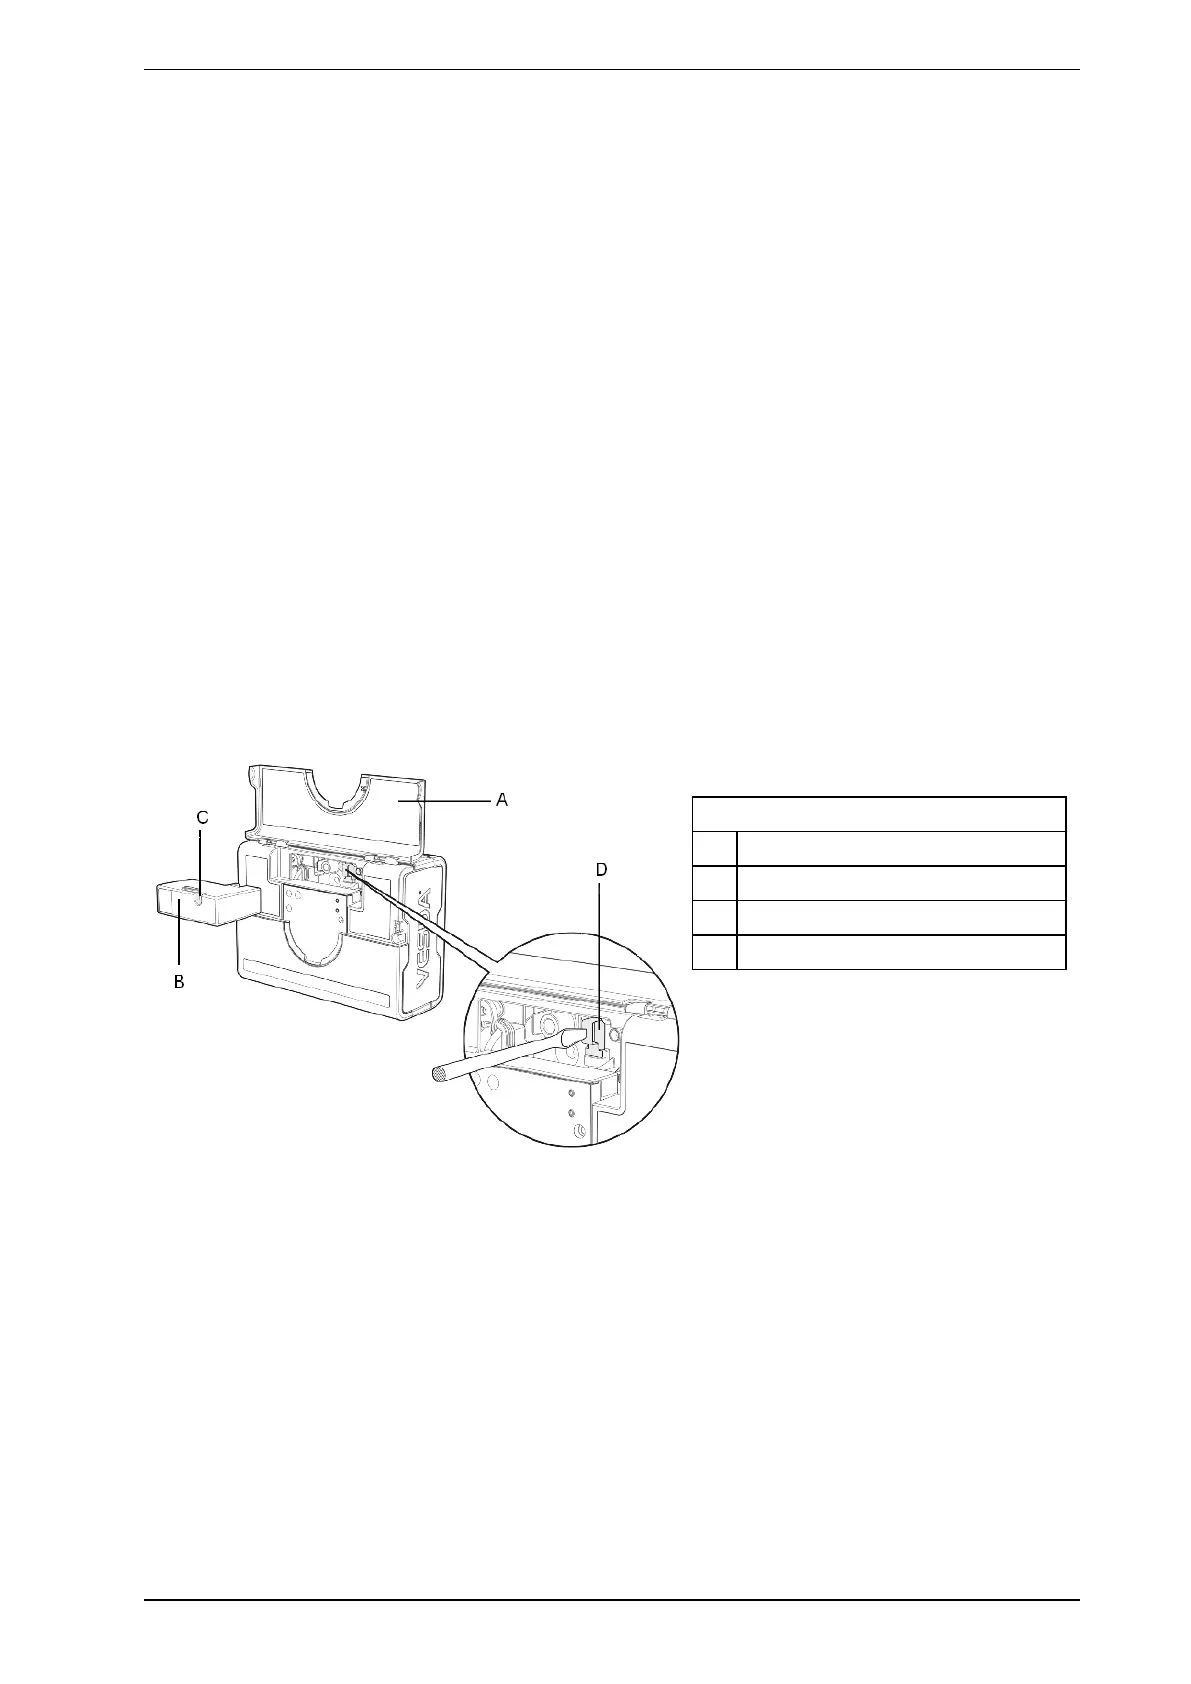
1. Push in the security tab and lift up the field service access door (A) in Figure 8-17 below.
2. Set the detector to 'Standby' mode by pressing the Disable button for 6 seconds. The Disabled LED
begins to flash rapidly. After releasing the Disable button the disabled LED will flash more slowly.
3. Undo the recessed retaining screw (C) and pull out the old filter (B) in Figure 8-17 below.
Legend
A Field service access door
B Air filter cartridge
C Retaining screw
D Filter switch
Figure 8-17: Replacing the air filter cartridge in a VESDA VLF detector
4. Using your finger, firmly press the filter switch (D), in the filter recess of the detector, 5 times within 5
seconds to confirm with the detector that a new filter is about to be installed (see inset). A LED next to the
serial interface will flash each time you push the filter switch, and will continue flashing once you have
successfully pressed the switch 5 times in 5 seconds.
5. Insert the new filter (VSP-005) and tighten the retaining screw.
6. Press the Disable button for 6 seconds to return the detector to normal operating mode.
7. Record the filter replacement date on the filter.
8. Close the field service access door.