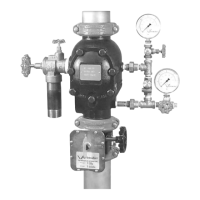
6a. If using the same clapper seal assembly and the seal ring was
removed from the clapper seal in the previous step: Re-insert
the seal ring carefully underneath the outer lip of the clapper seal.
Make sure the smaller diameter of the seal ring is toward the seal-
ing surface of the clapper seal.
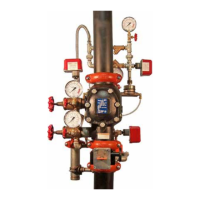
7. Insert the seal washer carefully underneath the sealing lip of the
gasket.
8. Remove any contaminants, dirt, and mineral deposits from the
clapper. Make sure the sealing surface area is clean, dry, and
free of foreign material. If the clapper shows any signs of damage,
replace it with a new, Victaulic-supplied clapper.
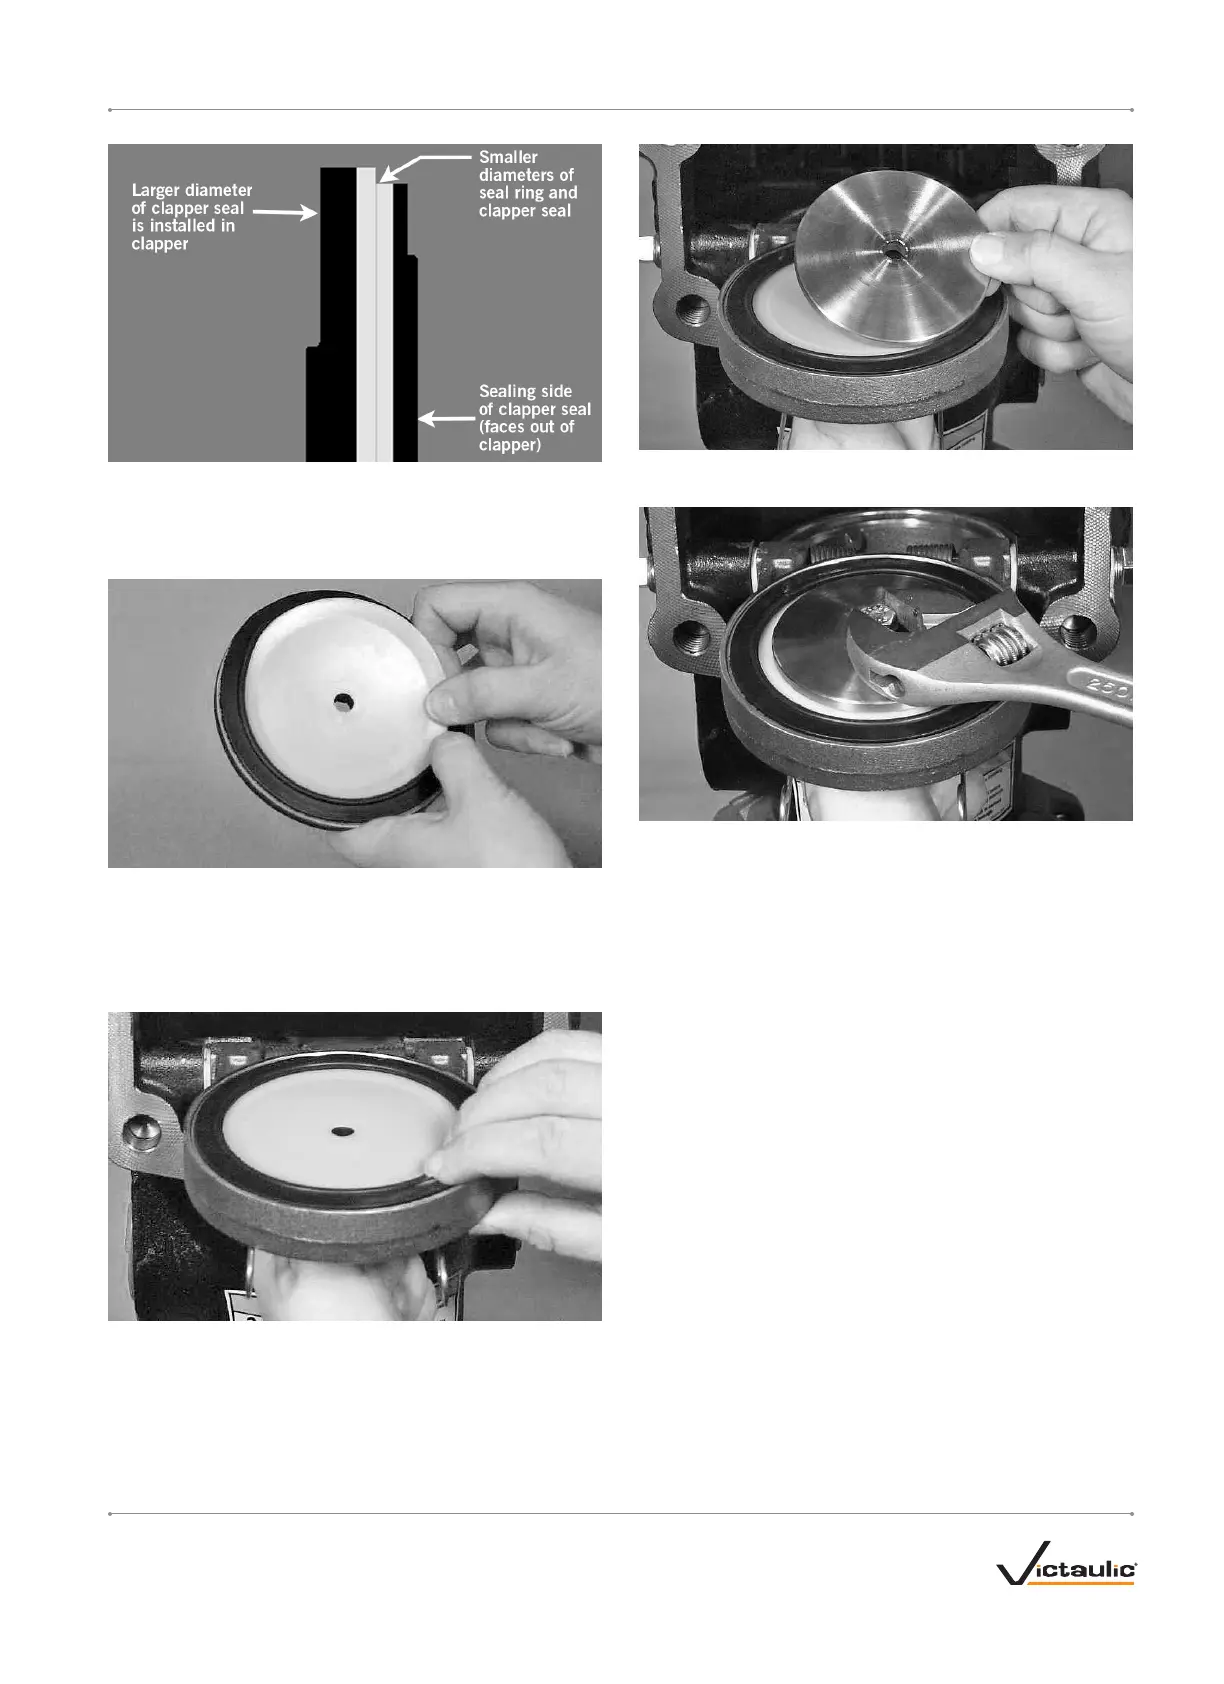
9. Install the clapper seal into the clapper carefully. Make sure the
seal ring snaps into the clapper completely.
10. Place the seal-retaining ring (flat side down) onto the seal washer
of the clapper seal.
11. Install the seal assembly bolt/bolt seal through the seal-retaining
ring and clapper. Tighten the seal-assembly bolt/bolt seal to
18 N•m.
12. Replace the cover plate by following the "Installing the Cover Plate
Gasket and Cover Plate" section.
13. Place the system back in service by following the "Placing the
System in Service" section.
I-751.VDS / Series 751 FireLock
™
European Alarm Check Valve Stations / Installation, Maintenance, and Testing Manual
I-751.VDS_17REV_F

 Loading...