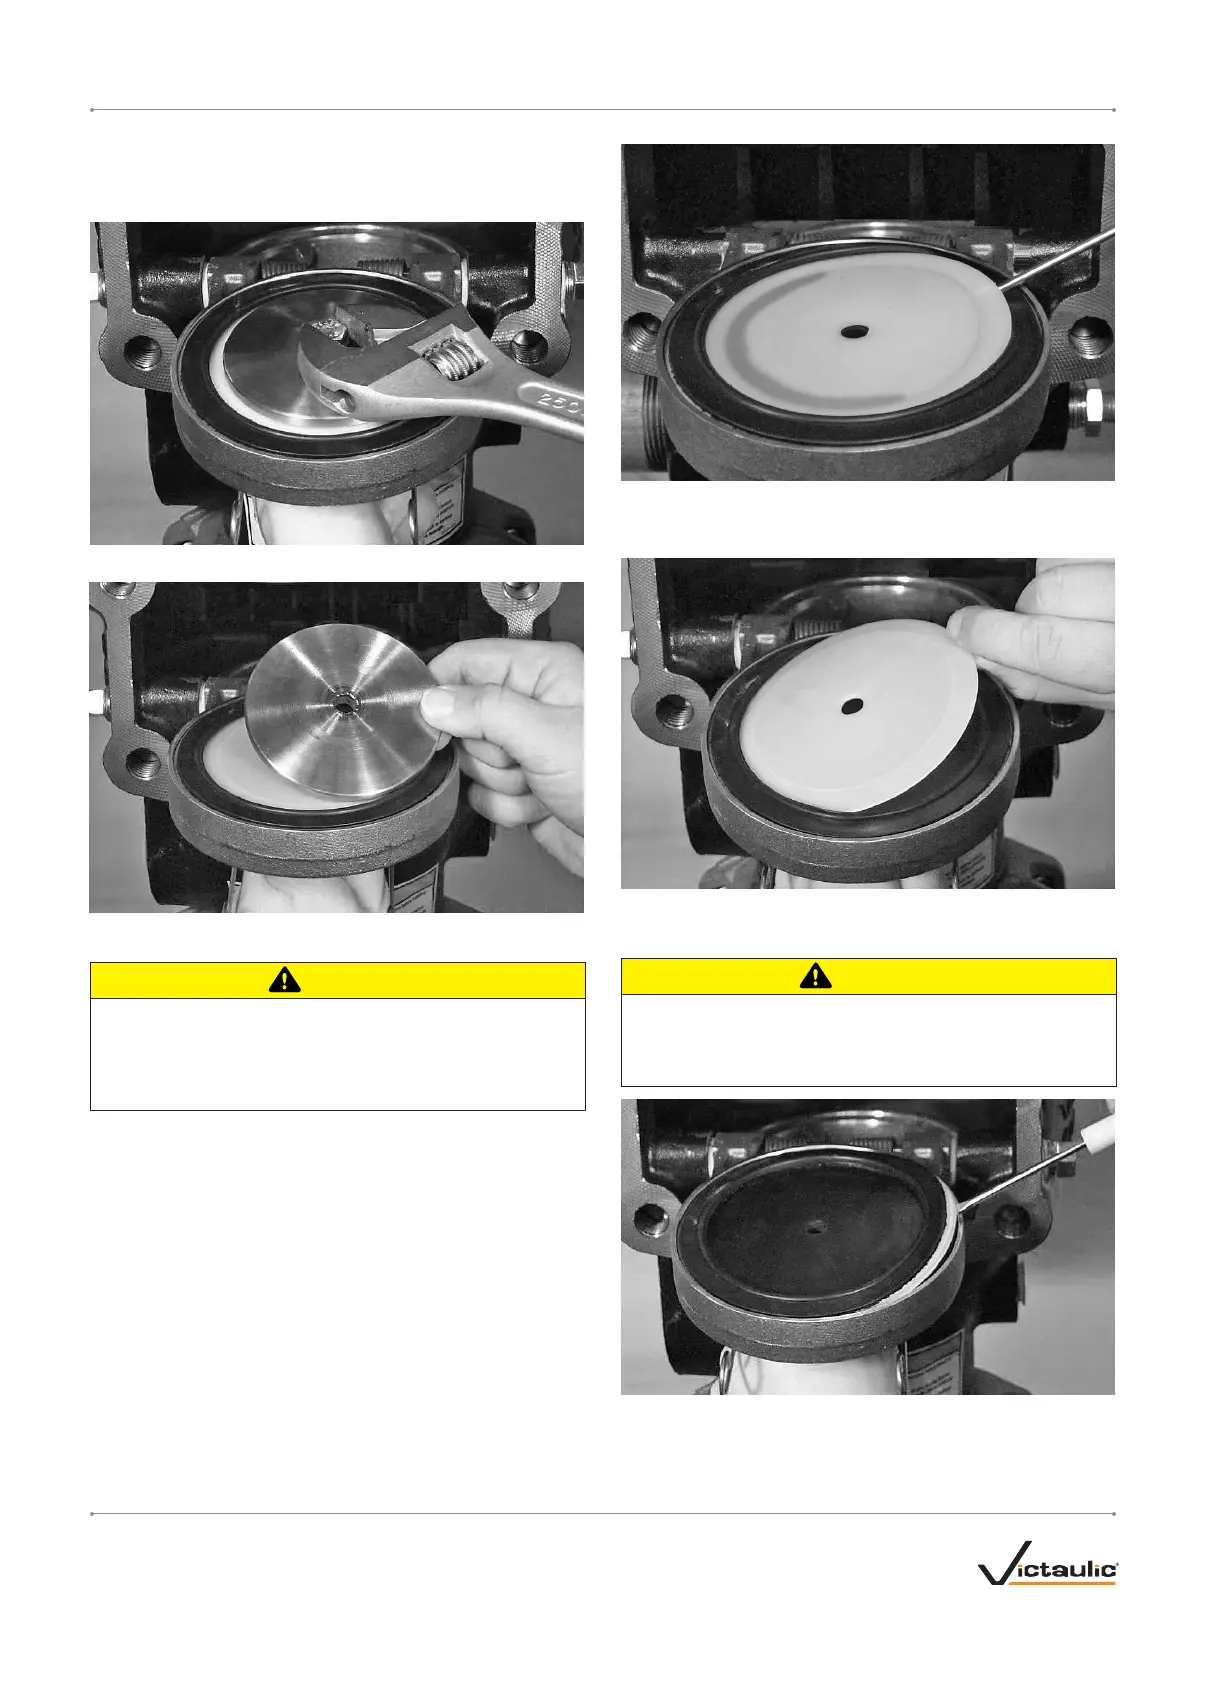
REMOVING AND REPLACING THE CLAPPER SEAL
FOR DN200 SIZE VALVES
1. Perform steps 1 – 4 of the "Required Internal Inspection" section.
2. Remove the seal assembly bolt/bolt seal from the clapper seal.
3. Remove the seal-retaining ring.
CAUTION
• DO NOT pry the seal washer out of the clapper seal from the
inner hole.
Failure to follow this instruction could damage the seal washer,
resulting in improper clapper sealing and valve leakage.
4. Pry the edge of the seal washer from inside the clapper seal, as
shown above. DO NOT PRY THE SEAL WASHER OUT FROM
THE INNER HOLE.
5. Remove the seal washer from the clapper seal. Dry up any mois-
ture that is under the seal washer and on the clapper seal.
CAUTION
• Use only Victaulic-supplied replacement parts.
Failure to follow this instruction could cause improper valve opera-
tion, resulting in property damage.
6. Pry the clapper seal, along with the seal ring, out of the clapper.
Inspect the clapper seal. If the clapper seal is torn or worn, replace
it with a new, Victaulic-supplied clapper seal. If replacing the clap-
per seal assembly with a new assembly, skip to step 7.
I-751.VDS / Series 751 FireLock
™
European Alarm Check Valve Stations / Installation, Maintenance, and Testing Manual
I-751.VDS_16 REV_F

 Loading...