Initial Start-up and Service
19
Steps (continued)
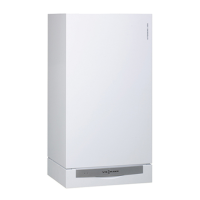
14. Disassemble burner and check burner gasket
Service
1. Remove burner cover panel (if still
installed) as per the removal and
reinstallation instructions on page 7
in this manual, and reinstall panel
upon completion of service work.
2. Switch off the heating system
switch on the control unit and the
power supply.
3. Close gas shutoff valve and secure.
4. Disconnect electrical cables from fan
motor
, differential air pressure
sensor
, combination gas valve
, ionization electrode , ignition
transformer
and grounding .
5. Remove two screws
to
disconnect gas line from gas valve.
6. Loosen six hexagon socket head cap
screws
and remove burner.
7. Check burner gaskets for damage
and replace if required (see Parts
List).
15. Visually check exterior of burner mesh assembly
Service
To check the exterior of the burner
mesh assembly for physical damages,
such as dents, corrosion and/or
abnormally large holes:
1. Remove burner cover panel, if still
installed (see page 7). Reinstall
panel upon completion of service
work.
Do not replace gasket
when visually
inspecting the exterior of the mesh
assembly.
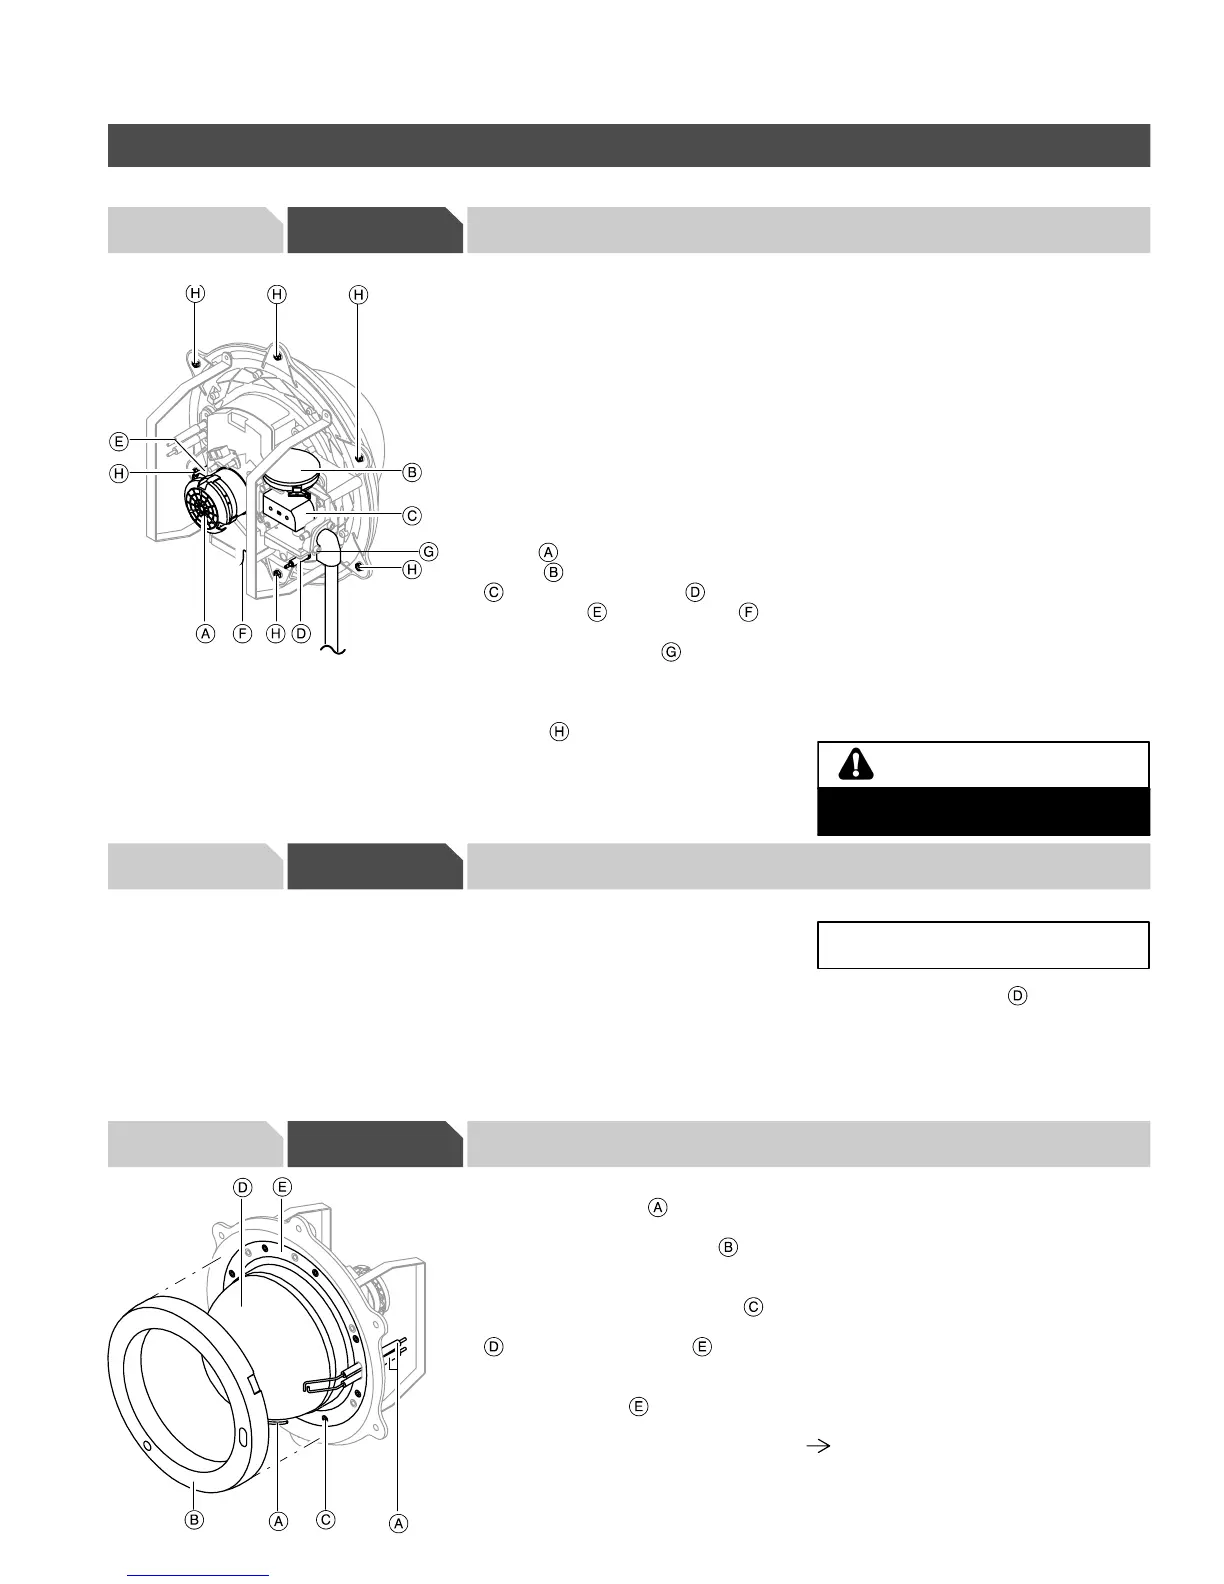
16. Replace burner mesh assembly (if wire mesh is damaged)
Service
1. Remove electrodes .
3. Turn thermal insulation ring
clockwise and remove.
2. Unsrew the eight Torx screws
and remove burner mesh assembly
and assembly gasket .
3. Remove existing burner mesh
assembly gasket .
4. Fit new burner mesh assembly with
the new gasket and tighten with the
eight Torx screws.
Tighten to a torque of 3.3 lb.ft. /
4.5 Nm
5285 961 v1.3
Do not lay burner on burner mesh
assembly (wire mesh)!
CAUTION
IMPORTANT
 Loading...